
Introduction to Strawberry Danish
The Allure of Homemade Pastries
There's something undeniably charming about homemade pastries. The process of creating your own treats, especially a delightful strawberry Danish, transforms an ordinary day into a special occasion. With just a few simple ingredients, you can create a flaky, buttery pastry filled with luscious cream cheese and sweet strawberries that will impress your friends and family.
Baking from scratch isn't just about the finished product; it’s about the experience. Think about the enticing aroma of puff pastry baking in the oven, filling your kitchen with warmth and inviting memories. According to a recent survey, nearly 70% of people find baking therapeutic, making it the perfect weekend project for any home cook. Plus, homemade pastries often taste significantly better than store-bought ones and can be customized to your personal preference.
In our recipe for the strawberry Danish, we'll guide you step-by-step to create these beautiful treats. Whether you’re hosting brunch or treating yourself to a delicious afternoon snack, this recipe is sure to become a staple in your baking repertoire. So roll up your sleeves, and let's get started! For specific tips on perfecting your pastry dough, check out resources like King Arthur Baking.

Ingredients for Strawberry Danish
Fresh Strawberries and Cream Cheese Goodness
Creating a delightful strawberry Danish begins with the star ingredients: fresh strawberries and a luscious cream cheese filling. Here’s what you need for a perfect balance of flavors:
-
Fresh Strawberries: 4 cups of sliced strawberries will bring a bright and tangy flavor to your pastry. If you want more sweetness, feel free to drizzle honey over them or opt for extra sugar as you mix.
-
Cornstarch and Sugar: A tablespoon of cornstarch and sugar will help thicken the berry mixture, ensuring a wonderful, syrupy consistency when baked.
For the luscious cream cheese filling, you’ll need:
- 8 oz. of cream cheese at room temperature, blended with ½ cup powdered sugar and a teaspoon of vanilla extract for a sweet, smooth texture. This filling is what makes your strawberry Danish so irresistible!
Don't forget about the buttery puff pastry, which creates that flaky crust, and a sprinkle of sugar for that golden finish.
Ready to get baking? The full recipe awaits to bring your kitchen to life!
Step-by-step Preparation of Strawberry Danish
Making a strawberry Danish can feel like a daunting task, but trust me—it’s much simpler than it seems! Just follow these steps and you'll be on your way to enjoying homemade flaky pastries filled with sweet strawberries and creamy goodness.
Thaw the puff pastry
Start by letting the puff pastry sheets thaw at room temperature for about 30-45 minutes. This is crucial because it helps the pastry puff up perfectly when baked. While the pastry is thawing, go ahead and preheat your oven to 400°F (204°C) and line two large baking sheets with parchment paper.
Prepare the strawberry filling
While your pastry is warming up, grab four cups of cleaned and sliced strawberries, and toss them in a bowl with a tablespoon of sugar and a tablespoon of cornstarch. The sugar helps to draw out the strawberries' juices, while the cornstarch thickens it. Let this mixture sit for about 15 minutes so the flavors can meld beautifully. This simple step enhances the overall taste and texture of your strawberry Danish.
Make the cream cheese filling
Next, it’s time for the cream cheese filling. In a separate bowl, mix together 8 oz. of room temperature cream cheese, ½ cup of powdered sugar, and a teaspoon of vanilla extract. Beat until smooth and creamy. Take a moment to taste it—if you're feeling adventurous, add just a pinch more of powdered sugar to sweeten it to your liking!
Cut and shape the puff pastry
Unfold one sheet of your now-thawing puff pastry, and cut it along the folded lines to create six smaller rectangles. With a small pairing knife, score a border about ¼ inch from the edges of each rectangle—this helps them puff up beautifully while keeping the filling secure.
Assemble the danishes
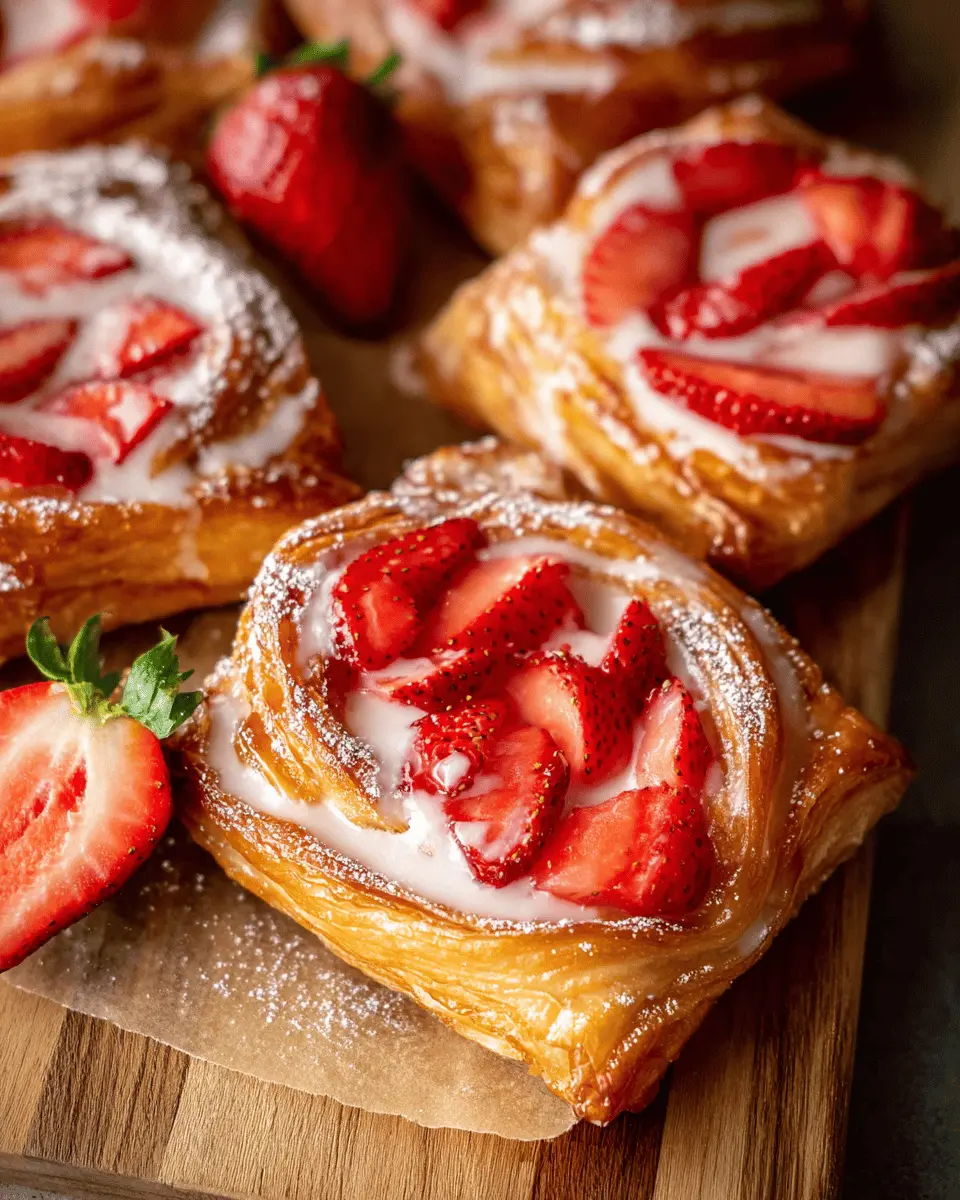
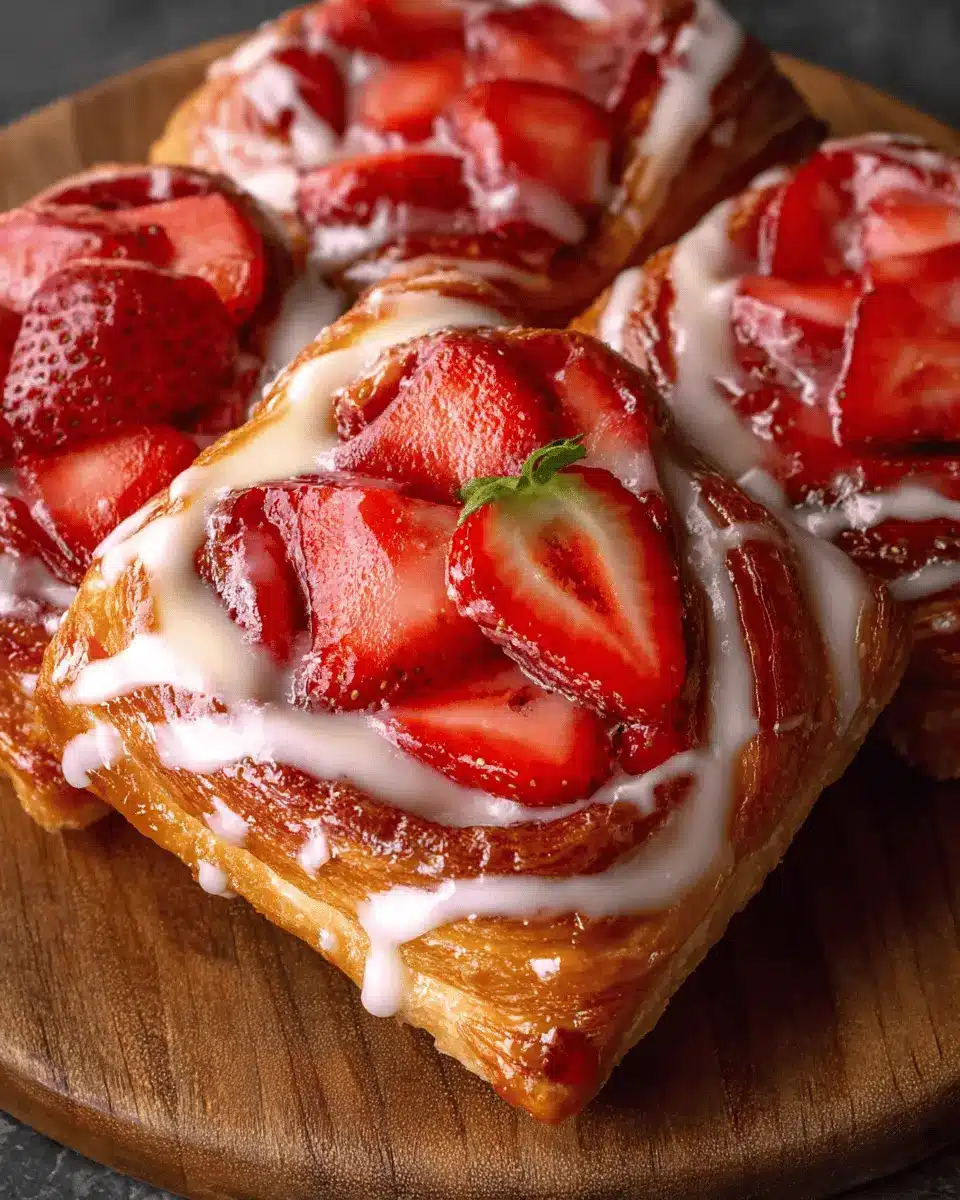
In each pastry rectangle, smooth about one tablespoon of cream cheese filling into the center, staying within those scored lines. Decoratively layer your strawberry filling on top, taking care to create an inviting look. A little tip: brush the edges of the pastry with a beaten egg to give it that lovely golden glow. If you like, sprinkle some sugar over the top for that sweet crunch!
Chill and bake
If the dough feels sticky, pop the assembled pastries in the fridge for 15-20 minutes to chill. This will ensure they puff up nicely in the oven. Bake for about 20-25 minutes until they turn a light golden brown. The aroma wafting through your kitchen will be nothing short of magical!
Cool and add toppings
After baking, let your strawberry Danish cool for about five minutes on the baking sheet before transferring to a cooling rack. For a delicious finish, you can top them with strawberry jam for an extra burst of flavor, and then dust with powdered sugar. If you're feeling fancy, whip up a quick glaze with powdered sugar, milk, and vanilla extract for that dreamy drizzle.
And voila—enjoy your delightful strawberry Danish! Share them fresh from the oven for a special brunch treat, or savor them over a cup of coffee for that perfect afternoon pick-me-up. Happy baking!
Variations on Strawberry Danish
Cream Cheese-Free Strawberry Danish
If you're looking for a lighter option, consider a cream cheese-free strawberry danish. Instead of the traditional cream cheese filling, simply mix your sliced strawberries with a touch of sugar and a splash of lemon juice for added brightness. Layer the sweetened strawberries directly onto the puff pastry and bake. This variation not only simplifies the process but also allows the fresh strawberry flavor to shine through, making it perfect for health-conscious friends or those with dietary restrictions.
Braided Strawberry Danish
Want to impress at your next brunch? Try the braided strawberry danish! Start by rolling out your puff pastry, then cut the edges into strips before filling the center with your strawberry mixture. Braid the strips over the filling and bake until golden brown. This beautifully braided danish is not only eye-catching but also great for sharing. Plus, its flaky layers will have your guests begging for the recipe. For inspiration on how to braid pastry, check out this handy guide!
Cooking Tips and Notes for Strawberry Danish
Ensuring the Perfect Puff Pastry
To achieve that deliciously flaky texture in your strawberry danish, be sure to keep your puff pastry cold while working with it. If it becomes too warm or sticky, pop it in the fridge for a few minutes. When rolled out, ensure you minimize handling to maintain those glorious layers.
Storing Leftovers
If you have any leftover strawberry danish, store them in an airtight container in the fridge for up to 2–3 days. They’re perfectly fine to enjoy at room temperature within 2–3 hours after baking. For the best flavor experience, warm them briefly in an oven or toaster before munching. Want more on danish variations? Check out our guide on making braided strawberry danishes.
Serving Suggestions for Strawberry Danish
Pairing with coffee or tea
Enjoying a strawberry Danish with your favorite cup of coffee or tea is a delightful experience! The buttery layers of puff pastry combined with the fresh strawberries and cream cheese create a harmony of flavors that elevate any morning routine or afternoon break. Opt for a smooth latte or a robust black tea to complement the sweetness of the Danish. If you’re curious about perfect coffee pairings, check out experts like Barista Hustle for tips on matching beverages and pastries.
Ideal for breakfast or dessert
The versatility of a strawberry Danish makes it an excellent option for either breakfast or dessert. Serve it warm from the oven for brunch outings with friends or let it cool for a delightful evening treat. Pairing with a scoop of vanilla ice cream or whipped cream elevates it to dessert status while still being wholesome enough for breakfast. So, whether it’s first thing in the morning or a sweet end to your day, these danishes never disappoint!
Time Breakdown for Strawberry Danish
Preparation Time
Get ready to enjoy some delicious strawberry danish! The preparation time will take about 30 minutes. This includes thawing the puff pastry, preparing the strawberries, and mixing the cream cheese filling.
Baking Time
Once assembled, these beauties need around 20-25 minutes in the oven. Expect your kitchen to fill with mouthwatering scents as they bake to golden perfection!
Total Time
In total, you’re looking at about 1 hour from start to finish. A satisfying and relatively quick treat for any gathering. Wondering how to make this delightful pastry? Let’s dive deeper into the recipe!
For helpful baking tips, check out this guide. Are you ready to whip up these strawberry danishes?
Nutritional Facts for Strawberry Danish
Calories per serving
Each strawberry danish serves up approximately 250-300 calories, depending on the sweetness and any added toppings. This delightful dessert is sure to satisfy your sweet tooth without derailing your nutrition goals!
Macronutrient breakdown
- Carbohydrates: 38g
- Protein: 4g
- Fat: 10g
Packed with fresh strawberries and creamy filling, these danishes offer a balance of carbs, proteins, and healthy fats. To learn more about how to balance your diet with treats like this, check out Nutrition.gov.
FAQs about Strawberry Danish
Can I use frozen strawberries?
Absolutely! Frozen strawberries can be a convenient alternative. Just make sure to thaw and drain them before using them in your strawberry danish to prevent excess moisture. This way, you’ll still achieve that delicious, fruity flavor without compromising the texture.
What’s the best way to store strawberry danish?
To keep your strawberry danish fresh, store them in an airtight container in the refrigerator. This will help maintain their deliciousness for a longer time. If you're looking for a quick snack, they're also delightful at room temperature for up to three hours after baking.
How long do strawberry danishes last?
When properly stored, strawberry danishes can last about 2 to 3 days in the fridge. However, for the best taste and texture, it’s ideal to enjoy them fresh. Consider reheating them for a few minutes in the oven or toaster for that freshly-baked flavor on subsequent days.
For tips on how to make the most of your strawberries, check out this guide on fruit preservation. Happy baking!
Conclusion on Strawberry Danish
Celebrate homemade goodness
Making a strawberry danish is not just about indulging in a delicious treat—it's about celebrating the joy of homemade goodness. Each bite delivers fresh flavors and flaky layers, perfect for any occasion. So gather your ingredients, try this recipe, and enjoy the process of creating something wonderful!

Strawberry Danish Delight: Easy Homemade Pastry Recipe
Equipment
- Oven
- mixing bowls
- baking sheets
- parchment paper
- Cooling Rack
Ingredients
Strawberry Filling
- 4 cups sliced strawberries
- 1 tablespoon cornstarch
- 1 tablespoon sugar
Cream Cheese Filling
- 8 oz cream cheese, room temperature
- ½ cup powdered sugar
- 1 teaspoon vanilla extract
Danish Pastry
- 2 sheets puff pastry, thawed
- 1 large egg, lightly beaten with water
- 2 - 3 tablespoons sugar for topping optional
Toppings
- ¼ cup strawberry jam optional for topping
- 1 cup powdered sugar
- ½ teaspoon vanilla extract
- 2 - 3 tablespoons milk
Instructions
Preparation Steps
- Thaw puff pastry at room temperature for 30-45 minutes. Preheat the oven to 400°F (204°C) and line baking sheets with parchment paper.
- Combine cleaned and sliced strawberries, sugar, and cornstarch in a mixing bowl. Mix well and let sit for 15 minutes.
- In another bowl, mix cream cheese until smooth, then add powdered sugar and vanilla extract until well combined.
- Unfold one sheet of puff pastry, cut into six smaller rectangles. Score a border ¼ inch from the edge.
- Add 1 tablespoon of cream cheese filling to the center and layer fresh strawberries on top. Brush edges with egg and sprinkle sugar if desired.
- Chill the prepared danishes in the fridge for 15-20 minutes, then bake for 20-25 minutes until golden brown.
- Cool on the baking sheet for 5 minutes, then transfer to a cooling rack.
- Top with warm strawberry jam and a dusting of powdered sugar, or use a vanilla glaze with powdered sugar, milk, and vanilla extract.


Leave a Reply