
Introduction to Ghostly Banana Pops
If you’re a young professional looking to add a fun yet healthy treat to your repertoire, look no further than ghostly banana pops! These delightful snacks are not only easy to make, but they also bring a playful twist to your dessert game. With their creamy banana core and a sweet white chocolate coating, they’re sure to satisfy your sweet tooth while keeping your snack choices in line with a health-conscious lifestyle.
Why are they particularly appealing? Well, the hustle and bustle of work-life can leave little room for fancy dessert prep. Ghostly banana pops can be prepped in advance, making them ideal for those busy weekdays. Plus, they’re a fantastic conversation starter for gatherings or casual get-togethers with friends. Just imagine serving these spooky delights while sharing laughs about your latest office stories!
Not to mention, bananas are packed with essential nutrients like potassium and fiber. When paired with a little bit of quality white chocolate, you’ve got a snack that feels indulgent without the guilt. For more banana-focused treats, check out resources that discuss the various health benefits of this fantastic fruit, such as those found on Healthline or WebMD.
Ready to dive into making your ghostly banana pops? Let’s get started!
Ingredients for Ghostly Banana Pops
Creating ghostly banana pops is a fun and simple activity that not only satisfies your sweet tooth but also makes for an adorable, spooky treat! Here's a breakdown of the essential ingredients you'll need and some optional ingredients to take your pops to the next level.
Essential ingredients you’ll need
To whip up these delightful treats, gather the following items:
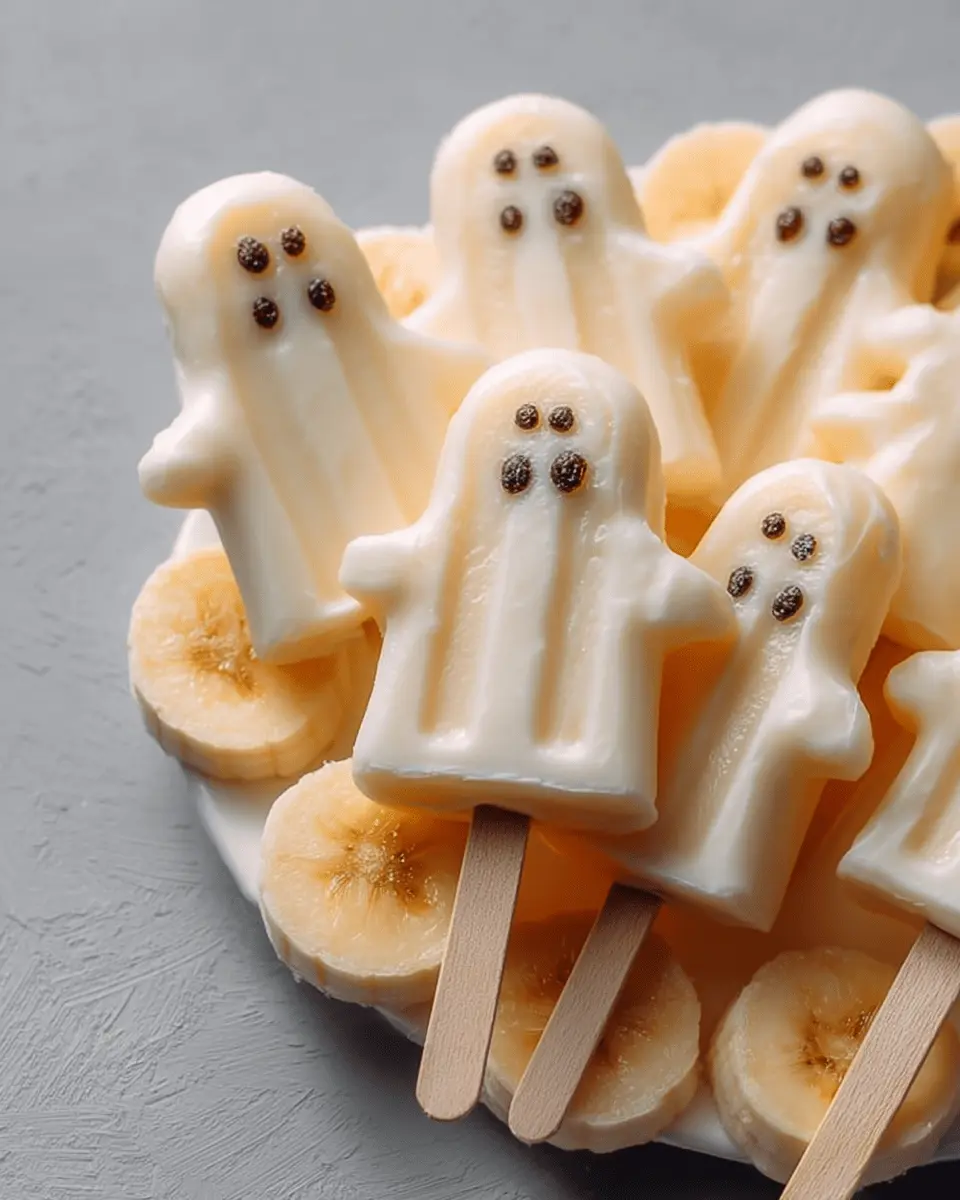
- 1 medium banana: The star of our show! Choose a ripe but firm banana for the best texture.
- 1 cup good quality white chocolate: This will give your ghostly pops that delicious creamy coating.
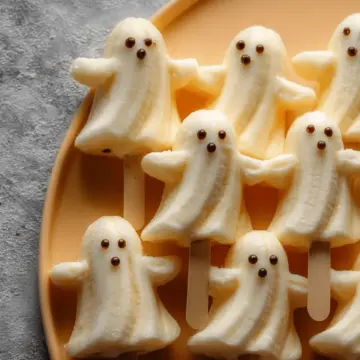
- 8 mini chocolate chips for eyes: These little bits will bring your ghosts to life!
- 4 popsicle sticks: Perfect for easy handling and fun presentation.
Optional ingredients for a twist
Feel free to get creative! Here are some optional ingredients you could consider adding for a unique twist:
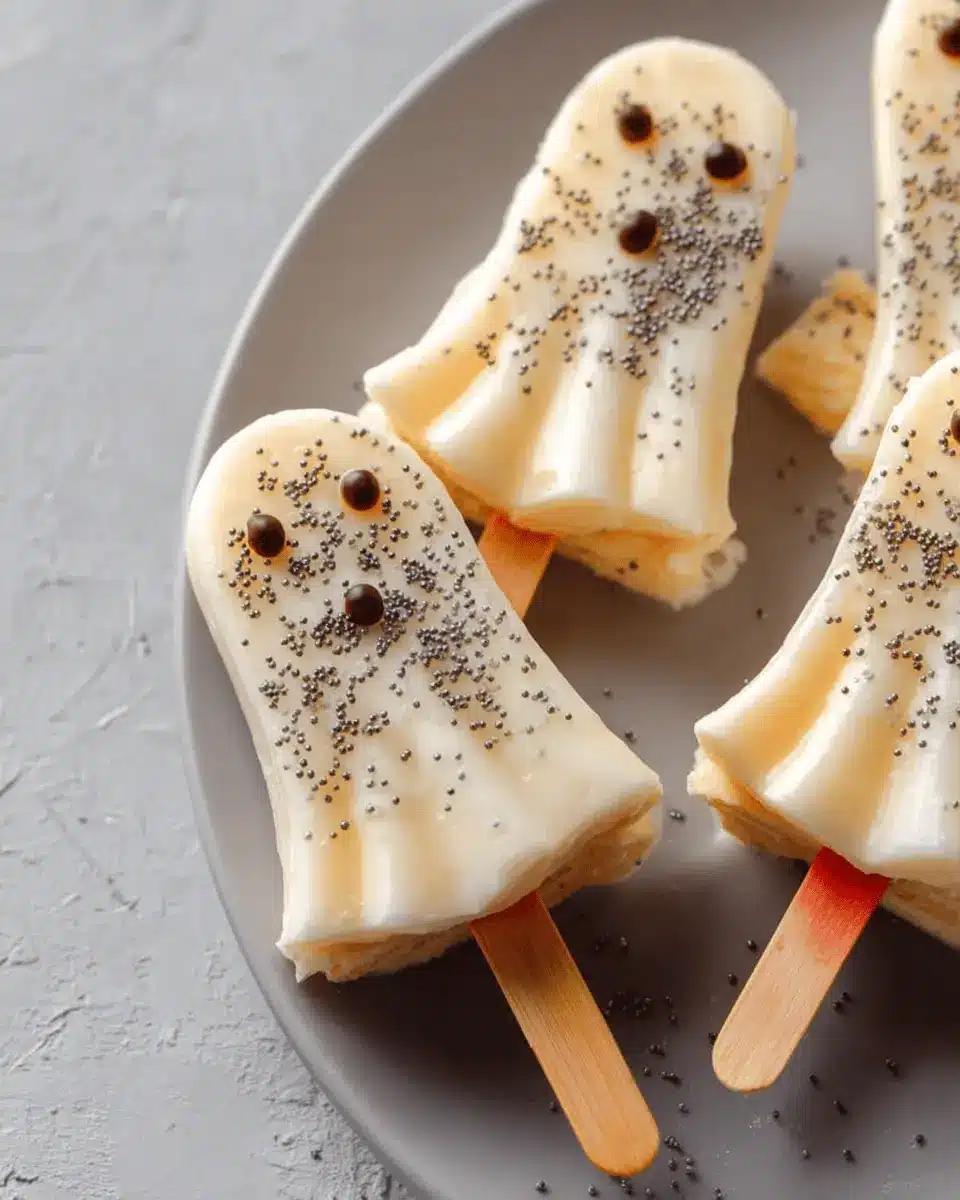
- Sprinkles or edible glitter: Add some colorful sprinkles or shimmer for a festive feel.
- Drizzle of dark chocolate: A drizzle can elevate the look and add a rich flavor contrast.
- Chopped nuts or crushed cookies: For a bit of crunch, toss some nuts or cookie crumbs on before the chocolate hardens.
You can easily make these ghostly banana pops your own by customizing them with these toppings! Happy creating!
Preparing Ghostly Banana Pops
Creating these ghostly banana pops is a fun and simple way to add a chillingly delightful treat to your Halloween festivities. This step-by-step guide will ensure your spooky snacks turn out perfectly every time!
Step 1: Prepare the bananas for freezing
Start by selecting a medium-sized banana that’s just ripe enough to be sweet but not overly soft. First, cut the banana in half lengthwise, and then slice each half into two quarters. This will give you four pop-sized treats! To help with easy handling, insert a popsicle stick into each banana quarter, making sure it's balanced and sturdy. For a clean setup, line a cookie sheet with wax paper before placing the banana pops on it. Once done, pop the sheet into the freezer and let the bananas chill until solid, which typically takes about 1-2 hours.
Step 2: Melt the white chocolate
While your bananas are freezing, it’s time to prepare the ghostly banana pops’ coating: white chocolate. Using a good quality white chocolate will make a noticeable difference in flavor and texture. Fill a coffee mug or a microwave-safe bowl with about a cup of white chocolate. Microwave the chocolate in 30-second intervals, stirring well between each interval until it’s completely melted. Remember, patience is key here! If you overheat the chocolate, it can seize up, turning into a frustrating clump instead of a smooth coating.
Step 3: Dip the bananas in melted chocolate
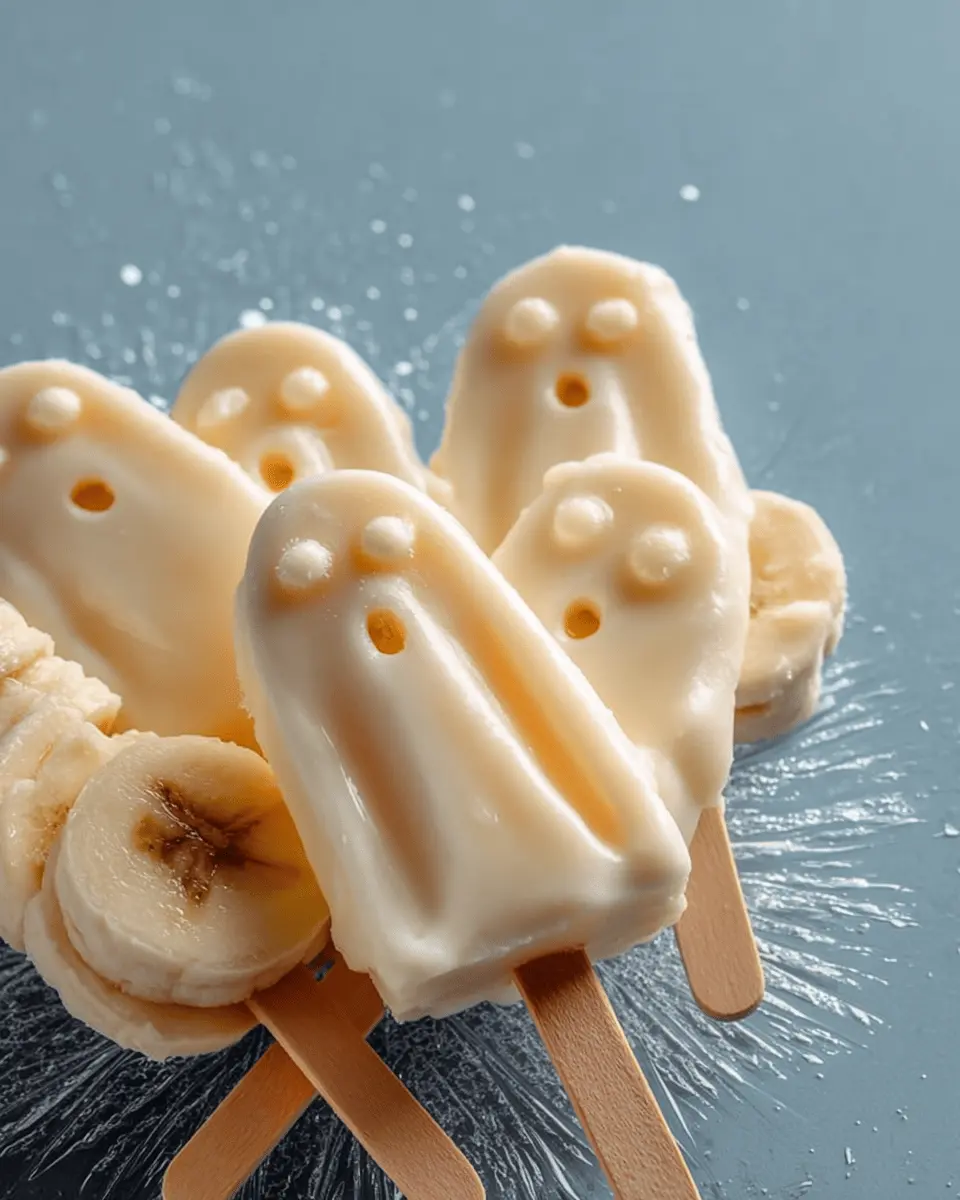
Once your bananas are frozen and the chocolate is melted, it’s time for some fun! Grab one frozen banana pop and dip it directly into the melted white chocolate. Be sure to coat it evenly, then gently scrape off the excess chocolate from the back. This will prevent your pops from being too drippy and ensures a smooth finish. Place the dipped banana back on the wax paper. Repeat this process until all your banana pops are coated in that lovely white chocolate.
Step 4: Add the mini chocolate chip eyes
Before the chocolate hardens, be quick to add the mini chocolate chips for the eyes to your ghostly banana pops. Choose the side that looks the best for displaying those curious little ghostly faces! A tip: You might find it easier to pop a few chocolate chips into the melted chocolate before dipping; this will give your bananas an even more ghostly appearance.
Step 5: Freeze until solid
Finally, once all your pops are decorated and adorned with eyes, return them to the freezer. Let them freeze until they are solid and ready to eat, typically about another hour. Your ghostly banana pops are now ready for mischievous nibbling!
Enjoy indulging in these healthy, fun treats with friends or family! They’re perfect for Halloween parties or simply as a sweet reward after a busy day. Don’t forget to leave a rating and comment to share your experience with this delightfully spooky recipe!
Variations on Ghostly Banana Pops
If you’re looking to switch up your ghostly banana pops game, here are two delightful variations that will tantalize your taste buds!
Peanut Butter Banana Pops
For a fun twist, slather your banana pieces with creamy peanut butter before dipping them in white chocolate. This not only adds a rich flavor but also supplies a protein boost. Finish with miniature chocolate chips for those classic ghostly eyes, and you’ve got a treat that satisfies both sweet and savory cravings!
Dark Chocolate Ghostly Pops
Craving something with a bit more depth? Try using dark chocolate instead of white chocolate for your ghostly banana pops. The bitterness of dark chocolate pairs beautifully with the sweetness of bananas, creating a more sophisticated dessert. As always, don’t forget to apply those cute mini chocolate chip eyes—they’re the perfect finishing touch!
Experiment with these variations and discover your favorite!
Cooking notes for Ghostly Banana Pops
Tips for melting white chocolate perfectly
Melting white chocolate can be tricky, as it burns easily. Start by chopping your chocolate into small, even pieces, which helps it melt uniformly. Microwave it on medium power for 30 seconds at a time, stirring in between. This gentle approach prevents overheating. For more tips, check this guide.
How to achieve the best texture
For creamy Ghostly Banana Pops, make sure your bananas are fully frozen before dipping them in the white chocolate. This not only helps the chocolate set quickly but also maintains a smooth finish. Scraping the excess chocolate off the back ensures a thin, even layer that’s delightful to bite into! Remember, it’s all about patience and practice!
Serving suggestions for Ghostly Banana Pops
Fun ways to present your pops
Presentation is key, especially when it comes to ghostly banana pops! Serve them on a spooky platter surrounded by faux cobwebs for a hauntingly fun display. You can even use black or orange paper plates to add to the festive vibe. Consider using clear cups filled with ice to stand your pops upright, creating a chic and striking centerpiece.
Creative serving ideas for gatherings
Hosting a Halloween party? Set up a DIY decorating station where guests can customize their ghostly banana pops with melted chocolate and toppings like sprinkles or colorful candies. You might also pair them with other spooky treats, such as pumpkin-shaped cookies or witchy cupcakes. Don’t forget to add a non-alcoholic punch to quench everyone’s thirst while keeping the mood lively.
These creative touches will ensure your ghostly banana pops are not only tasty but a hit at any event! For more inspiration, check out our favorite party planning tips at The Spruce Eats.
Time breakdown for Ghostly Banana Pops
Preparation time
To whip up your ghostly banana pops, you'll need about 10 minutes. This includes cutting the bananas, inserting popsicle sticks, and getting everything ready for freezing.
Freezing time
Once prepped, the bananas will need a solid freeze for around 2 hours. This helps them solidify and ensures that they're the perfect chilly treat!
Total time
In total, you’re looking at approximately 2 hours and 10 minutes to prepare these delightful snacks. Trust me; the wait will be worth it when you take that first bite!
If you're eager to dive deeper into creative ways to enjoy frozen treats, check out these delicious variations that can complement your ghostly banana pops!
Nutritional Facts for Ghostly Banana Pops
Calories per pop
Each Ghostly Banana Pop contains approximately 103 calories, making it a delightful yet guilt-free treat for your next gathering or a spooky snack for kids!
Key nutritional information
These fun frozen delights not only satisfy your sweet cravings but also provide:
- Carbohydrates: 14.5 g
- Protein: 1.5 g
- Fat: 5 g
- Saturated Fat: 0.5 g
- Cholesterol: 1.5 mg
- Sodium: 14 mg
- Fiber: 1 g
- Sugar: 11.5 g
Packed with the natural goodness of bananas, Ghostly Banana Pops are perfect for a quick energy boost. Plus, they’re a great way to impress your friends with minimal effort. Don't forget to check out this resource on healthy snacks for more inspiration!
When you're serving these treats, you can feel good knowing they’re a hit with both kids and adults, uniquely combining health and fun. Enjoy your healthy living journey with a tasty twist!
FAQs about Ghostly Banana Pops
Can I use different types of chocolate?
Absolutely! While our ghostly banana pops feature delightful white chocolate, feel free to mix it up with dark or milk chocolate for a different flavor profile. Each variation brings its own charm—think of dark chocolate's robust notes or the creaminess of milk chocolate. Just remember to watch the melting process and adjust the time accordingly.
How long can I store these pops in the freezer?
You can keep your ghostly banana pops in the freezer for up to two months. They’re perfect for a quick snack or a party-themed treat! Just ensure you store them in an airtight container or freezer bag to prevent freezer burn. When you're ready to indulge, pull them out and enjoy!
Are there alternatives for the popsicle sticks?
Certainly! Wooden popsicle sticks are common, but if you’re in a pinch, you can use sturdy straws or even small skewers. Just ensure whatever you use can hold the banana pop securely. This way, you won't miss out on the fun, creative process of making these adorable frozen treats!
For more fun frozen treats recipes, check out this great blog for ideas that can be made year-round!
Conclusion on Ghostly Banana Pops
Recap and encouragement to try this fun treat!
In summary, ghostly banana pops are not just a delicious and nutritious snack; they’re also a great way to get creative in the kitchen. Attempt this simple recipe for your next gathering or family night—your taste buds will thank you! Don’t forget to share your spooky creations and let us know how much fun you had!
Ghostly Banana Pops: Easy Spooky Treats for Halloween Fun
Equipment
- Microwave
- cookie sheet
- coffee mug
- wax paper
Ingredients
- 1 medium banana
- 1 cup good quality white chocolate *
- 8 mini chocolate chips for eyes
- 4 popsicle sticks
Instructions
- Cut banana in half lengthwise, then in half to make four quarters. Insert popsicle sticks into bananas, and freeze bananas on a wax paper lined cookie sheet.
- When the bananas are frozen, fill a coffee mug with chocolate. Melt chocolate in the microwave 30 seconds at a time, stirring until the chocolate is melted and soft.
- Dip the bananas one at a time into the chocolate, scraping off the excess chocolate from the back of the banana, and place it on a cookie sheet lined with wax paper.
- Quickly add the chocolate chips for the eyes before the chocolate hardens (you have to work quickly here).
- Return to the freezer until frozen and ready to eat. Eat frozen.
Leave a Reply