
Introduction to Apple Crumble
Why Apple Crumble is the Perfect Homemade Dessert
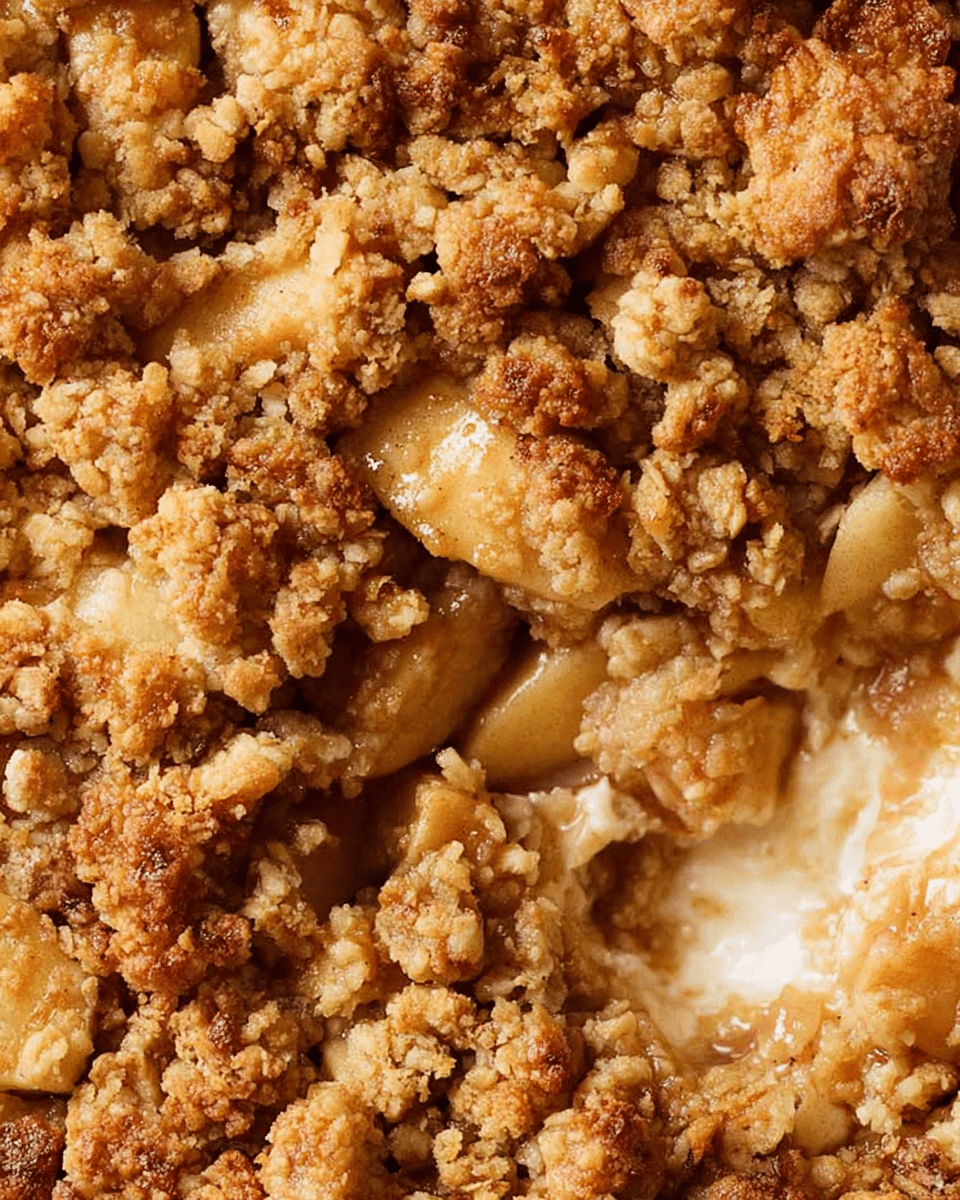
As the leaves turn and the air gets a little crisper, there's nothing quite like the warm, inviting aroma of apple crumble wafting through your kitchen. This classic dessert balances a buttery, crumbly topping with the sweet, tangy filling of tender apples, making it a delightful treat for any occasion.
So, why is apple crumble the ultimate homemade dessert? For starters, it’s incredibly easy to make, requiring just a handful of everyday ingredients. There's something charming about the straightforward process of peeling apples, tossing them with sugar and cinnamon, and layering them under a delicious crumble. Plus, you can customize it to your heart's content—add nuts, oats, or even a sprinkle of dried fruit for that extra texture.
Not only is apple crumble delicious, but it also boasts some nutritional benefits. Apples are rich in fiber and essential vitamins, and when paired with wholesome oats in the topping, you create a dessert that feels just a little more wholesome.
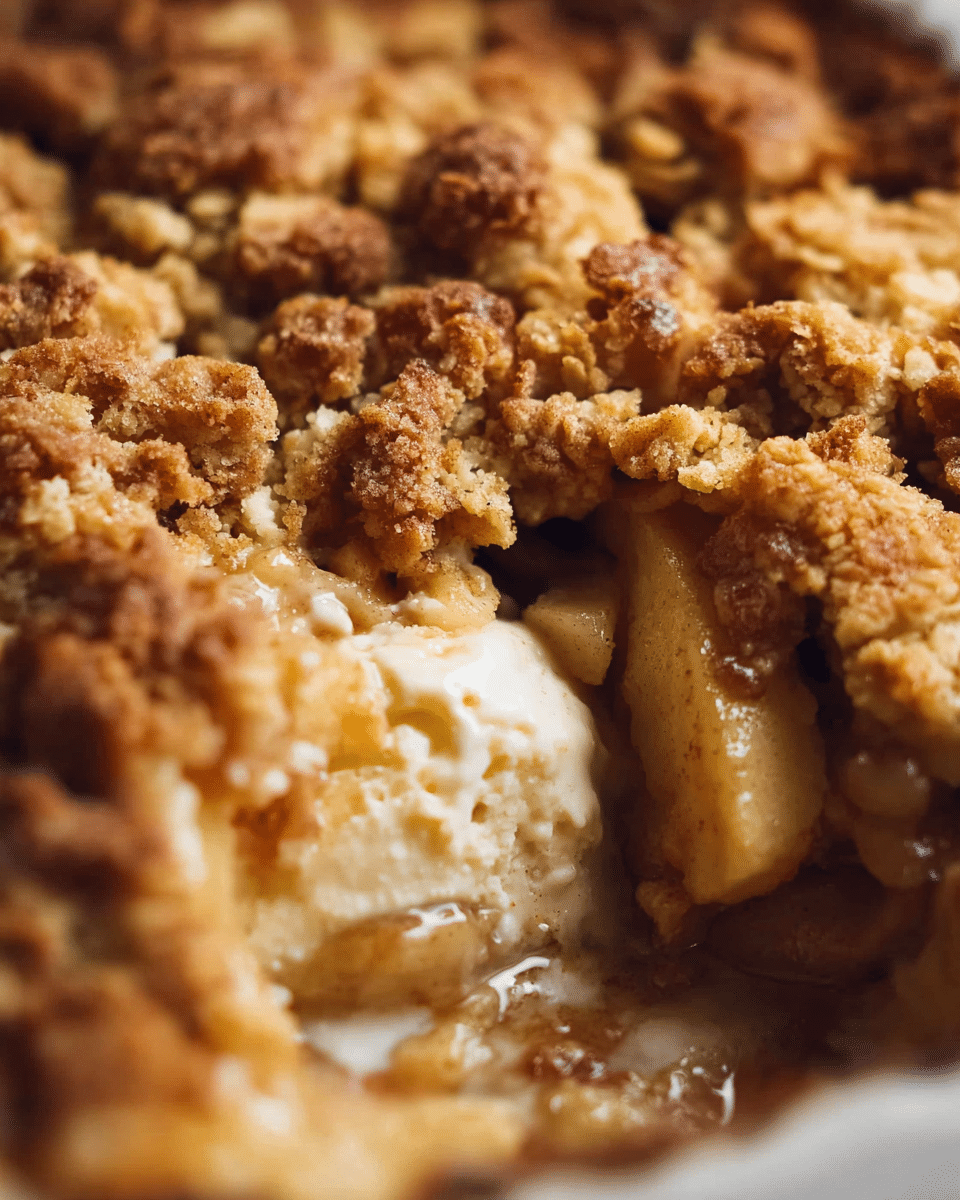
Whether you're hosting a dinner party or enjoying a cozy night in, serving warm apple crumble with a scoop of vanilla ice cream elevates it to a whole new level of comfort. Don't miss out on indulging in this scrumptious classic!
Ingredients for Apple Crumble
Essential Ingredients for the Apple Filling
To create a delightful apple filling for your apple crumble, you'll need a few essential ingredients. Start with 2 pounds (1kg) of Granny Smith apples, as their tartness beautifully balances the sweetness of the crumble. You'll also need:
- 1 tablespoon of all-purpose flour – this helps thicken the filling.
- ½ cup of white sugar (you can substitute brown sugar for a richer flavor).
- 2 tablespoons of lemon juice to brighten up the apples.
- ½ teaspoon of ground cinnamon for that warm, comforting aroma.
These simple ingredients work together to create a velvety, warm apple layer that truly enhances your crumble’s overall taste.
Topping Ingredients You Need
For a perfectly crumbly topping that complements your apple filling, gather the following ingredients:
- 1 cup of rolled oats (quick-cooking works too).
- 1 cup of all-purpose flour for the structure.
- 1 cup of loosely packed brown sugar to add sweetness and depth.
- ½ teaspoon of baking powder for a little lift.
- 1 teaspoon of cinnamon powder to echo the flavors from the filling.
- ½ cup (125g) of melted unsalted butter for that buttery richness.
- A pinch of salt to enhance all the flavors.
Mixing these ingredients creates a delightful crunchy topping that beautifully contrasts the soft apple filling. Ready to create a treat that’s perfect for any occasion? Dive into the full recipe!
Preparing Apple Crumble
Making a delicious apple crumble at home is a delightful experience that combines the warmth of freshly baked apples with a crumbly topping. The process is straightforward, and I guarantee your kitchen will smell amazing! Let’s walk through the steps together.
Gather Your Ingredients
Before diving into the preparation, it’s important to have everything ready. For the apple filling, you'll need:
- 2 lb / 1kg Granny Smith apples
- 1 tablespoon all-purpose flour
- ½ cup white sugar (or brown sugar)
- 2 tablespoon lemon juice
- ½ teaspoon ground cinnamon
For the topping, here's what you need:
- 1 cup rolled oats
- 1 cup all-purpose flour
- 1 cup brown sugar (or white sugar)
- ½ teaspoon baking powder
- 1 teaspoon cinnamon powder
- 125g / ½ cup unsalted butter, melted
- Pinch of salt
And finally, don’t forget to serve with vanilla ice cream! Once you’ve pulled all your ingredients together, let’s get started!
Prepare the Apple Filling
Begin by preheating your oven to 180°C / 350°F, ensuring it’s hot enough to perfectly bake your apple crumble. Next, peel and cube your Granny Smith apples into 1.5 cm (½”) pieces. In a mixing bowl, combine the apple cubes with flour, sugar, ground cinnamon, and lemon juice. Toss the mixture gently, then spread it evenly in a 1.5 liter (1.5 quart) baking dish. These tart apples are key in balancing out the sweetness later!
Mix the Crumble Topping
In another bowl, mix together the rolled oats, flour, sugar, baking powder, cinnamon, and a pinch of salt. Drizzle the melted butter over the dry ingredients, then mix until it resembles wet sand with small clumps. Remember, a good topping is what makes the apple crumble so irresistible, so take your time to get it just right!
Assemble and Bake
Spread the crumble topping over the apple filling, using your fingers to create those lovely crumbly textures. Bake in your preheated oven for about 30-40 minutes, or until the top is golden brown. Pro tip: If the topping looks too brown early on, cover it loosely with foil to keep the moisture in and avoid burning.
Let It Rest Before Serving
Once it’s baked to perfection, remove the apple crumble from the oven and let it sit for about 10 minutes. This resting time allows the apple syrup to thicken slightly, making it even more delicious when you serve it warm with a scoop of vanilla ice cream. While you wait, feel free to set the table for an extra bit of ambiance.
By following these steps, you'll create a comforting, homemade apple crumble that everyone will love. Enjoy the process, and make sure to savor the delightful flavors that come together in this classic dessert!
Variations on Apple Crumble
Apple and Berry Crumble Twist
Looking to mix things up? Try adding mixed berries to your classic apple crumble! Combine your sliced apples with blueberries, raspberries, or even blackberries for a delightful burst of flavor. The juicy berries complement the tartness of Granny Smith apples, creating an irresistible filling. Not only does it taste amazing, but it’s also a colorful showstopper that’s perfect for inviting friends over or treating yourself.
Spicy Apple Crumble with a Kick
For those who enjoy a bit of heat, why not add some spice to your apple crumble? Incorporate a pinch of cayenne or grated fresh ginger into the apple filling. This unexpected twist enhances the flavor profile and adds a warming sensation that pairs perfectly with a scoop of vanilla ice cream. It's a comforting, exciting dessert that’s guaranteed to surprise your guests!
Explore more variations and creative ideas on apple desserts at culinary blogs like Serious Eats for inspiration.
Cooking Tips and Notes for Apple Crumble
Choosing the Right Apples
When it comes to creating the perfect apple crumble, the choice of apples is crucial. I recommend Granny Smith apples for their tartness, which beautifully contrasts with the sweetness of the crumble. Alternatively, consider mixing varieties like Honeycrisp or Fuji for added flavor complexity. Just remember: stick with firmer apples to ensure they hold up during baking.
For more apple varietals, check out this guide on apple types.
Storage Tips for Leftovers
If you have any leftovers (which is rare, but it happens!), store your apple crumble covered in an airtight container in the fridge. It keeps for about 3 days. To reheat, simply pop it back in the oven at 350°F (175°C) for about 15-20 minutes until warm. Consider serving with a scoop of vanilla ice cream for an unforgettable treat!
Serving Suggestions for Apple Crumble
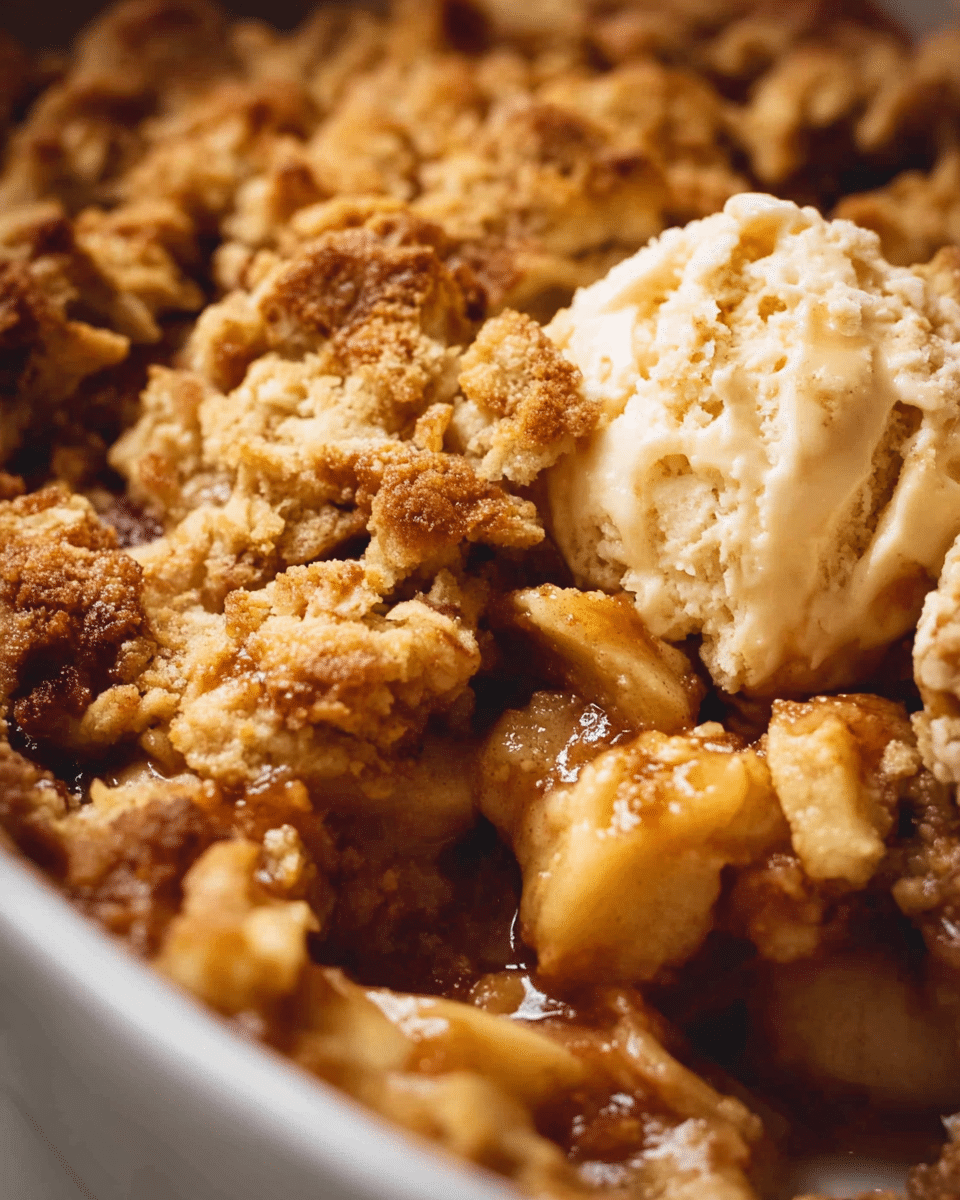
Pairing with Vanilla Ice Cream
There’s nothing quite like a warm apple crumble served with a scoop of creamy vanilla ice cream. The hot, fragrant apples complement the cool, velvety texture of the ice cream beautifully, creating a delightful contrast that your taste buds will thank you for. The vanilla notes mingle with the cinnamon and tartness of the apples, enhancing the dessert experience!
Creative Serving Ideas
While vanilla ice cream is a classic choice, feel free to get creative! Serve your apple crumble with:
- Whipped cream or chantilly for a lighter option
- Caramel sauce drizzled on top for extra sweetness
- Greek yogurt or ice cream alternatives for a healthier twist
Consider pairing it with a cup of herbal tea or a refreshing iced coffee to balance the richness of the crumble. The possibilities are endless, so get inspired and enjoy your dessert experience!
Time Breakdown for Apple Crumble
Preparation Time
Getting your apple crumble ready doesn’t take long at all! You’ll need about 15 to 20 minutes to prepare the ingredients, peel the apples, and mix the topping.
Baking Time
Once you have everything prepped, pop it in the oven! The baking time is approximately 30 to 40 minutes until it turns a lovely golden brown.
Total Time
In total, expect to spend around 45 to 60 minutes from start to finish. Not too bad for a delicious dessert that’s sure to impress, right? Enjoy a cozy evening while your apple crumble fills your home with wonderful aromas!
If you haven’t tried making apple crumble yet, here’s a link to a great beginner’s guide on preparation techniques that could inspire your cooking journey!
Nutritional Facts for Apple Crumble
Calories
A serving of apple crumble typically contains around 250-300 calories, making it a delightful treat without overindulging. It’s perfect for that cozy weekend dessert or a special occasion!
Sugar Content
With about 15-20 grams of sugar per serving, this classic dessert provides just the right amount of sweetness. Opt for less sugar if you prefer a more tangy flavor, especially if using tart apples like Granny Smith.
Fiber
Each serving boasts around 3-4 grams of fiber, thanks to the oats and apples. This can help you feel fuller for longer and supports a healthy digestive system. Not bad for a treat, right?
For more tips on healthy desserts, check out Healthline’s guide to dietary fiber. You’ll find that enjoying your favorites while being mindful of nutrition can be easy and satisfying!
FAQs about Apple Crumble
Can I use other fruits in my crumble?
Absolutely! While apple crumble is a classic favorite, feel free to get creative with other fruits. Peaches, pears, or even berries can work beautifully. Just note that with sweeter fruits like peaches, you might want to reduce the sugar a bit to balance the flavors. For more fruit ideas, check out this fruit substitution guide.
How do I make it gluten-free?
Making a scrumptious gluten-free apple crumble is easier than you might think! Simply substitute regular flour with a gluten-free blend. You can also use almond flour or oat flour for a nutty flavor. Be sure to check your oats as well; choose certified gluten-free oats to avoid cross-contamination.
What’s the best way to reheat leftover apple crumble?
To enjoy your leftover apple crumble just like new, preheat your oven to 350°F (180°C). Place the crumble in a baking dish and cover it with foil to prevent over-browning. Warm it for about 15-20 minutes until it’s hot throughout. Serve it with a scoop of vanilla ice cream for that fresh-out-of-the-oven taste!
Conclusion on Apple Crumble
In summary, apple crumble is a delightful dessert that combines the tartness of fresh apples with a crunchy topping. It’s perfect for any occasion, and serving it warm with a scoop of vanilla ice cream elevates the experience. Embrace this classic recipe and enjoy cozy moments with loved ones.
Apple Crumble
Equipment
- baking dish
Ingredients
Apple Filling
- 2 lb Granny Smith Apples weight before peeling
- 1 tablespoon flour plain / all-purpose
- 0.5 cup white sugar sub brown sugar
- 2 tablespoon lemon juice or water
- 0.5 teaspoon ground cinnamon
Topping
- 1 cup rolled oats oatmeal (quick cooking is ok)
- 1 cup flour plain / all-purpose
- 1 cup brown sugar (loosely packed) sub white sugar
- 0.5 teaspoon baking powder
- 1 teaspoon cinnamon powder
- 125 g unsalted butter melted
- 1 pinch salt
To Serve
- 1 scoop Vanilla ice cream
Instructions
Preparation
- Preheat oven to 180°C / 350°F (both fan and standard).
- Peel apples, then cut into 1.5cm/ ½” cubes.
- Place apples in a bowl. Sprinkle with flour, sugar and cinnamon, then pour over lemon juice. Toss, then spread out evenly in a 1.5 litre/1.5 quart baking dish.
- Place topping ingredients in a bowl. Mix until clumps form, like wet sand. Spread over the apples, crumbling with fingers if required to get that crumbly topping.
- Bake for 30 to 40 minutes or until golden brown. Remove, cover loosely with foil to keep warm and let stand for 10 minutes before serving.
- Serve warm with vanilla ice cream!


Leave a Reply