
Spooky Black Velvet Cake Recipe Introduction
Why a spooky cake for Halloween?
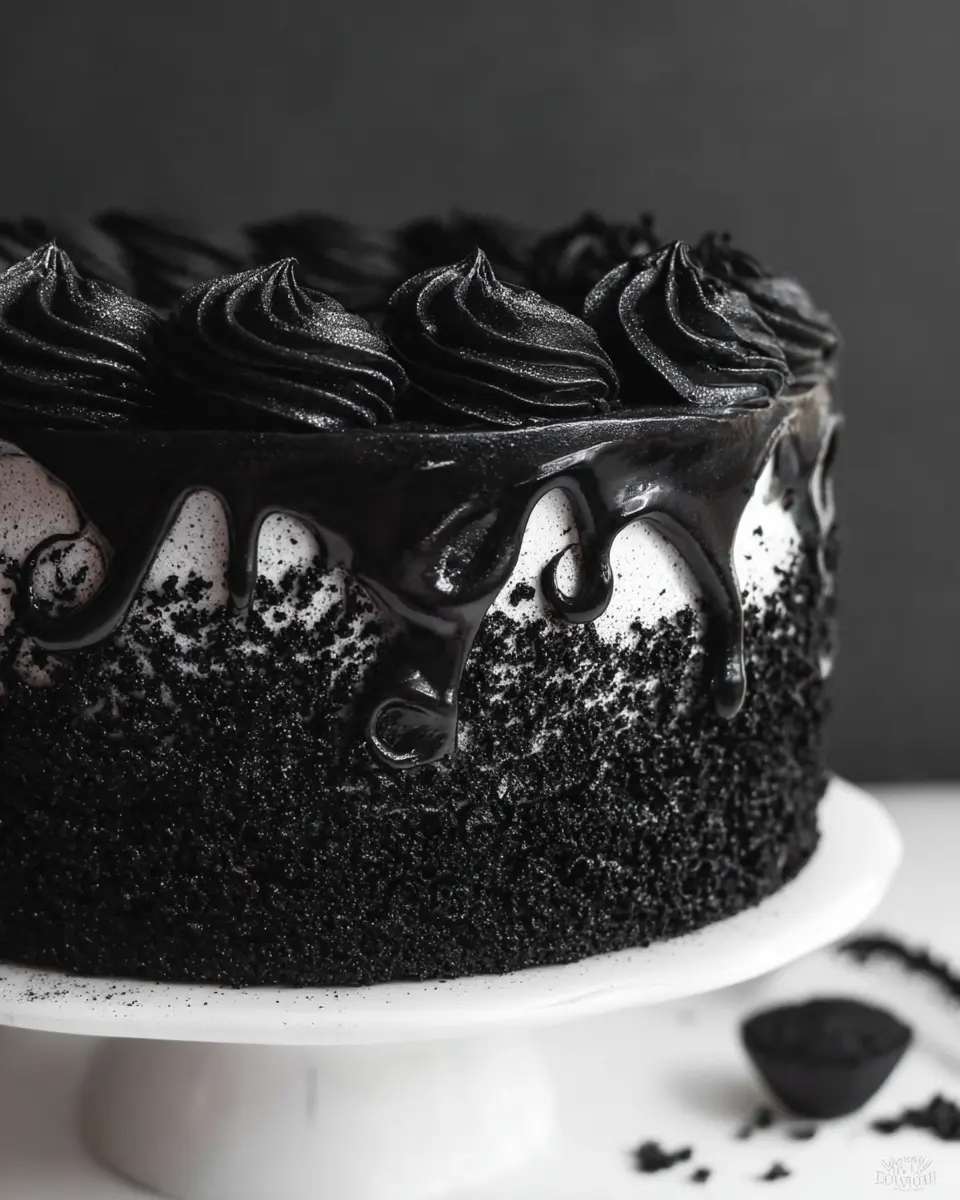
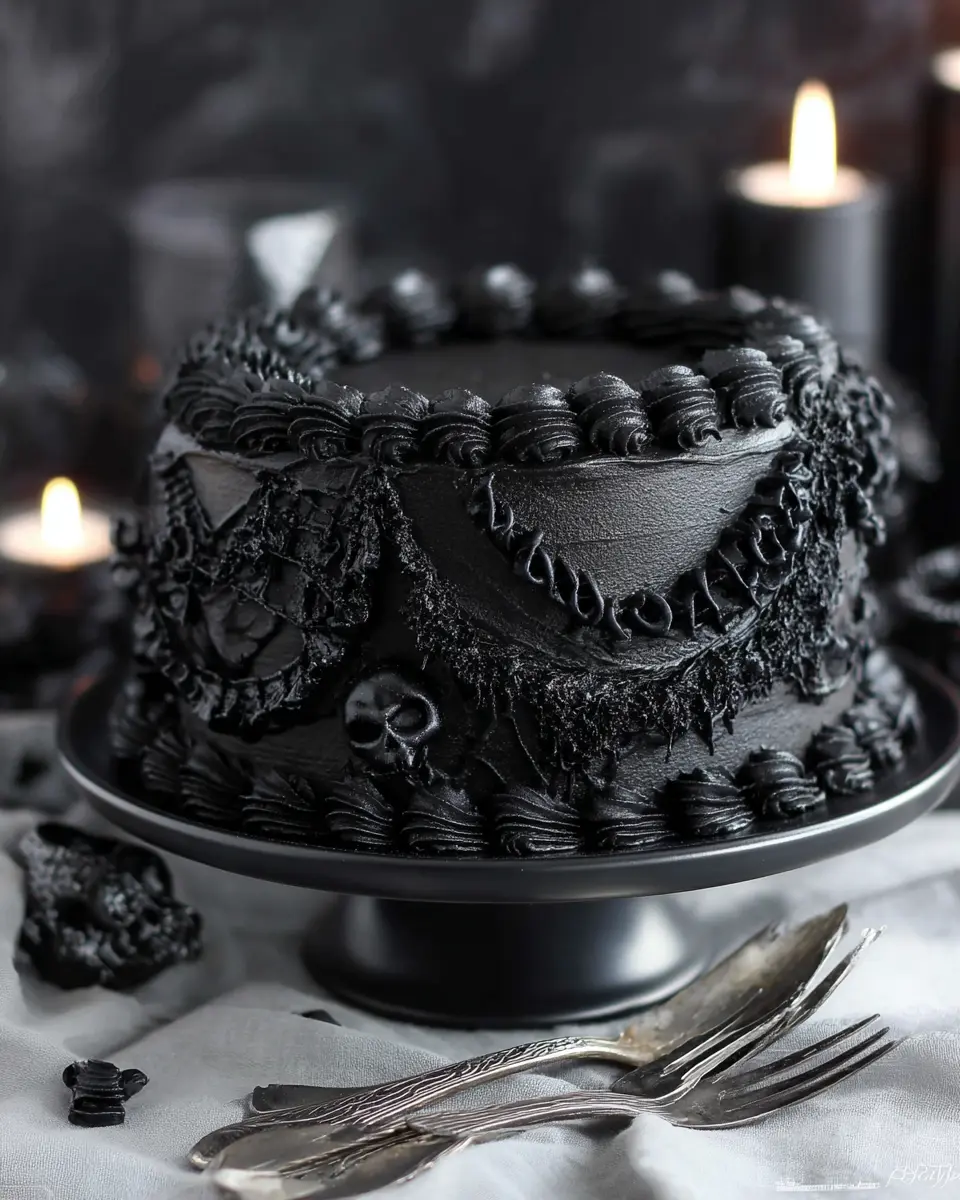
When Halloween rolls around, what better way to celebrate than with a spooky black velvet cake recipe? Halloween is all about embracing the fun, creativity, and slightly eerie side of life. A cake that’s strikingly black not only adds an element of surprise but also works perfectly for the occasion, making it a fantastic centerpiece for your gathering. Plus, the combination of rich chocolate flavor and a velvety texture is something that your friends and family will definitely adore. Want it to be even more festive? Dress it up with some creepy toppers or a glossy black buttercream that adds an extra layer of thrill!
Making homemade desserts that are a treat to share
Creating your own desserts can be incredibly rewarding, especially when they're designed to impress. Homemade treats hold a special place in our hearts, offering a touch of love and care that store-bought options simply can't match. This spooky black velvet cake not only serves as a dessert; it becomes a conversation starter that you can share with loved ones. Imagine biting into a slice while enjoying the laughter and joy of sharing something you made yourself. It’s these moments that make pumpkin-spice lattes and candy corn a little less enticing than they used to be!
With simple ingredients and a spine-tingling presentation, this cake will leave a lasting impression and fill your Halloween with delight. Ready to whip up some chilling goodness? Let's dive into the recipe!
Ingredients for Spooky Black Velvet Cake
Creating your own spooky black velvet cake is more than just a culinary adventure; it’s a delicious way to celebrate! Let's break down the essential ingredients you'll need.
Black Velvet Cake Ingredients
To start with the cake itself, gather these items for the perfect rich, dark flavor:
- 2 Cups (265g) all-purpose flour
- 1 ⅔ Cups (340g) granulated sugar
- ⅔ Cup (80g) black cocoa powder (for that deep, spooky color)
- 2 teaspoon baking soda
- 1 teaspoon baking powder
- ½ teaspoon salt
- ½ Cup (120ml) vegetable oil
- 2 large eggs, room temperature
- 1 ½ teaspoon pure vanilla extract
- 1 Cup (240ml) full-fat buttermilk
- 1 Cup (240ml) hot coffee or hot water
Dye-Free Black Buttercream Ingredients
Now let's move on to the frosting. You don't need artificial colorants to get that dark, enchanted look:
- 2 Cups (452g) unsalted butter, room temperature
- 5 Cups (600g) powdered sugar
- 1 Cup (112g) black cocoa powder
- 4 tablespoon whole milk, room temperature
- 2 teaspoon pure vanilla extract
- ¼ teaspoon salt, or to taste
By using black cocoa powder, you're avoiding artificial dyes while still achieving that delectable, dark aesthetic. This cake is not just a treat; it’s a conversation starter!
For more tips on essential pantry ingredients, check out The Spruce Eats for creative cake ideas.
Ready to dive into the recipe? Let’s get baking your own spooky black velvet cake!
Step-by-step Preparation of Spooky Black Velvet Cake
Creating the perfect spooky black velvet cake is not only a delicious endeavor but also a fun project to get into the Halloween spirit. Follow these steps, and you’ll have a decadent cake that’s sure to impress everyone at your next gathering.
Prepping Your Kitchen and Cake Pans
Before diving into the mixing and baking, the first step is to prepare your kitchen workspace. Start by preheating your oven to 350°F (175°C). This allows your oven to reach the right temperature while you whip up the batter.
Next, take three 6-inch or two 8-inch baking pans and prepare them by:
- Spraying the sides with cooking spray
- Fitting the bottoms with wax paper or parchment cake circles
This will ensure that your cake layers come out easily and maintain their shape.
Mixing the Dry Ingredients
In the bowl of your stand mixer, gather all the dry ingredients for the cake. This includes:
- 2 cups of all-purpose flour
- 1 ⅔ cups granulated sugar
- ⅔ cup black cocoa powder
- 2 teaspoons baking soda
- 1 teaspoon baking powder
- ½ teaspoon salt
Whisk these together on low speed for about 30 seconds until well combined. This step is crucial as it evenly distributes the leavening agents throughout the flour, which helps your cake rise beautifully.
Creating the Moist Cake Batter
Now that your dry ingredients are ready, it’s time to mix in the wet ingredients to create a luscious batter. Add:
- ½ cup vegetable oil
- 2 large eggs (make sure they’re at room temperature)
- 1 ½ teaspoons pure vanilla extract
- 1 cup full-fat buttermilk (you can easily make homemade buttermilk if you don’t have any)
- 1 cup hot coffee or hot water
Mix on low until just combined, then slowly pour in the hot water while mixing. Increase the speed to medium for about 2 minutes, beating until smooth. Note that the batter will be quite thin — that’s exactly what you want for a moist cake!
Baking the Cake Layers
Pour the batter into your prepared cake pans, filling them no more than two-thirds full. This gives your cakes room to rise. Bake in the preheated oven for 32-36 minutes, or until a toothpick inserted in the center comes out clean. Once baked, let them cool completely in the pans before attempting to frost — this is essential for creating a beautiful finish.
Preparing the Black Buttercream
While the cake layers are cooling, whip up your dye-free black buttercream. In the stand mixer, cream:
- 2 cups unsalted butter (room temperature)
- Half of the powdered sugar (2 ½ cups)
- 1 cup black cocoa powder
- 4 tablespoons room temperature whole milk
- 2 teaspoons pure vanilla extract
- ¼ teaspoon salt
Mix this on low until combined, then increase to medium for about 4 minutes until light and creamy. Yes, it may look dark brown now, but it will transform into an even richer black as it rests.
Assembling and Frosting the Cake
Once your cake layers are completely cool, it’s time for assembly. Level off any domed tops if necessary. Stack the layers, adding a generous amount of black buttercream between each one. Don’t forget to crumb coat the cake with a thin layer of icing to seal in any loose crumbs before refrigerating it for 20-30 minutes.
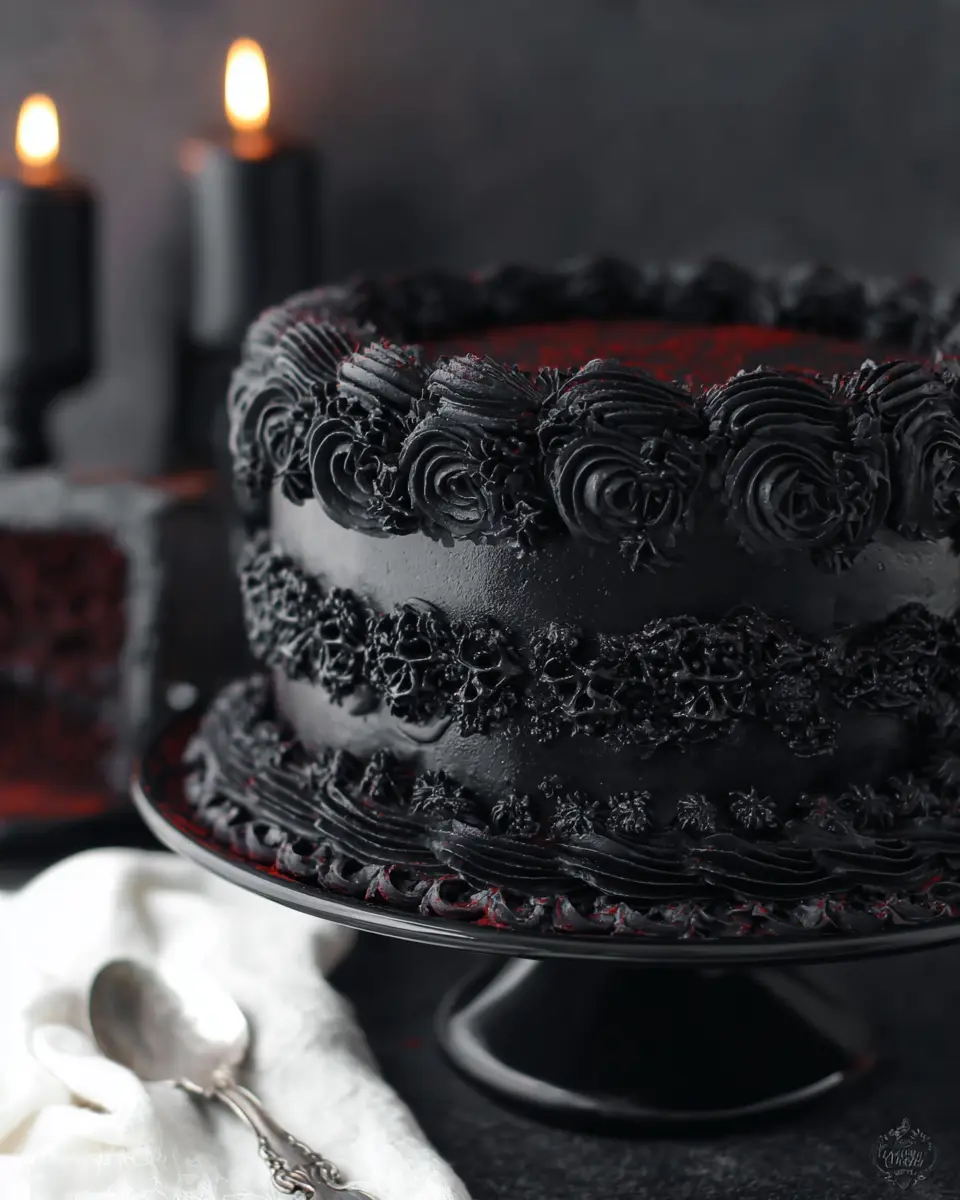
After the crumb coat has set, use the remaining black buttercream to achieve a smooth finish around the outside. Refrigerate for at least another 30 minutes before decorating your cake as desired. Think about adding lambeth piping or round black sprinkles to give it that spooky flair.
With each step of this process, your spooky black velvet cake recipe will come to life, becoming a centerpiece that’s both striking and scrumptious!
Variations of Spooky Black Velvet Cake
Adding orange zest for a citrus twist
If you're looking to elevate your spooky black velvet cake recipe, consider adding a splash of freshness by incorporating orange zest. This simple addition can brighten up the flavors and bring a delightful contrast to the rich cocoa. Just a tablespoon of finely grated zest will infuse your cake with a hint of citrus that complements the chocolate beautifully, making every bite unexpectedly refreshing. Plus, it adds a gorgeous pop of color to the dark cake!
Customizing with layer fillings or toppings
Get creative with your cake by experimenting with different layer fillings or toppings! You could use a luscious chocolate ganache or even a tangy cream cheese frosting to add a different texture and flavor profile. Seasonal toppings—like candied pumpkins or ghostly meringues—can also enhance the spooky theme and delight your guests. For a fun twist, try alternating layers of black velvet with a vibrant orange cake for a striking visual contrast that’s perfect for any Halloween gathering. The possibilities are endless!
Cooking Tips and Notes for Spooky Black Velvet Cake
Storage Options for Cake Layers and Buttercream
To keep your Spooky Black Velvet Cake fresh, consider these storage tips:
-
Cake Layers: Wrap cooled cake layers tightly in plastic wrap and store them at room temperature for up to two days. For longer storage, freeze them wrapped properly for up to two months. Just remember to thaw them completely at room temperature before frosting.
-
Buttercream: Make your black buttercream in advance and store it in an airtight container. It can stay at room temperature for one day or in the refrigerator for up to two weeks. When ready to use, simply rewhip it for the perfect frosting consistency.
Ensuring the Best Texture and Flavor
For the ultimate flavor experience in your Spooky Black Velvet Cake recipe, always use room temperature ingredients. This helps the batter mix evenly, yielding a softer texture. Don't skip the hot water or coffee step—these are vital for deepening the rich flavor of your cake! Plus, using high-quality cocoa powder will elevate the cake’s visual appeal and taste. After baking, patience is key; allow the layers to cool completely before frosting. Enjoy the spooky season!
Serving Suggestions for Spooky Black Velvet Cake
Festive Ways to Serve at Halloween Parties
Hosting a Halloween party? Slice up your spooky black velvet cake and present it on a creepy-themed platter for that perfect eerie touch. You can even add edible witch’s fingers made from marzipan or candy corn as fun decor. For extra festivity, use black plates or serve with pumpkin-shaped napkins to really tie the whole theme together.
Pairing Ideas with Beverages and Desserts
Complement your cake with delightful pairings to enchant your guests. Consider serving it alongside:
- Pumpkin spice lattes for a warm, cozy vibe.
- Apple cider—its sweetness balances the cake's rich flavors perfectly.
- A scoop of vanilla ice cream or whipped cream to introduce a creamy texture.
These combos will elevate your spooky black velvet cake recipe into a dessert experience everyone will remember!
Time Breakdown for Spooky Black Velvet Cake
Preparation time
Get ready for a fun baking session! You’ll need about 20 minutes to gather your ingredients, preheat the oven, and prepare the cake pans.
Baking time
Once the heavenly batter is ready, bake your cake for 32-36 minutes. This fragrant cake will fill your kitchen with aromas that scream celebration!
Total time
From start to finish, expect around 1 hour for this spooky black velvet cake recipe. This makes it a perfect option for a last-minute festive treat!
With this time breakdown, you're well on your way to creating a stunning dessert that will wow your guests. For more tips on prepping and baking like a pro, check out resources from King Arthur Baking. Happy baking!
Nutritional Facts for Spooky Black Velvet Cake
When you're whipping up this spooky black velvet cake recipe, it’s important to know what you’re indulging in. Here are the key nutritional facts to keep in mind:
Calories
A slice of this decadent cake boasts about 400 calories, depending on portion size and frosting.
Carbohydrates
This cake contains approximately 60 grams of carbohydrates per slice, making it a delightful treat for special occasions.
Sugars
With around 30 grams of sugar per serving, it's a sweet indulgence that satisfies those dessert cravings.
For a deeper dive into the world of cake nutrition, check out resources like Healthline for more insights into your favorite sweets!
FAQ for Spooky Black Velvet Cake
Can I make this cake ahead of time?
Absolutely! You can prepare the Spooky Black Velvet Cake layers in advance. Simply wrap them tightly in plastic wrap and store them at room temperature for up to two days. If you want to keep them longer, they can be frozen for up to two months. Just remember to let them thaw to room temperature before frosting.
How do I get the black buttercream color?
Achieving that rich black buttercream is easier than you think! Use high-quality black cocoa powder, as it gives a deep color and flavor. After preparing your buttercream, it may initially appear dark brown, but it will deepen into that striking black hue over several hours. Give it some time to reach its full potential!
What’s the best way to store leftovers?
If you have any leftover Spooky Black Velvet Cake, store it in an airtight container at room temperature for up to three days. For longer freshness, you can refrigerate the cake, which will keep it moist. Just be sure to seal it well, as the flavor can be affected by fridge odors.
For more tips on cake storage and preservation, check out resources like The Spruce Eats for handy guidelines. Happy baking!
Conclusion on Spooky Black Velvet Cake
Making this spooky black velvet cake recipe at home can be a delightful adventure in baking! Don't hesitate to gather your loved ones, share the joy, and create lasting memories together. Every slice brings a sprinkle of creativity and a dash of fun—perfect for any gathering or celebration!
Spooky Black Velvet Cake Recipe
Equipment
- Stand Mixer
- cake pans
- paddle attachment
- measuring cups
- measuring spoons
- Oven
Ingredients
Black Velvet Cake
- 2 cups all purpose flour
- 1 ⅔ cups granulated sugar
- ⅔ cup black cocoa powder **For darkest color use extra dark black cocoa.
- 2 teaspoon baking soda
- 1 teaspoon baking powder
- ½ teaspoon salt
- ½ cup vegetable oil
- 2 large eggs room temperature
- 1 ½ teaspoon pure vanilla extract
- 1 cup full-fat buttermilk *DIY buttermilk recipe included.
- 1 cup hot coffee or hot water
Dye-Free Black Buttercream
- 2 cups unsalted butter room temperature
- 5 cups powdered sugar
- 1 cup black cocoa powder **For darkest color use extra dark black cocoa.
- 4 tablespoon whole milk room temperature
- 2 teaspoon pure vanilla extract
- ¼ teaspoon salt or to taste
Instructions
Make the Black Velvet Cake
- Preheat the oven to 350ºF and prepare three 6-inch or two 8-inch cake pans by spraying the sides with cooking spray and fitting the bottoms with a wax paper or parchment cake circle.
- Place all of the dry ingredients into the bowl of a stand mixer and stir on low for 30 seconds to fully combine them. Add the vegetable oil, eggs, vanilla, and buttermilk and mix on low until just combined.
- With the mixer still on low, add the hot water in a slow stream, then turn the mixer to medium and beat until smooth, about 2 minutes. The batter will be very thin.
- Pour into prepared cake pans no more than ⅔ full and bake for 32-36 minutes, until a toothpick inserted comes out clean. Cool completely before frosting.
Make the Black Buttercream
- In a stand mixer fitted with a paddle attachment, whip the butter on medium speed until creamy and light in color, about 4 minutes.
- Scrape down the bowl and paddle, then add half of the powdered sugar. Mix on low speed until just incorporated, then add the rest of the powdered sugar.
- With the mixer still in the off position, sift in the black cocoa powder and add the vanilla, milk, and salt. Mix on low until all ingredients are thoroughly combined, about 2 minutes, scraping down the bowl and paddle as needed.
- The buttercream will look dark brown at this point, but the color will darken significantly over the next several hours.
Assembly
- Once the cake layers have cooled completely, level them to your desired height. Fill and stack the layers with black buttercream, then crumb coat the cake with more black buttercream.
- Refrigerate the crumb coated cake for 20-30 minutes to let the frosting firm up.
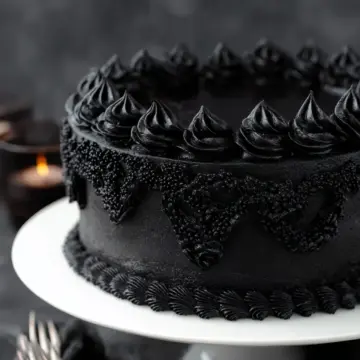
- To create the design pictured, use the black buttercream to create a smooth finish on the cake, then refrigerate it for at least 30 minutes.
- Use the rest of the black buttercream to create lambeth piping and accent with round black sprinkles where desired.
Leave a Reply