
Introduction to No Knead Bread
Why No Knead Bread is a Game Changer
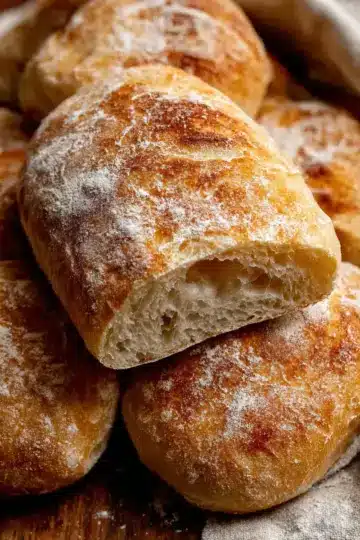
If you've ever wanted to bake fresh bread at home without the arm workouts that kneading can sometimes entail, no knead bread is your answer! This revolutionary approach to bread-making has gained popularity for its simple method and impressive results. Imagine warm, crusty loaves that are effortlessly pulled together with just a few ingredients and minimal effort.
What makes this bread so special? Unlike traditional methods that require hours of kneading, no knead bread relies on a long resting period for the dough to develop gluten. This not only enhances flavor but also creates that beautiful, airy texture we all love. It’s perfect for busy young professionals who crave homemade brews without the fuss.
Furthermore, the process is incredibly forgiving. If you've ever found yourself fretting over the perfect bread-making technique, fear no more! With just a few simple steps, you can achieve bakery-quality results right from your kitchen.
Curious to dive deeper? Check out this extensive guide on how to make the perfect bread every time! With a little patience and our foolproof recipe, you'll be impressing friends and family in no time.
So roll up your sleeves and get ready to turn your kitchen into a cozy bakery with the art of no knead bread!
Ingredients for No Knead Bread
Essential Ingredients
For a perfect no knead bread that’s simple and delicious, here’s what you’ll need:
- 4 ¾ cups all-purpose flour (570g), plus extra for dusting
- 2 ½ teaspoons instant yeast (about 1 packet or 7g)
- 2 teaspoons sea salt (12g)
- 2 cups very warm water (approximately 120°F/48°C) (472 ml)
- 2 teaspoons maple syrup, agave, or granulated sugar (13.5g)
- 1 teaspoon olive oil or your choice of oil (4.4g)
With these essential ingredients, you’re well on your way to baking a crusty, golden loaf that pairs beautifully with butter, soups, or sandwiches.
Optional Ingredients for Flavor
Feel free to get creative! Consider adding herbs like rosemary or thyme for a fragrant twist, or garlic for an aromatic base. If you enjoy experimenting, toss in some cheese or even sun-dried tomatoes to elevate the flavor profile further. A hint of vinegar can also enhance the dough's tanginess, giving your no knead bread a unique kick. Explore your pantry and tailor the recipe to your taste!
Looking for more tips on flavoring your bread? Check out resources on flavor combinations to inspire your baking adventure.
Step-by-Step Preparation of No Knead Bread
Gather and Whisk the Ingredients
To begin your journey into the world of no knead bread, you'll need to start by gathering your ingredients. This simple list includes:
- 4 ¾ cups all-purpose flour (570g)
- 2 ½ teaspoons instant yeast (about 1 packet or 7g)
- 2 teaspoons sea salt (12g)
- 2 cups very warm water (about 120°F/48°C, roughly 472 ml)
- 2 teaspoons maple syrup (or agave/sugar, 13.5g)
- 1 teaspoon olive oil (4.4g)
Once you have everything organized, grab a very large bowl and whisk the dry ingredients together until they’re thoroughly mixed. Creating a well in the center, you’ll want to pour in the warm water, maple syrup, and olive oil. Stir everything together until it forms a shaggy dough, which should take about a minute.
Mix and Form the Dough
Now that you have your dough formed, it’s time to lightly grease the sides of the bowl. Turn the dough over within the bowl to ensure it’s lightly coated with oil. Cover it with greased plastic wrap or a light kitchen towel. This is where the magic happens—set it aside for 2 to 3 hours. If your kitchen is cool, consider placing the bowl in your oven (with the oven light on, but the oven off) to create a warm, draft-free space.
Allow the Dough to Rise
After waiting patiently, your dough should have doubled in size and may even have bubbles on the surface. Isn’t that satisfying? This rising process is crucial as it develops flavor and texture. If you’d like to read more about the science behind yeast, check out this yeast guide.
Shape the Dough
Sprinkle flour liberally on your work surface—about a tablespoon is good. Gently pour your risen dough onto it, then sprinkle a little more flour on top. Use a dough scraper or a large knife to fold the dough over itself several times, creating a tighter shape. In just under a minute, you’ll have a beautifully shaped dough.
Scoop the dough with your hands and shape it into a round loaf on a piece of parchment paper.
Preheat and Prepare the Dutch Oven
In the last 30-40 minutes of rising, place your Dutch oven into an oven preheated to 450°F (230°C). This step ensures that your Dutch oven is hot enough to start the baking process immediately without any temperature shocks.
Bake the Bread to Perfection
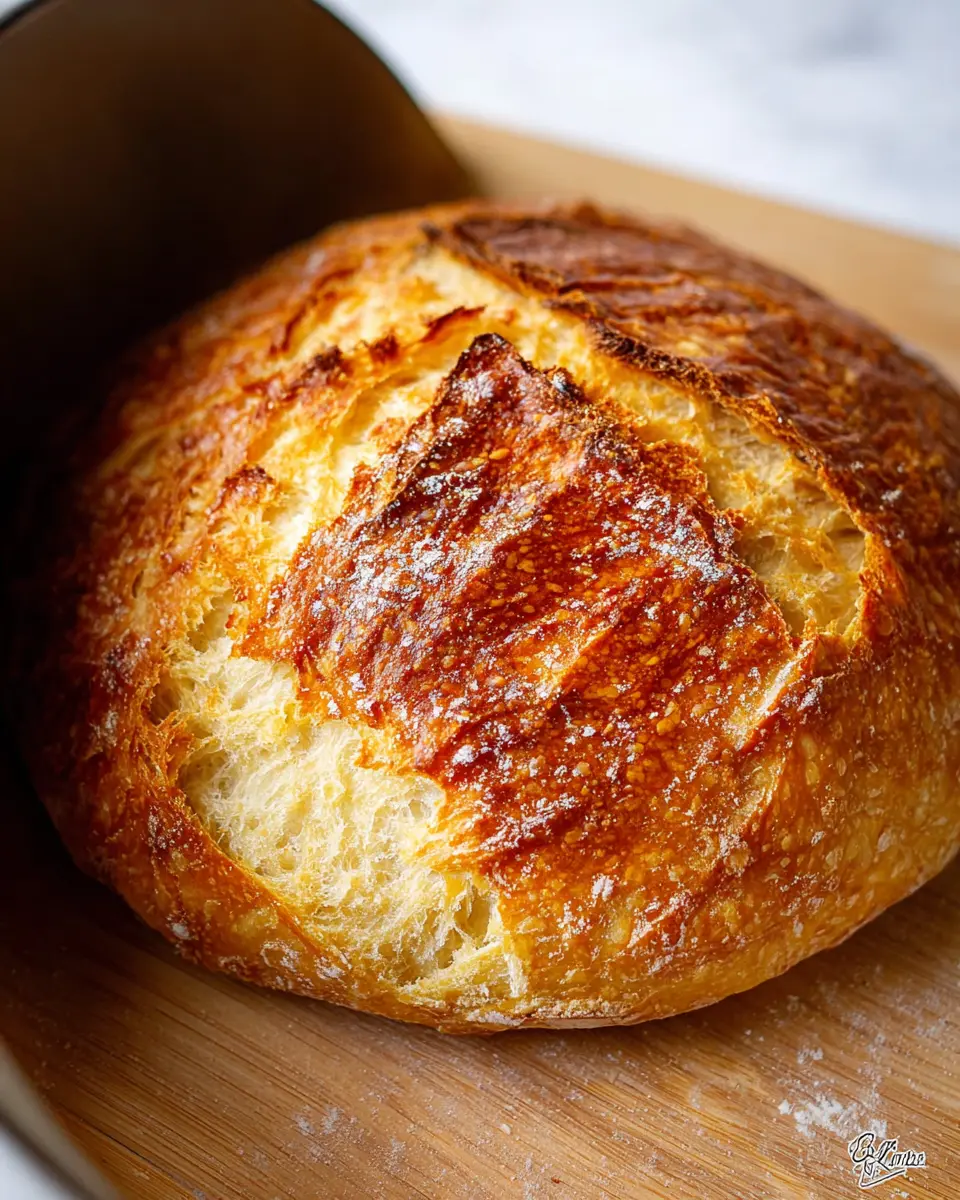
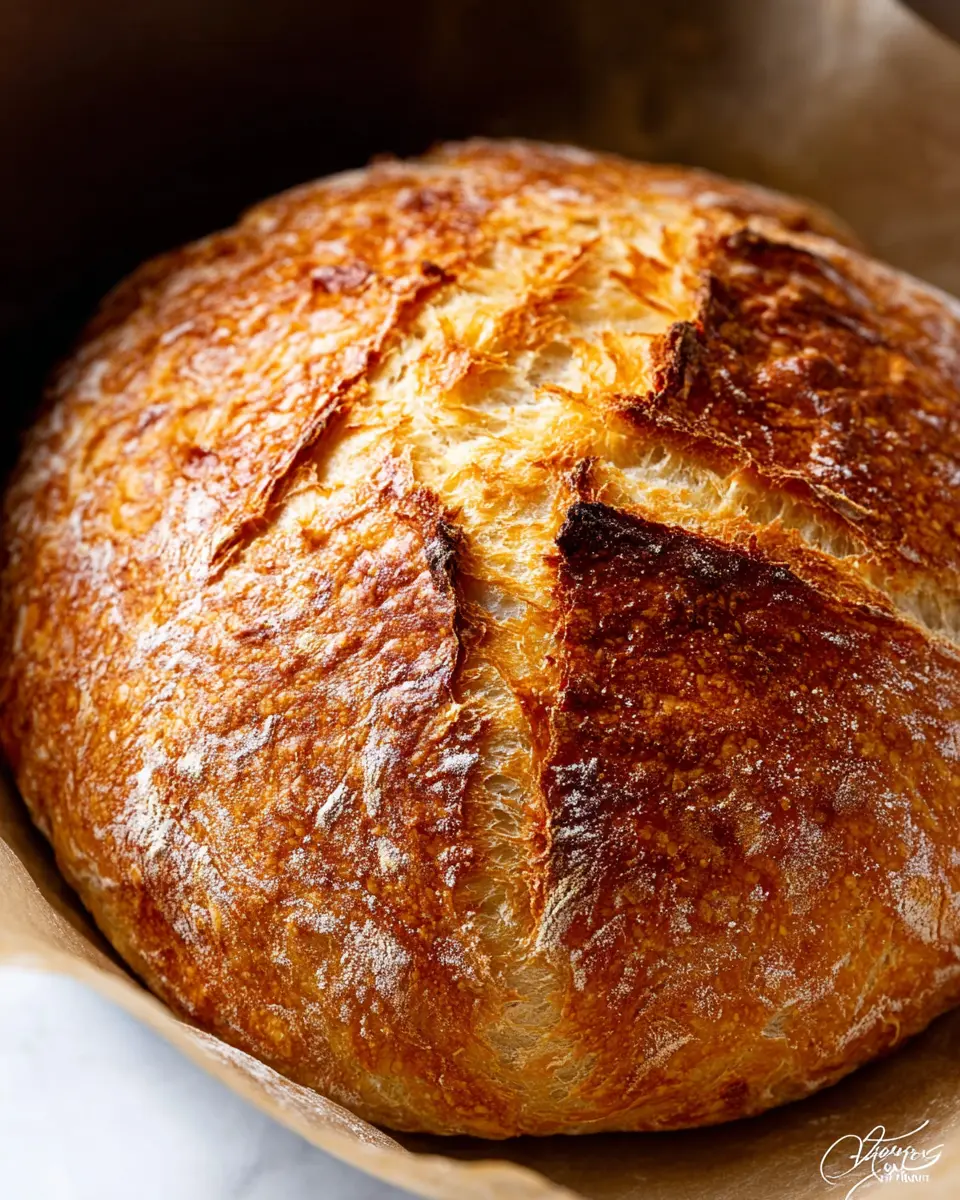
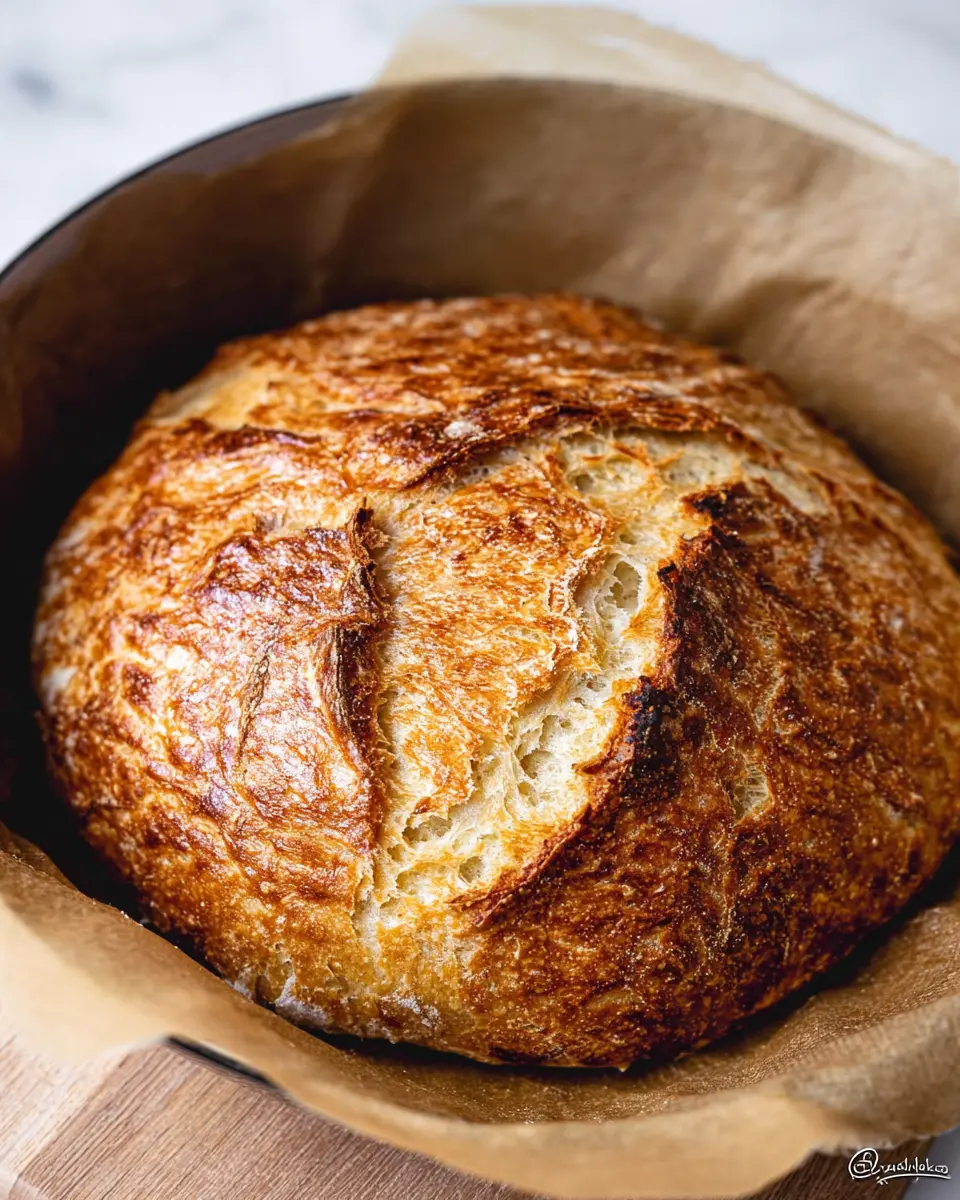
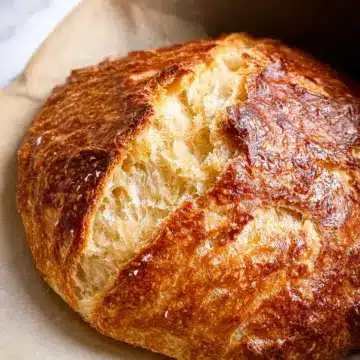
Once your oven is preheated, carefully remove the Dutch oven with oven mitts, remove the lid, and place your dough (still on the parchment) into the pot. Make sure to cover it back up and pop it back into the oven. Bake it for 45 minutes, then remove the lid to allow the crust to crisp up for an additional 15 to 20 minutes. If you prefer a golden crust, keep a close eye on it!
After baking, let it cool slightly before slicing. You’ll be rewarded with a crisp crust and soft, airy interior—perfect for that next brunch spread or simply enjoying with a spread of butter. Enjoy your homemade no knead bread!
Variations of No Knead Bread
Herb and Cheese No Knead Bread
Elevate your no knead bread experience by adding herbs and cheese. Simply mix in fresh herbs like rosemary or thyme along with chunks of your favorite cheese, such as cheddar or feta, into the dough during the initial mixing. This savory twist will infuse flavor and create a delicious aroma while baking. Imagine tearing into a warm loaf with gooey cheese that complements your favorite soups or salads.
Sweet No Knead Bread with Dried Fruits
For a delightful breakfast option, consider transforming your no knead bread into a sweet treat. Fold in dried fruits like cranberries, apricots, or raisins before letting the dough rise. A touch of cinnamon can further enhance the flavor profile. This sweet version pairs perfectly with butter or cream cheese, making it an excellent addition to your morning routine. Plus, it's an impressive homemade gift for friends and family!
Cooking Tips and Notes for No Knead Bread
Best Practices for Ingredient Quality
For the best no knead bread, selecting high-quality ingredients is crucial. Opt for fresh all-purpose flour and ensure your instant yeast is active. You can check this by dissolving it in warm water with a pinch of sugar; if it bubbles after 5-10 minutes, it’s good to go! Using sea salt enhances flavor, while filtered water can improve texture. Consider experimenting with different oils for added taste — a fruity olive oil can elevate your bread to new heights.
Troubleshooting Common Issues
Is your bread too dense? It might be due to insufficient rising time or expired yeast. If the crust is too tough, aim to reduce baking time. Don't hesitate to adjust based on your oven’s quirks — every one is different! If your dough doesn’t rise as expected, check your kitchen temperature; a warmer environment helps fermentation. Remember, practice makes perfect — your no knead bread will improve with each bake!
For more tips, explore resources like King Arthur Baking and Serious Eats for baking insights and methods.
Serving Suggestions for No Knead Bread
Pairing with Spreads and Dips
One of the simplest yet delightful ways to enjoy no knead bread is with your favorite spreads and dips. Try slathering it with:
- Cream cheese or herbed cheese spreads: Great for a savory snack or breakfast.
- Avocado: Mashed with a sprinkle of salt and lime, it makes for a creamy topping.
- Hummus: A perfect pair that’s both healthy and flavorful.
Dipping into homemade pesto or olive oil infused with balsamic vinegar also elevates the flavor experience.
Serving with Soups and Salads
This versatile no knead bread shines when served alongside soups and salads. Its crusty exterior and soft inside create a perfect contrast, making it ideal for:
- Chunky vegetable soups: Perfect for soaking up all those savory flavors.
- Classic tomato soup: There’s nothing better than a fresh slice alongside.
- Bright, crisp salads: Pairing with a refreshing vinaigrette can complement the bread's texture.
Consider dipping the bread into your soup for an extra satisfying meal. Whatever you choose, it’s hard to go wrong!
Time Breakdown for No Knead Bread
When you’re ready to dive into the world of homemade no knead bread, let's break down the time needed for each step, so you can plan your baking adventure effortlessly.
Preparation Time
The initial prep time is super quick—only about 10 minutes. That’s just enough time to mix your ingredients and get your dough started!
Rising Time
Patience is key here. Allow your dough to rise for 2 to 3 hours at room temperature, or longer if your kitchen is on the cooler side. This is where the magic happens as the dough almost doubles in size.
Baking Time
Once your dough has risen, it's time to bake! Total baking time is around 60 minutes, which includes both covered and uncovered baking to achieve a perfect crust.
Total Time
From start to finish, you’re looking at about 3 to 4 hours, including rising and baking. Most of this time is just letting the dough do its thing—easy peasy!
Nutritional Facts for No Knead Bread
When baking this delightful no knead bread, it's essential to consider its nutritional profile. Here are some key facts:
Calories per Serving
A typical serving of no knead bread contains about 120 calories, making it a light and satisfying option for any meal.
Protein Content
Each slice offers around 4 grams of protein. This helps keep you feeling full and supports your body's repair and growth.
Sodium Level
With approximately 200 milligrams of sodium per slice, this bread remains a great choice for those monitoring their salt intake. Enjoy without worries when paired with fresh ingredients!
For more on the health benefits of whole grains, check out Healthline's article on whole grains.
FAQ about No Knead Bread
Can I use whole wheat flour instead?
Absolutely! You can substitute part of the all-purpose flour with whole wheat flour for a heartier texture and flavor. A good starting point is to replace up to half of the all-purpose flour with whole wheat flour. Just keep in mind that it may require a little more water because whole wheat flour absorbs more moisture.
How do I store leftover no knead bread?
To keep your no knead bread fresh, wrap it in a clean kitchen towel and store it in a bread box or at room temperature. For longer storage, you can slice the bread and place it in a resealable plastic bag or an airtight container in the freezer. This way, you can enjoy your homemade bread weeks later!
What can I do if my bread doesn’t rise?
If your no knead bread isn’t rising, it might be due to inactive yeast. Check that your yeast is fresh by testing it in warm water with sugar before using it. If it’s still not rising after that, ensure you’re letting it rise in a warm, draft-free spot. If all else fails, consider adjusting your water temperature or the rising time based on your kitchen’s environment.
Conclusion on No Knead Bread
Enjoy Freshly Baked Bread at Home!
In just a few simple steps, no knead bread transforms into a delightful, crusty loaf that elevates any meal. With minimal effort, you can impress friends and family with your baking skills. So, gather your ingredients, embrace the magic of fermentation, and relish the warm aroma of freshly baked bread wafting through your home!
No Knead Bread
Equipment
- Dutch oven
- large bowl
- Dough scraper
- parchment paper
Ingredients
- 4.75 cups all purpose flour extra for flouring
- 2.5 teaspoons instant yeast about 1 packet
- 2 teaspoons sea salt
- 2 cups very warm water about 120°F/48°C
- 2 teaspoons maple syrup agave or granulated sugar
- 1 teaspoon olive oil or any oil
Instructions
- In a very large bowl, whisk the dry ingredients together until thoroughly combined. Create a well in the centre and add the warm water, maple syrup and the oil. Stir the water into the dry ingredients to form a dough. You want to stir until it’s all incorporated and the dough looks shaggy but mixed together, about 1 minute.
- Lightly grease the sides of the bowl, and turn the dough over in it to grease the dough. Cover with greased plastic wrap, an alternative wrap or light kitchen towel and let it rise on your counter for 2 to 3 hours.
- In the last 30-40 minutes of rising, place your Dutch oven in the oven and preheat at 450℉/230°C.
- After two hours, the dough should have bubbles on the top. Flour a surface with at least 1 tablespoon flour spread out, then pour the risen dough onto it. Sprinkle another ½ tablespoon of flour onto the top of the dough.
- Using your dough scraper or large knife or spatula, fold the dough on top of itself. Rotate the dough and do it a few more times, about 6 to 12 times.
- Scoop the dough and place onto a piece of parchment paper. Using your hands, scoop/shape it into a circle.
- When the oven is preheated, remove the Dutch oven carefully with oven mitts. Take the lid off and place the dough (on the parchment paper) into the Dutch oven. Place lid back on.
- Bake for 45 minutes. After that time, open the oven, carefully remove the lid and continue to bake for an additional 15 to 20 minutes.
- Remove from the oven, and lift up the edges of the parchment to transfer the bread to a wire cooling rack.
- Completely cool, then slice, serve and enjoy! If you can't wait, cool it for at least 30 minutes!


Leave a Reply