
Introduction to Homemade Cream Puffs
The Allure of Homemade Cream Puffs
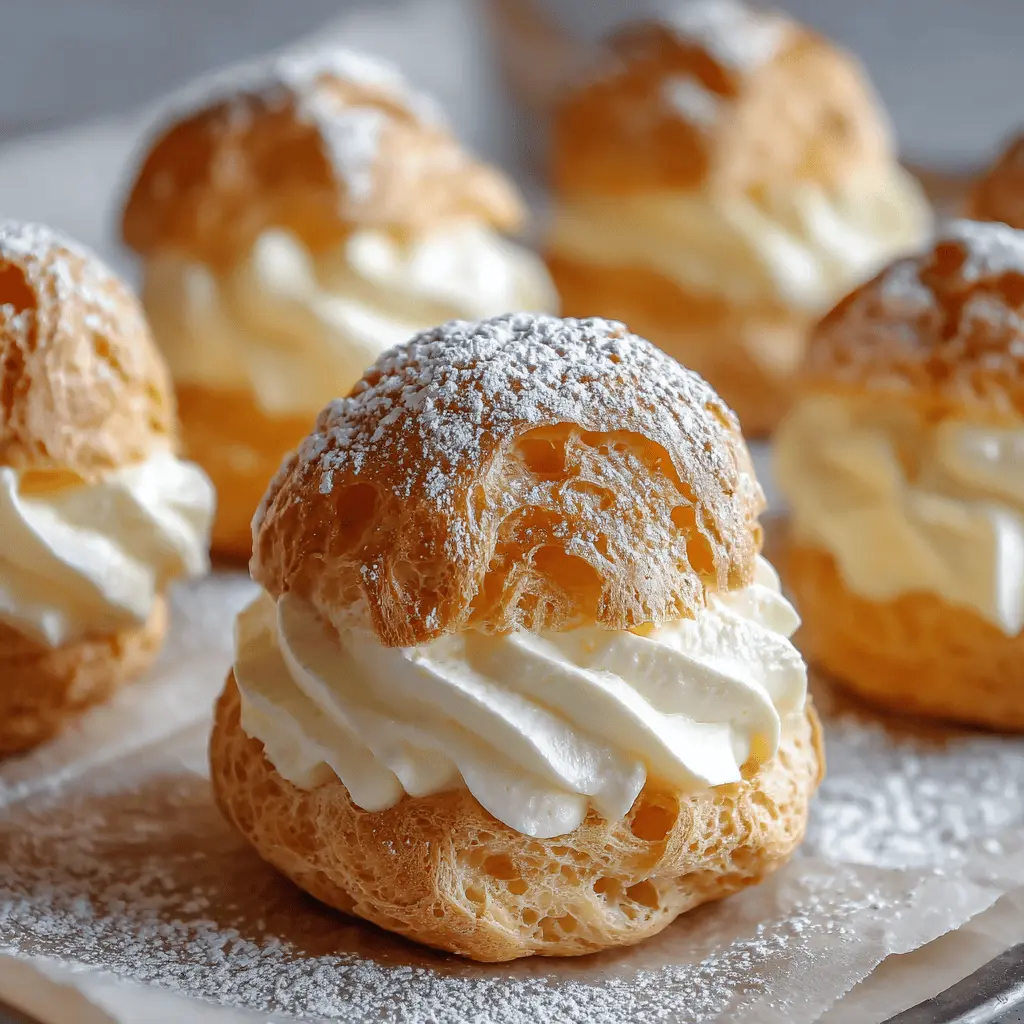
Have you ever bitten into a light, airy cream puff and wondered how something so delightful could come from your own kitchen? Homemade cream puffs are not only a treat for your taste buds but also a feast for the senses. Their delicate, crispy shells are a testament to the artistry of choux pastry—a simple recipe that leads to spectacular results.
Creating these delightful pastries can be a rewarding experience, especially when you can indulge in them right after they come out of the oven. Imagine the warmth of freshly baked puffs filled with whipped cream, just waiting to be devoured. Whether you’re hosting a dinner party or simply satisfying your sweet tooth, these treats are sure to impress.
For the best tips on mastering these French classics, consider checking out resources from reputable culinary sites like Serious Eats or Bon Appétit. They provide invaluable insights that can take your baking skills to the next level. So roll up your sleeves and get ready for a bake-off adventure that will culminate in beautifully topped homemade cream puffs!
Ingredients for Homemade Cream Puffs
Creating delightful homemade cream puffs begins with a few key ingredients that come together to form the perfect pastry and filling.
Pâte à Choux
The base of your cream puffs is the classic pâte à choux. You’ll need:
- 1 ¼ cup (300 ml) water
- 1 teaspoon (4 g) granulated sugar
- ½ teaspoon (2 g) kosher salt
- ½ cup (114 g) unsalted butter, cut into eight slices
- 1 cup (124 g) all-purpose flour
- 4 large eggs
- ¼ cup (12 g) powdered sugar for dusting
This simple dough is what gives your cream puffs that light, airy texture we all love!
Whipped Cream
Next, let’s talk about the luscious filling:
- 2 cups (480 ml) heavy whipping cream
- ½ cup (24 g) powdered sugar (or granulated sugar)
- 1 teaspoon (5 ml) pure vanilla extract
This creamy mixture adds delightful sweetness to your pastries and is incredibly satisfying when you take that first bite.
Special Equipment
To make your baking experience smoother, having the right tools is essential:
- Stand Mixer
- Cooling Rack
- Pastry Bag with tips (plain and star)
These items will help you achieve flawless results while making your homemade cream puffs. Happy baking! You can dive deeper into baking techniques here for more insights on mastering the art of pastries.
Preparing Homemade Cream Puffs
Making homemade cream puffs may seem intimidating, but once you break it down into steps, you’ll see just how manageable it really is! Let’s walk through the process together.
Preheat the Oven
Start by preheating your oven to 425°F (218ºC). Set both racks in the upper-middle and lower-middle positions. Using parchment paper to line your sheet pans will prevent the cream puffs from sticking—making your cleanup a breeze.
Make the Dough
In a large saucepan, combine 1 cup of water, sugar, salt, and butter. Heat on medium-high until it comes to a boil, stirring regularly to help the butter fully melt, which typically takes about 2 minutes. Once the mixture is bubbling, swiftly add the flour and stir vigorously with a wooden spoon until it comes together into a smooth dough. This step should take about 4 to 5 minutes; you'll want it to leave a thin film on the sides of the saucepan.
Cool the Dough
After you mix the dough, it’s time to transfer it to the bowl of your stand mixer. Let it cool on low speed until it reaches about 130°F (54ºC). This step is critical—it helps avoid curdling the eggs when you incorporate them.
Add the Eggs
Once cooled, it's time to mix in the eggs. Add them one at a time, waiting for each to fully incorporate before adding the next. This process should take about 30 to 45 seconds for each egg. The dough should be shiny and firm—not too runny!
Pipe the Dough
Using a piping bag fitted with a large plain tip, pipe the dough into 2-inch circles on your prepared sheet pans. Leave at least 2 inches between each ball, as they will expand during baking. If you notice any pointed tips on the dough, dip a finger in water and smooth them out.
Brush on Egg Wash
For that beautifully golden finish, brush the tops of your dough balls with an egg wash made from one egg and a tablespoon of water. This will give them a nice sheen once they bake!
Bake the Cream Puffs
You’ll want to bake your cream puffs with a gradual heat adjustment. Bake at 425°F (218ºC) for the first 10 minutes, then lower to 375°F (191ºC) for another 10 minutes. Finally, drop to 325°F (163ºC) and continue the gradual decrease down to 200°F (93ºC). Avoid opening the oven door during this time to ensure they puff perfectly.
Make the Whipped Cream
While the dough is baking, prepare the luscious whipped cream. In your stand mixer, beat the heavy cream, powdered sugar, and vanilla extract until stiff peaks form. This should only take about 2-3 minutes.
Pipe the Cream
Once the cream puffs have cooled completely, cut them in half and fill them with your whipped cream using a star tip for a pretty finish.
Top with Sugar
Lastly, give your homemade cream puffs a sprinkle of powdered sugar on top for that finishing touch. Serve them immediately or refrigerate them uncovered for up to three days, although they are best enjoyed fresh!
Homemade cream puffs make for a delightful dessert that’s always a crowd-pleaser. By following these steps, you’ll impress your friends and family with your baking skills!
Variations on Homemade Cream Puffs
Seasonal Fruit Cream Puffs
Transform your homemade cream puffs by incorporating seasonal fruits! Think strawberries in spring or peaches in summer. Just fold chopped fruit into whipped cream for a delightful filling that bursts with fresh flavor. This variation not only elevates the taste but also adds a pop of color, making your cream puffs even more visually appealing. For the ultimate summer treat, consider making a strawberry coulis to drizzle on top!
Chocolate Cream Puffs
For chocolate lovers, chocolate cream puffs are a must-try. You can easily make a rich chocolate ganache or a creamy chocolate mousse to fill your puffs. Simply melt some chocolate into your whipped cream for a delectable chocolate variation that offers a decadent twist. The rich flavor will satisfy your sweet tooth while keeping the classic cream puff experience intact. Want to take it up a notch? Garnish with chocolate shavings or drizzle melted chocolate on top!
Try these variations for a fun twist on your classic homemade cream puffs. You'll impress friends and family with your creativity and delicious flavors! If you're interested in more dessert ideas, check out Food Network's dessert collection.
Cooking Tips and Notes for Homemade Cream Puffs
Measuring Flour Accurately
To achieve the perfect texture in your homemade cream puffs, it's essential to measure the flour correctly. Use the spoon-and-level method: scoop the flour into the measuring cup, then level it off with a knife. This will prevent adding too much flour, which can create a denser pastry.
Storing Unfilled Shells
Once baked and cooled, store your unfilled cream puff shells in an airtight container at room temperature for up to five days. For longer storage, freeze them for up to one month. This way, you can always have fresh shells on hand for that spontaneous dessert craving!
Reheating Stored Shells
If you have leftovers, you can rejuvenate your homemade cream puffs by reheating them. Place the shells on a baking sheet and heat in a preheated oven at 300ºF (149ºC) for 5 to 10 minutes until they feel crisp again. Let them cool before filling with cream for the best texture.
Serving Suggestions for Homemade Cream Puffs
Dessert Plating Ideas
Elevate your homemade cream puffs by presenting them on a stylish plate. Consider arranging them in a pyramid shape for an eye-catching centerpiece. Drizzle some chocolate ganache or berry coulis on the plate for added elegance. For a rustic touch, garnish with fresh berries or mint sprigs that complement the cream filling.
Pairing with Beverages
To enhance your dessert experience, consider pairing your cream puffs with a delightful beverage. A rich cup of coffee or a frothy cappuccino balances the sweetness of the cream. Alternatively, a refreshing herbal tea such as chamomile or mint can provide a soothing contrast, making it a perfect afternoon treat.
For more creative serving ideas, check out this guide on dessert pairings from The Spruce Eats.
Time Breakdown for Homemade Cream Puffs
Preparation Time
Getting ready for your homemade cream puffs involves about 30 minutes of prep work. This includes gathering ingredients, making your choux pastry, and whipping up that delightful cream filling.
Cooking Time
Bake your cream puffs for approximately 1 hour and 15 minutes. It's crucial to follow the gradual temperature changes to achieve that perfectly crispy exterior. Patience is key!
Total Time
In total, you’re looking at around 1 hour and 45 minutes from start to finish. Plus, you'll end up with 16 delicious cream puffs that are sure to impress your friends and family!
Making these treats might be a little time-consuming, but the delicious payoff is totally worth it! If you want tips on perfecting your technique, check out this guide on making choux pastry. Happy baking!
Nutritional Facts for Homemade Cream Puffs
Calories
Each homemade cream puff contains approximately 116 calories, making them a light yet indulgent dessert option.
Carbohydrates
With about 10 grams of carbohydrates per puff, these treats are a delightful way to satisfy your sweet cravings without the heavy carb load.
Protein
You can enjoy around 3 grams of protein in each cream puff, adding a small nutritional boost to this delectable dessert.
Fat
Homemade cream puffs have around 7 grams of fat, contributing to their rich and satisfying taste. Enjoy them in moderation for the best experience!
For a deeper dive into nutritional insights, consider exploring resources like NutritionData or USDA FoodData Central for more detailed information.
FAQs about Homemade Cream Puffs
How do I ensure my cream puffs are crispy?
To achieve that satisfying crunch, it's essential to manage moisture during baking. Avoid opening the oven door while baking, as this can cause steam to escape and cool the shells prematurely. After baking, let the cream puffs cool completely on a wire rack to allow any residual moisture to escape. If stored, re-crisp them by placing them in a 300°F oven for 5 to 10 minutes before serving.
Can I make the dough ahead of time?
While it's best to use the dough fresh for optimal results, you can refrigerate it for up to 24 hours in an airtight container. When you're ready to bake, give it a quick stir before piping. You can also freeze the piped dough balls and bake them straight from the freezer—just remember to add a few extra minutes to your baking time.
What can I substitute in the whipped cream?
For a delicious twist in your homemade cream puffs, consider using mascarpone cheese or Greek yogurt blended with the heavy cream for added flavor and creaminess. If you're looking for a non-dairy option, coconut cream is a fantastic substitute that adds a hint of tropical sweetness!
Conclusion on Homemade Cream Puffs
Embrace cooking at home with this delightful dessert!
Creating homemade cream puffs is a rewarding experience that combines both skill and creativity. With a few simple ingredients and steps, you can impress friends and family with these elegant treats. So, roll up your sleeves, and let your baking adventure begin! Enjoy every bite!
Homemade Cream Puffs: Easy Indulgence for Your Sweet Tooth
Equipment
- Stand Mixer
- Cooling Rack
- Pastry Bag
- Plain Pastry Tip
- Star Pastry Tip
Ingredients
Pâte à Choux
- 1 ¼ cup water, divided
- 1 teaspoon granulated sugar
- ½ teaspoon kosher salt
- ½ cup unsalted butter, cut into 8 slices
- 1 cup all-purpose flour, spoon and leveled
- 4 large eggs
- ¼ cup powdered sugar, for dusting
Egg Wash
- 1 large egg
- 1 tablespoon water, or milk
Whipped Cream (4 cups)
- 2 cups heavy whipping cream, or heavy cream
- ½ cup powdered sugar, or granulated sugar
- 1 teaspoon pure vanilla extract
Instructions
Instructions
- Preheat the Oven - Set the oven racks to upper-middle and lower-middle positions. Preheat to 425°F (218ºC). Line two sheet pans with parchment paper and set them aside.
- Make the Dough - In a large heavy-bottomed saucepan, add 1 cup of water, sugar, salt, and butter. Bring to a boil over medium-high heat and stir until the butter fully melts, about 2 minutes.
- Cool the Dough - Transfer the dough to a bowl of a stand mixer fitted with a paddle. Slowly stir on low speed (setting 2) to cool to 130°F (54ºC) or just below, about 2 to 3 minutes.
- Add the Eggs in Stages - Add eggs one at a time, mixing on medium-low speed (setting 4) until each egg is fully incorporated, about 30 to 45 seconds per egg.
- Piping the Dough - Add a large plain tip to a piping bag. Add the dough to the pastry bag. Pipe onto the sheet pan, creating a 2-inch circular ball.
- Brush on Egg Wash - In a small bowl, whisk together one egg and 1 tablespoon of water. Brush the tops and sides of each dough ball with the egg wash.
- Gradual Baking Process - Place the sheet trays in the oven. Bake for 10 minutes at each temperature setting: 425°F, 375°F, 325°F, 275°F, 225°F, 200°F. It will take about 60 to 70 minutes of total baking time.
- Make the Whipped Cream - In a stand mixer fitted with the whisk attachment, add heavy cream, powdered sugar, and vanilla extract to the bowl. Whip until smooth, stiff peaks form, about 2 minutes.
- Piping the Cream - Working in batches, add the whipped cream to a pastry bag fitted with a large star tip. Cut the shells in half and pipe whipped cream into the pastry bottoms.
- Top with Sugar - Sprinkle powdered sugar on top of each cream puff. Serve immediately, or refrigerate if not eating within one hour.

Leave a Reply