
Why Homemade Ciabatta Bread is Worth the Effort
Making homemade ciabatta bread isn’t just about following a recipe; it’s an experience that connects you to the art of baking. The delightful aroma wafting through your kitchen while the bread is baking offers an unparalleled joy that store-bought loaves simply can't match. Think of it—each bite of your fresh ciabatta provides a cozy warmth perfect for enjoying with a simple olive oil dip or as the foundation for a delicious sandwich.
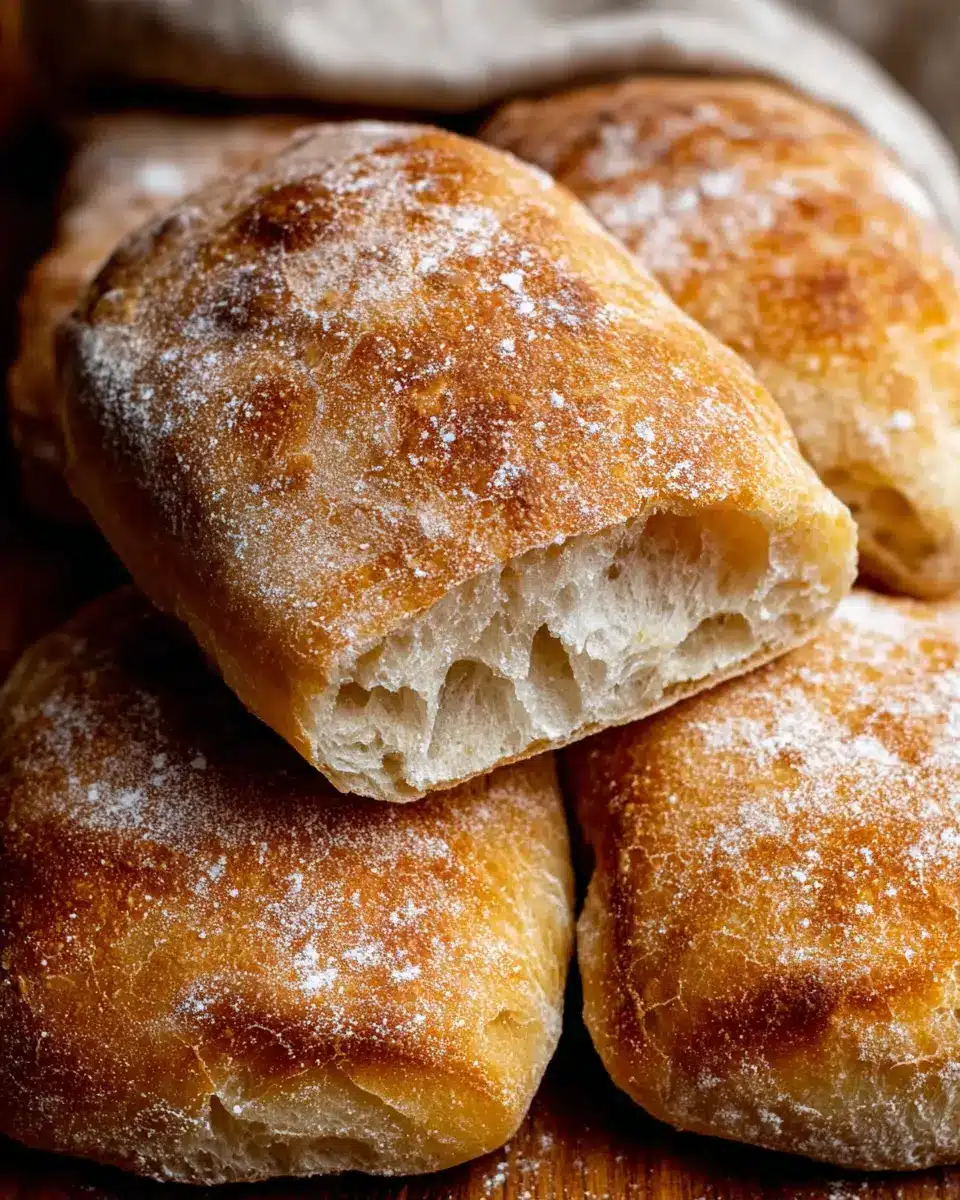
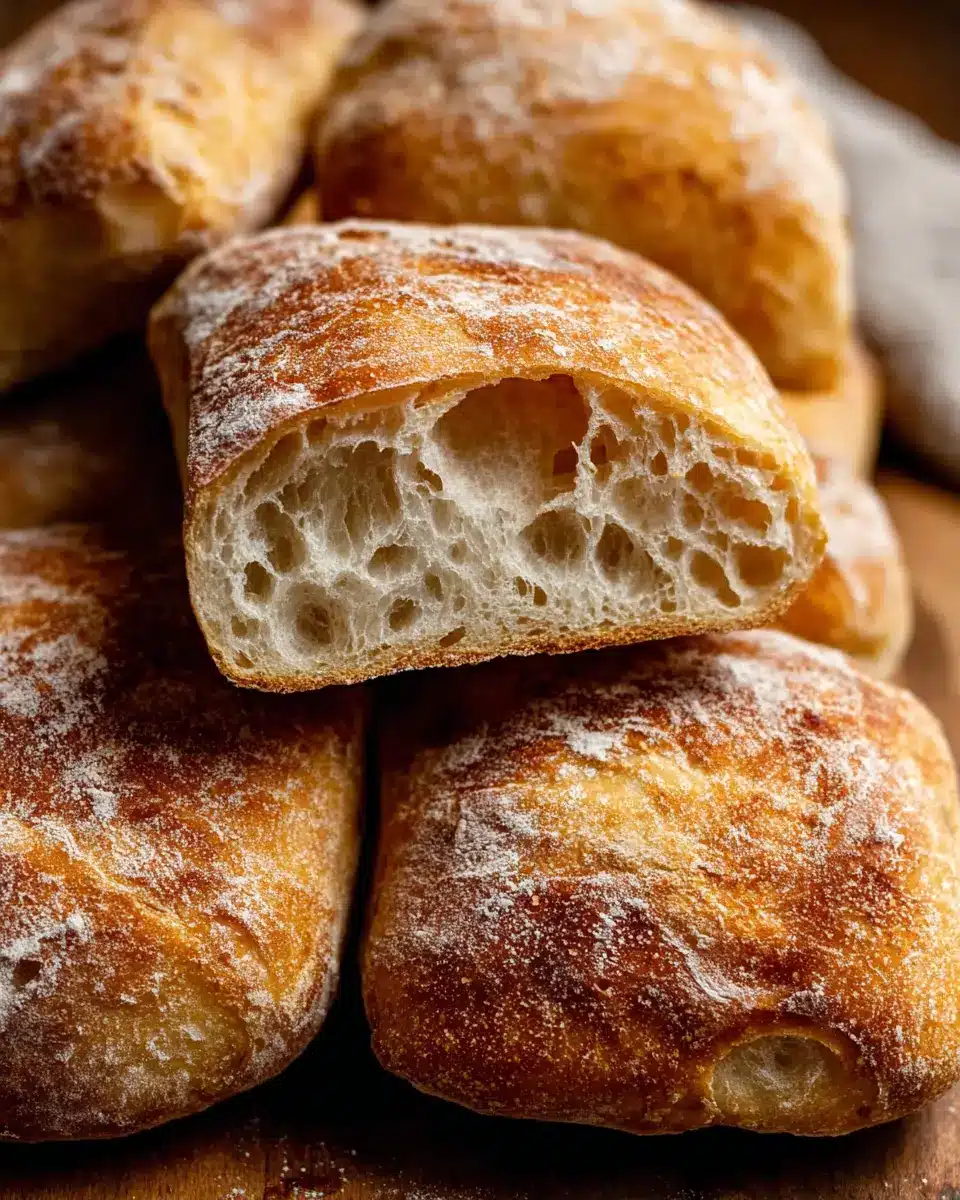
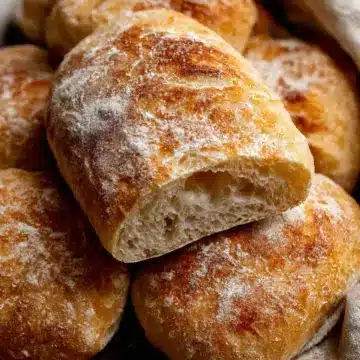
The reason to invest time in this recipe is rooted in the texture and flavor. With its crispy crust and soft, airy interior, ciabatta bread stands out on any dining table. Plus, by making it at home, you're in control of the ingredients. You can choose organic flour and skip preservatives, elevating your meals while making them healthier and tastier.
Embrace the process! As you master the steps, you’ll find a meditative rhythm, transforming flour and water into something wonderful. Don't hesitate to personalize your loaf with fresh herbs like rosemary or a sprinkle of garlic—your imagination is your only limit. Want tips on enhancing flavors? Explore this guide on herbs for baking!
In the end, taking that first bite of your freshly baked ciabatta lies a satisfaction that’s truly rewarding. So, roll up your sleeves and embark on this delicious journey—your taste buds will thank you!
Ingredients for Homemade Ciabatta Bread
Baking your own homemade ciabatta bread is a rewarding process that will elevate any meal. Let's break down the essential ingredients you’ll need to achieve that crispy crust and airy interior that makes ciabatta so beloved.
Biga/Preferment Ingredients
To create the flavorful base of your ciabatta, you’ll need:
- 1 cup (130g) bread flour (I recommend this one, for the best results)
- ⅛ teaspoon active-dry or instant yeast
- ½ cup (120g/ml) room-temperature water (aim for about 70°F (21°C))
This biga, or preferment, plays a crucial role in developing the bread's rich flavor and texture.
Ciabatta Roll Ingredients
Next, for the actual ciabatta rolls, gather these ingredients:
- 1 teaspoon (3g) active-dry or instant yeast
- 1 cup (240g/ml) warm water (around 100–110°F (38°–43°C))
- 2 and ½ cups (325g) bread flour (spooned & leveled)
- 1 and ½ teaspoons (8g) table salt
- Olive oil, for coating hands and your spatula
Having good quality ingredients is key. If you’re a bread aficionado looking for expert tips, check out King Arthur Baking, a fantastic resource for all things baking. Happy baking!
Step-by-Step Guide for Preparing Ciabatta Bread
Day 1: Making the Biga/Preferment
Begin your journey to crafting homemade ciabatta bread by preparing the biga, which is a flavorful preferment that enhances the dough’s structure and taste. In a large mixing bowl, whisk together 1 cup of bread flour with ⅛ teaspoon of yeast. Pour in ½ cup of room-temperature water and mix until smooth. This step is crucial, as it sets the foundation for your bread's flavor profile. Once combined, cover the bowl tightly with plastic wrap and let it sit at room temperature overnight, or for a delightful 8 to 24 hours.
Day 2: Mixing the Dough
The following day, it's time to bring your dough to life! In a separate bowl, combine 1 teaspoon of yeast with 1 cup of warm water (around 100–110°F). Let it sit for 5-10 minutes until the yeast is dissolved. Now, add your prepared biga, 2 and ½ cups of bread flour, and 1 and ½ teaspoons of salt into the bowl. Mix well, and don’t shy away from getting your hands messy. The dough will be sticky, which is perfectly fine!
Step 1: First Rest and Stretch-and-Fold
Once combined, cover the bowl and let it rest for 30 minutes. This resting period allows the gluten to relax. Then, for the first stretch-and-fold, visualize a clock on your dough. Fold it over four times, lifting from the 12 o'clock position and stretching it down to six o'clock. Rotate the bowl and repeat until you’ve made a full round.
Step 2: Remaining Stretch-and-Folds
After the first fold, repeat the process three more times, allowing a 30-minute resting period between each. By the end of this, your dough will have developed strength and elasticity!
Step 3: Shaping the Rolls/Bread
Generously flour your work surface, then gently release the dough onto it. Shape it into a rough rectangle, about 10x7 inches. For rolls, cut into 8 equal pieces, or slice it in half for two loaves. Handle the dough gently to maintain its airy structure—remember, ciabatta is meant to look rustic!
Step 4: Proofing Before Baking
Transfer the cut dough pieces to lightly floured parchment paper, sprinkling a bit of flour on top. Cover with a kitchen towel and let it sit for 1 hour. This proofing stage is vital for achieving that delightful texture.
Step 5: Baking the Ciabatta
Preheat your oven to a toasty 450°F, placing a flat baking sheet on the middle rack. Just before baking, spritz your dough with water for a crispier crust and immediately place it in the oven. Bake for 20-25 minutes or until golden brown, emitting a hollow sound when tapped. Let them cool for at least 45 minutes before slicing!
With these steps, you’re well on your way to impressing friends and family with your homemade ciabatta bread. Enjoy it fresh with olive oil or as part of your favorite sandwich! For tips on enhancing your bread with herbs, check out this article.
Happy baking!

Variations of Homemade Ciabatta Bread
Herb-Infused Ciabatta
Elevate your homemade ciabatta bread by infusing it with delightful herbs. Simply mix in 2 teaspoons of your favorite dried herbs, such as rosemary or oregano, during the dough-making stage. Fresh herbs can be equally exciting! Add a couple of tablespoons of minced fresh herbs for a fragrant twist. The result? A loaf that sings with flavor, perfect for pairing with soups or salads.
Ciabatta with Cheese
For a cheesy twist, you can incorporate 1 cup of shredded cheese, like mozzarella or cheddar, into your dough. This technique not only adds rich flavor, but it also creates a beautifully chewy texture. You could also sprinkle some cheese on top before baking for an extra crispy finish. Enjoy these rolls warm, dipped in marinara or served with your favorite pasta dish!
Feel free to experiment and customize your ciabatta to your liking. Happy baking!
Baking Tips and Notes for Ciabatta Bread
Proper Dough Handling
When preparing homemade ciabatta bread, it’s essential to handle the wet, sticky dough gently. Use lightly oiled hands and a bench scraper to minimize deflation. Remember, the dough will be sticky; resist the urge to add too much flour during shaping. Flour your work surface generously, and don’t worry about making it perfect—rustic is part of the charm!
Ensuring a Crispy Crust
To achieve that signature crust, preheat your oven with a baking sheet inside for about an hour before baking. Consider creating steam by adding ice cubes to a pan at the bottom of the oven just as you place your bread inside. This helps develop that crispy, golden exterior we all love! For more tips on achieving the perfect crust, check out King Arthur Baking.
Serving Suggestions for Homemade Ciabatta Bread
Ideal Pairings for Ciabatta
When it comes to savoring homemade ciabatta bread, the right accompaniments make all the difference. Here are some ideal pairings that enhance its rustic charm:
- Soups: A comforting tomato basil soup or creamy minestrone can perfectly complement your ciabatta.
- Salads: Serve it alongside a fresh garden salad or a classic Caprese salad with ripe tomatoes and mozzarella.
- Dips: Try a delightful olive tapenade or hummus for a Mediterranean twist.
Sandwich Ideas Using Ciabatta
Homemade ciabatta also shines in the sandwich realm. Here are some tempting ideas to get your creativity flowing:
- Turkey Bacon Club: Layered with crisp turkey bacon, lettuce, tomato, and a spread of mayo.
- Chicken Ham Delight: Fluff it up with a fresh slice of chicken ham, arugula, and avocado.
- Mediterranean Veggie: Stuff with grilled vegetables, feta cheese, and pesto for a flavorful vegetarian option.
With these serving suggestions, your homemade ciabatta bread will elevate any meal! Don't hesitate to experiment! Try out different pairings and fillings for your own culinary adventure!
Time Breakdown for Ciabatta Bread
Preparation Time
Creating your homemade ciabatta bread takes about 1 hour and 30 minutes of hands-on time. Much of this involves mixing, resting, and occasionally stretching the dough, allowing you to multitask or simply enjoy a good podcast while you wait!
Baking Time
Once your dough has risen to perfection, the baking process itself will take around 20 to 25 minutes. This short duration rewards you with a golden crust and a soft, airy interior that makes ciabatta so delightful.
Total Time
In total, you're looking at approximately 24 hours from start to finish, which includes the long fermentation of the biga. Don't let the time scare you—the ultimate flavor and texture are well worth the wait!
Nutritional Facts for Homemade Ciabatta Bread
When indulging in homemade ciabatta bread, understanding its nutritional content can help you appreciate each bite.
Calories
Each roll contains approximately 233 calories, making it a satisfying option for any meal without excessive calorie counting.
Protein
With about 7.4 grams of protein per serving, this bread can be a delightful addition to your diet, especially when paired with toppings like turkey bacon or chicken ham.
Sodium
This ciabatta has roughly 437.5 mg of sodium per roll, which keeps it within a reasonable range for sodium intake.
If you're looking for bread that balances flavor and nutrition, this recipe has you covered! Enjoy your baking adventure!
FAQs about Homemade Ciabatta Bread
Can I use all-purpose flour instead of bread flour?
Absolutely! While bread flour is preferred for ciabatta because of its higher protein content, you can substitute it with all-purpose flour in a pinch. Keep in mind that the dough may not have the same structure or chewiness, but it will still turn out delicious.
What is the purpose of the biga?
The biga is a type of starter that helps develop flavor and texture in your homemade ciabatta bread. By fermenting the flour and yeast in advance, it not only adds a delightful nutty taste but also contributes to a chewy crust and airy crumb, making your bread all the more delightful.
How do I store leftover ciabatta bread?
To keep your ciabatta fresh, store it loosely covered at room temperature for up to five days. If you find that you have a lot left over, you can refrigerate it for up to a week. Just avoid sealing it tightly, as this can make the crust go soft. If you need to keep it longer, consider freezing it for up to three months.
For more tips on bread storage, check out King Arthur Baking.
Conclusion on Homemade Ciabatta Bread
Making homemade ciabatta bread is rewarding and surprisingly simple. With a crispy crust and airy interior, it’s perfect for sandwiches or served alongside your favorite dishes. Enjoy the therapeutic process of baking, and don’t hesitate to experiment with flavors. Your kitchen will smell incredible, and your taste buds will thank you!
Homemade Ciabatta Bread
Equipment
- mixing bowl
- Silicone Spatula
- Stand Mixer
- dough hook
- bench scraper
- baking sheet
- Cooling Rack
- Instant-Read Thermometer
Ingredients
Biga/Preferment
- 1 cup bread flour spooned & leveled
- ⅛ teaspoon active-dry or instant yeast
- ½ cup room-temperature water about 70°F (21°C)
Ciabatta Rolls
- 1 teaspoon active-dry or instant yeast
- 1 cup warm water about 100–110°F (38°–43°C)
- 2.5 cups bread flour plus more as needed
- 1.5 teaspoons table salt
- olive oil as needed for coating hands and spatula
Instructions
Day 1: Prepare the Biga
- In a large mixing bowl, whisk together the bread flour and yeast. Add the water and mix with a silicone spatula until combined. Cover the bowl tightly with plastic wrap and let rest at room temperature for 8–24 hours.
Day 2: Make the Dough
- Uncover the bowl with the biga. In a separate large mixing bowl, whisk together the yeast and warm water. Cover and let sit for 5 to 10 minutes until the yeast has dissolved. Add the biga, flour, and salt. Gently mix together. Knead if necessary.
- Cover the bowl and let the dough rest for 30 minutes.
- Perform the first stretch-and-fold.
- Repeat stretching and folding, allowing the dough to rest for 30 minutes each time for 4 times total.
- After the fourth stretch-and-fold, cover the bowl and place it in the refrigerator for 1 hour to 24 hours.
Shaping and Baking
- Flour your work surface. Gently scrape the dough out onto the floured surface and shape it into a rectangle.
- For 8 rolls, cut the dough into 8 pieces. For 2 loaves, cut in half.
- Arrange the dough on floured parchment, covering lightly with a towel. Let rest for 1 hour.
- Preheat oven to 450°F (232°C).
- When ready, transfer the dough to the baking sheet and bake for 20–25 minutes until golden brown.
- Cool for at least 45 minutes before slicing.


Leave a Reply