
Introduction to Homemade Apple Cider
Homemade apple cider is more than just a delicious drink; it's a warm embrace that transports you to crisp autumn days filled with falling leaves and hayrides. Why make homemade apple cider? Well, for starters, the taste is incomparable. Store-bought options often contain preservatives and artificial flavors, but making it at home lets you control every ingredient. You can use fresh, organic apples and experiment with spices to create a flavor profile that's perfect for you.
Creating your own cider can also be a delightful experience to share with friends and family. Imagine cozying up with loved ones, sharing a steaming mug of your freshly made cider while recounting your favorite fall memories. Plus, it's surprisingly simple! In just a couple of hours, you can transform a bag of apples into a comforting beverage that smells heavenly and tastes even better.
And if you're looking for a way to impress guests at your next autumn gathering, serving homemade apple cider will definitely do the trick. Not only will they appreciate the effort, but they'll also love the unique flavors that come from balancing sweet and tart apples with warm spices like cinnamon and cloves. So grab your favorite apples, and let’s get started!
For more inspiration and tips on apple varieties, check out resources from The United States Apple Association or explore spice combinations at McCormick.
Essential Ingredients for the Perfect Cider
When it comes to crafting homemade apple cider, the right ingredients can make a world of difference. Think of this as your cozy potion for chilly evenings! Start with a delightful mix of both sweet and tart apples; I'm a huge fan of Honeycrisp and Granny Smith. These varieties blend together beautifully for that essential flavor balance.
Here’s what you’ll need:
- 10 medium apples (about 3-4 lbs), a mix to enhance complexity
- 1 orange, peeled and quartered, for a zesty kick
- 4 cinnamon sticks, adding warm, spicy notes
- 1 teaspoon whole cloves, contributing earthy undertones
- 1 teaspoon allspice berries, optional but adds elegance
- ½ cup (100g) brown sugar, adjust to your sweetness preference
- 8 cups (2 liters) water, to bring everything together
Choosing fresh apples can elevate your cider—maybe check out local orchards or farmers' markets for the best picks! Don't ignore the spices; they're the secret to transforming apple juice into a cozy masterpiece. For more tips, you can explore resources like The Spruce Eats for techniques on selecting apples.
Step-by-step preparation of Homemade Apple Cider
Gather your ingredients
Before you jump into making this delightful homemade apple cider, let’s take a moment to gather everything you’ll need. Having your ingredients prepped and ready will make your cooking experience smoother and more enjoyable. Here’s what you should have on hand:
- 10 medium apples (about 3-4 lbs), a mix of Honeycrisp and Granny Smith
- 1 orange, peeled and quartered
- 4 cinnamon sticks
- 1 teaspoon whole cloves
- 1 teaspoon allspice berries (optional)
- ½ cup (100g) brown sugar
- 8 cups (2 liters) water
Shopping seasonally at a local orchard for your apple cider ingredients is always a bonus, especially in fall when apples are at their peak.
Prepare the apples and orange
Now that you’ve gathered your ingredients, it’s time to get a little hands-on. Start by giving your apples a good rinse under cool water. You want to wash away any dirt or pesticides. Next, core and cut the apples into quarters. There’s no need to stress about peeling them; the skin adds flavor and will be strained out later.
Don’t forget to peel and quarter your orange as well; it brings a lovely citrus brightness to the mix.
Combine and simmer the ingredients
Once your fruits are prepped, it’s time for the fun part! Combine the apple quarters, orange pieces, cinnamon sticks, cloves, and allspice (if using) in a large pot. Pour in the water until it’s enough to cover the ingredients.
Now, bring it to a boil over medium-high heat. You’ll want to let it boil for about 10-15 minutes, then reduce the heat to low and let it simmer. This is where the magic happens! Allow it to simmer gently for 2-3 hours (or 6-8 hours if you prefer using a slow cooker). The aroma will fill your home, transforming it into a warm, cozy haven.
Strain the cider
After your concoction has simmered and the flavors have danced together beautifully, it’s time to strain the cider. Using a fine-mesh strainer or cheesecloth, pour the mixture and discard the solids. Don't rush this stage—take your time to ensure you extract all that delicious liquid.
Serve and enjoy the cider
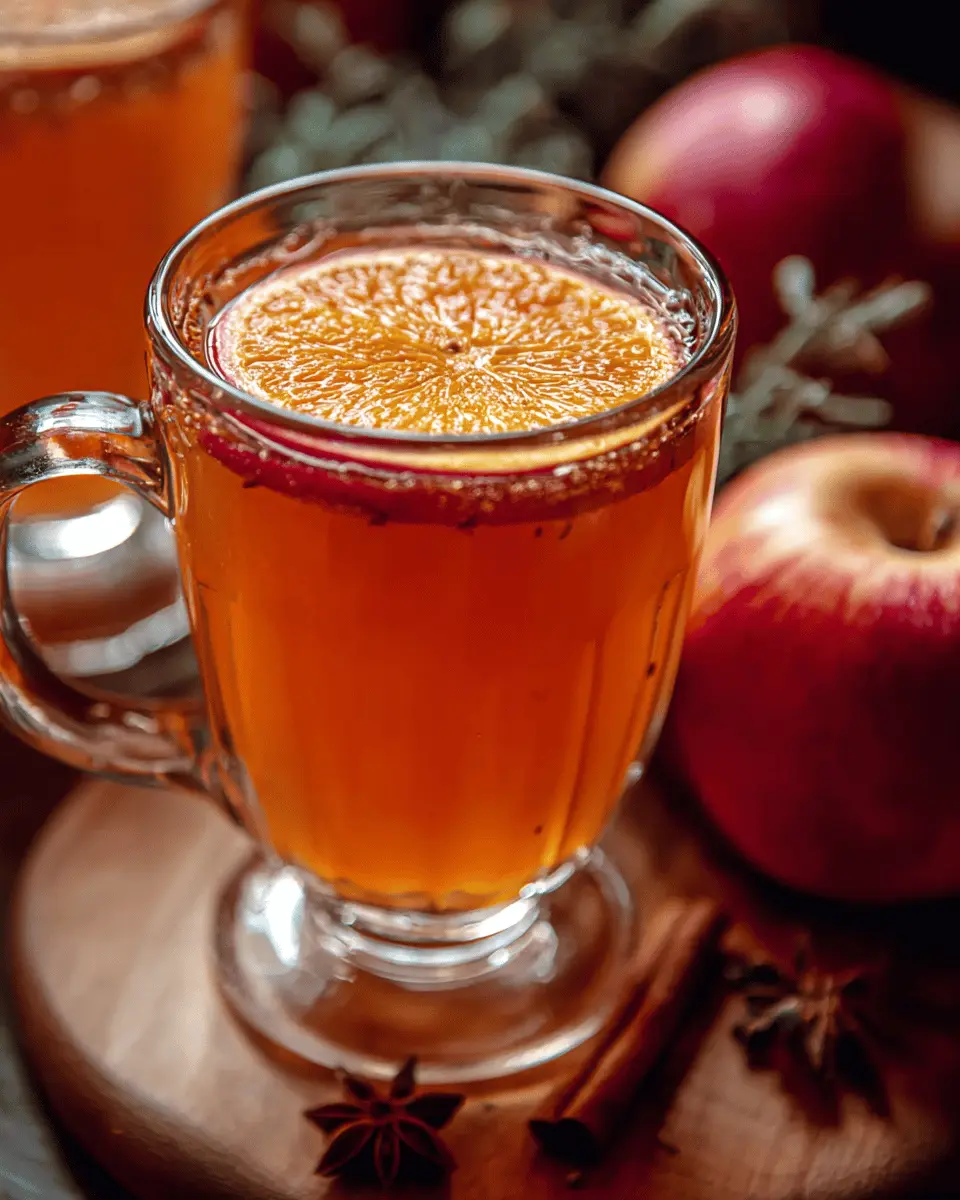
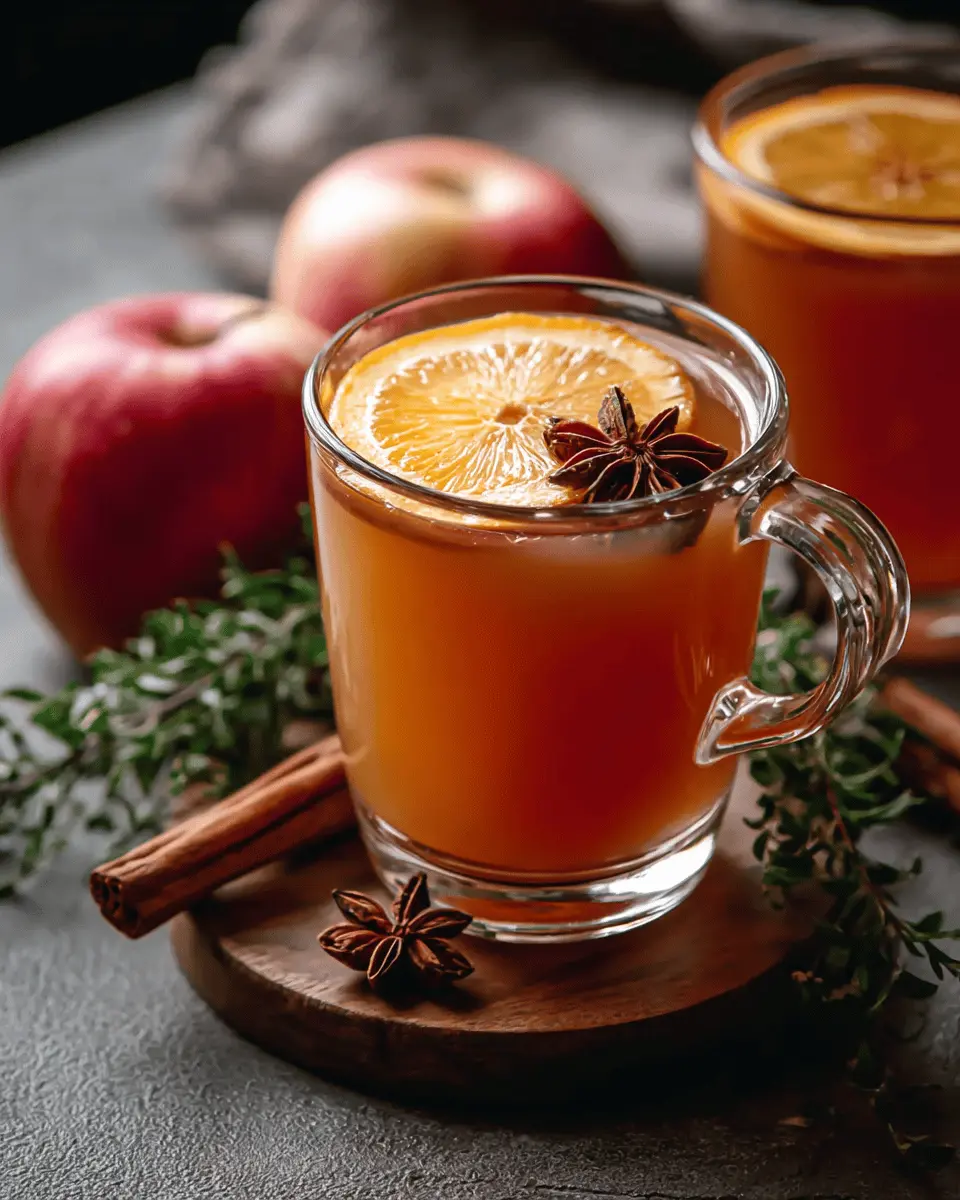
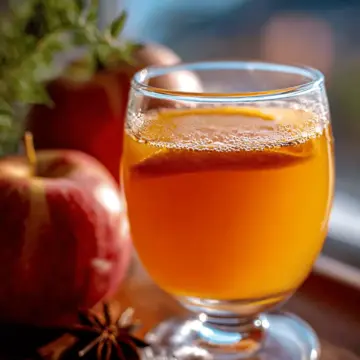
Now for the best part: serving your homemade apple cider! Pour it steaming into mugs and consider garnishing with a cinnamon stick or a slice of fresh apple for that picture-perfect touch. It’s scrumptious on its own, but if you like, feel free to experiment with some of those suggested variations I mentioned earlier.
Whether enjoyed solo or shared with friends, your homemade cider is sure to bring warmth and joy to any gathering. Here’s to cozy sips and autumn vibes! For more inspiration, check out The Spruce Eats for related seasonal recipes.
Variations of Homemade Apple Cider
One of the joys of crafting homemade apple cider is the freedom to experiment! Here are several delightful variations that can elevate your cider game:
Spicy Kick: Adding Fresh Ginger
For a warming twist, toss in a small piece of fresh ginger (about 1 inch, sliced) during simmering. It adds a zesty punch that feels like a cozy hug on chilly days.
Maple Twist: Swapping Brown Sugar for Maple Syrup
Give your homemade apple cider a sweet upgrade by replacing brown sugar with ⅓ cup of pure maple syrup. This swap introduces a delightful breakfast flavor that kids will love.
Cranberry Blend: Adding Fresh Cranberries
Incorporate 1 cup of fresh cranberries for a festive tartness. This not only enhances the flavor but also gives your cider a beautiful crimson hue—perfect for gatherings!
Vanilla Dream: Incorporating Vanilla Extract
For a dessert-like finish, stir in 1 teaspoon of vanilla extract after straining. Trust me, this version is perfect for late-night sips.
Star Anise Magic: Using Star Anise Pods
Add 2-3 star anise pods while cooking for a hint of exotic flavor. This surprising twist can transform your cider experience!
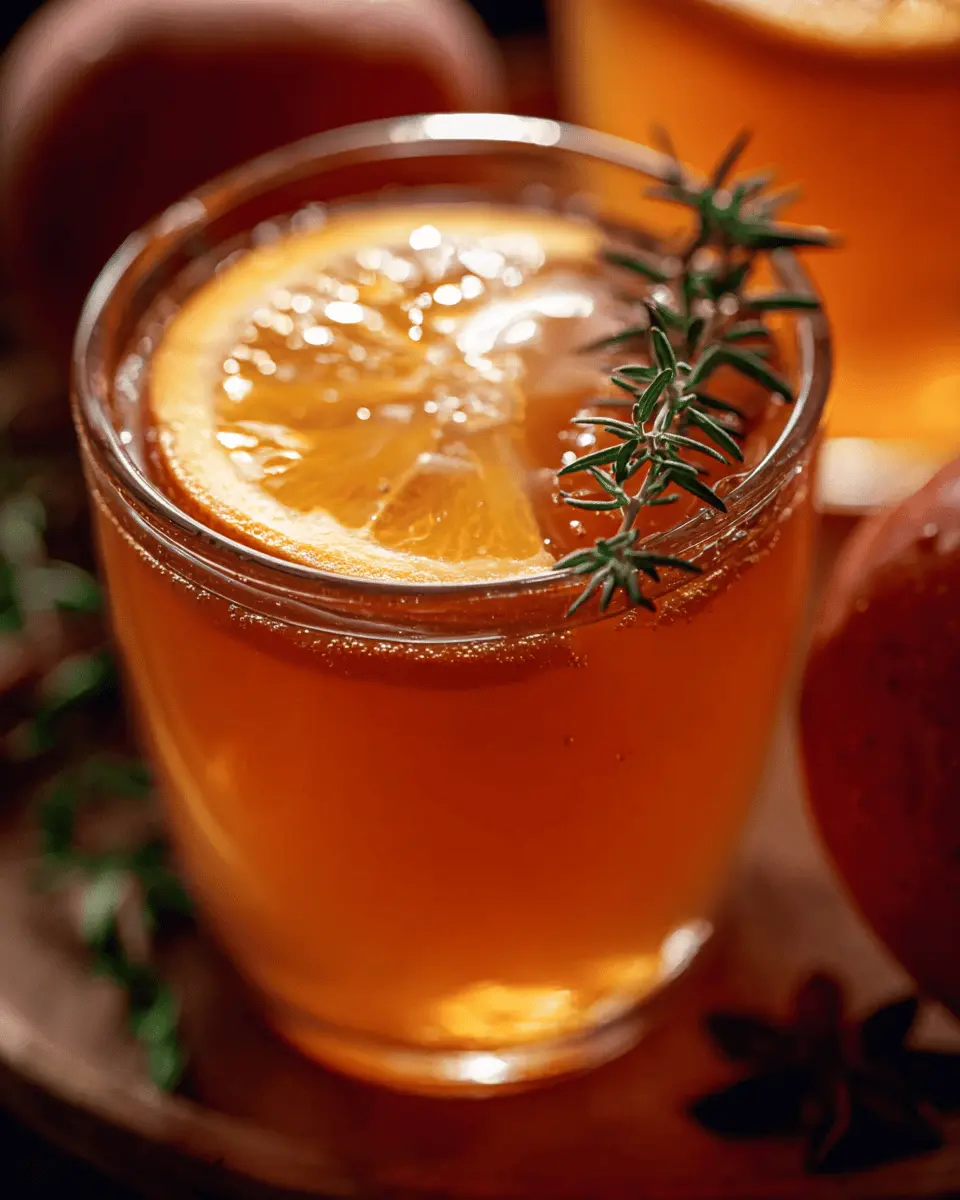
Herbal Touch: Adding Fresh Rosemary
For a refreshing and unique twist, drop in a sprig of fresh rosemary. You’ll be amazed at how well it complements the apples.
Feel free to mix and match—each variation is an adventure waiting to happen! What’s your favorite twist on homemade apple cider? Share your discoveries!
Cooking Tips and Notes for Homemade Apple Cider
Importance of Fresh Ingredients
When it comes to crafting the perfect homemade apple cider, fresh ingredients are key! Opt for local apples that are in season. For the best flavor, choose a mix of sweet and tart varieties, like Honeycrisp and Granny Smith. Not only do they provide a delightful balance, but they also bring a depth of flavor that makes your cider truly shine. For more apple varieties and seasonal purchasing tips, check out resources like Local Harvest.
Spice Recommendations
No homemade apple cider is complete without spices! While cinnamon, cloves, and allspice are classics, feel free to experiment with ginger for a zesty kick or even star anise for a unique twist. Each spice adds its own character to your cider, turning a humble drink into a warm hug in a mug. Don't forget, the spice blend can be adjusted according to your preference—so taste as you go!
Serving Suggestions for Homemade Apple Cider
Perfect Pairings with Seasonal Treats
Homemade Apple Cider is a versatile drink that complements a variety of seasonal snacks. Pair it with:
- Turkey Bacon or Chicken Ham sandwiches for a savory contrast.
- Pumpkin muffins to enhance those autumn flavors.
- A cheese platter featuring aged cheddar and brie for a cozy gathering.
These delicious bites elevate your cider experience, turning an average day into something special.
Ideal Serving Temperature and Presentation
Serve your homemade apple cider warm for that comforting embrace, ideally between 150°F to 160°F. For a festive touch, garnish with a slice of orange or a cinnamon stick in each mug. You can even add a few cranberries for a pop of color. Consider using clear mugs to showcase its beautiful, rich hue. If you’re entertaining, why not set up a cider bar with fun mix-ins? Your guests will love experimenting with flavors!
For more tips on creating an inviting drink station, check out resources from Epicurious or Food Network.
Time Breakdown for Homemade Apple Cider
Preparation Time
Gather your ingredients and equipment—this usually takes about 10 minutes. Make sure to wash and slice your apples and prepare the spices for a smooth start.
Cooking Time
Expect to spend 2-3 hours simmering your homemade apple cider on the stove. If you opt for a slow cooker, it may take 6-8 hours—perfect for when you want that cozy aroma filling your home throughout the day.
Total Time
All in all, you’re looking at approximately 2.5 to 3 hours for the full experience. With this time frame, you can easily entertain guests while enjoying the comforting scent of your cider bubbling away!
For more detailed steps on making this delicious beverage, check out this guide on the history of apple cider. Happy sipping!
Nutritional Facts for Homemade Apple Cider
Calories per Serving
Homemade apple cider is surprisingly light, with approximately 120 calories per 1-cup serving. It’s a great choice for those chilly days when you want something warming without a hefty calorie count.
Sugar Content
This delicious drink typically contains about 24 grams of sugar per serving. Most of this sugar comes naturally from the apples, making it a sweet treat without the need for excess added sugars.
Vitamins and Minerals
Homemade apple cider can provide a good source of vitamins C and A, along with essential minerals like potassium. These nutrients can help boost your immune system and provide essential hydration, making it not just tasty but also beneficial for your well-being.
For more detailed nutritional information on apples, check out this resource by the USDA.
FAQs about Homemade Apple Cider
How long does homemade apple cider last?
Once you whip up your homemade apple cider, it can stay fresh in the fridge for about a week if stored properly in an airtight container. If you want to extend its life, consider freezing it in portions. Just make sure to leave some space in the container, as the cider will expand when frozen. Frozen cider can last between 6 to 12 months!
Can I use different types of apples?
Absolutely! Mixing different apple varieties is one of the best ways to craft a unique flavor profile for your homemade apple cider. Feel free to experiment with sweet apples like Fuji or Gala alongside tart options like Granny Smith or Jonagold. Each combination brings a delightful twist, so get creative and use what you enjoy!
Is homemade apple cider safe for children?
Yes, homemade apple cider is generally safe for children! Just be aware that if you choose to add any spices or sugar, you might want to adjust those according to your kids' taste preferences. Always use fresh, quality ingredients to ensure a yummy and healthy treat for your little ones. For more tips on making kid-friendly cider, check out Healthy Living.
Conclusion on Homemade Apple Cider
Making your own homemade apple cider is a delightful journey full of warmth and creativity. With each batch, you capture the essence of fall, bringing family and friends together. So gather your favorite apples, explore new flavors, and enjoy the comforting embrace of freshly made cider in your favorite cozy spot.
Homemade Apple Cider: The Best Cozy Beverage for Fall Gatherings
Equipment
- large pot
- strainer
Ingredients
- 10 medium apples a mix of Honeycrisp and Granny Smith
- 1 orange peeled and quartered
- 4 sticks cinnamon for a warm spice kick
- 1 teaspoon whole cloves for earthy depth
- 1 teaspoon allspice berries optional, adds complexity
- 0.5 cup brown sugar adjust to taste
- 8 cups water enough to cover the apples
Instructions
- Combine all ingredients in a large pot.
- Bring to a boil, then reduce heat and simmer for 2 to 3 hours.
- After cooking, strain mixture through a strainer into a clean pot or pitcher.
- Serve warm and enjoy!

Leave a Reply