
Introduction to Green Velvet Cheesecake Cake
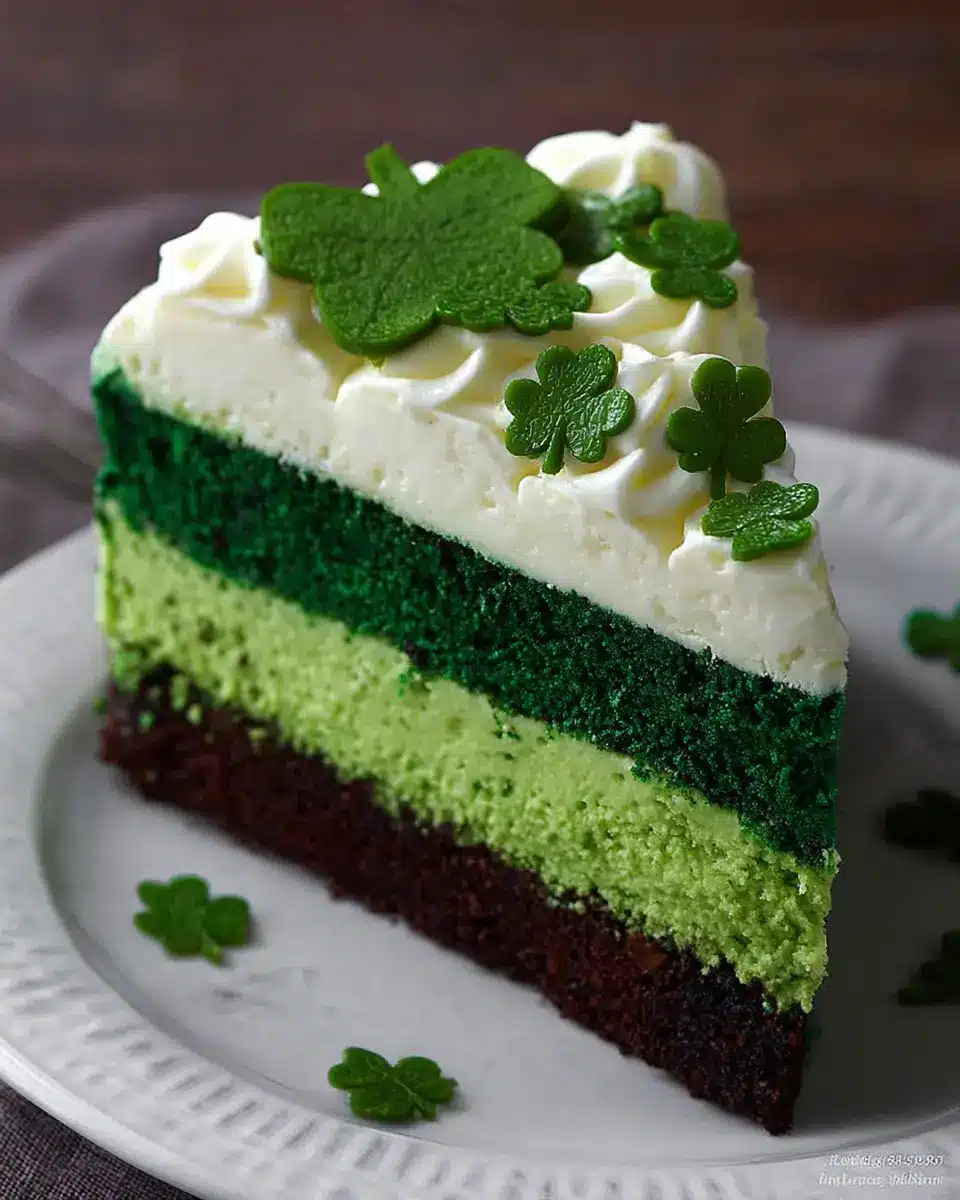
If you've ever indulged in a classic red velvet cake, imagine that buttery texture and rich flavor reimagined in a striking green hue! The green velvet cheesecake cake not only captivates the eye but also delights the palate with its unique combination of flavors and textures. A luscious cheesecake layer nestled between moist green velvet cake layers creates a show-stopping dessert that’s perfect for birthdays, holidays, or simply treating yourself!
Why is the green velvet cheesecake cake a must-try dessert? For starters, it's a feast for the senses — the vibrant green color brings an element of fun and surprise to any dessert table. This cake is not just about looks; the rich cream cheese filling perfectly balances the sweetness of the cake, providing a creamy, tangy contrast that leaves you wanting more. Plus, with a simple recipe that allows even novice bakers to create this masterpiece, it's an excellent choice for anyone looking to impress friends during a casual get-together or special occasion.
Beyond its delicious flavors, the green velvet cheesecake cake can easily become a conversation starter, elevating your hosting game. So, let’s dive into creating this delightful dessert and make some sweet memories along the way!
Ingredients for Green Velvet Cheesecake Cake
Creating the perfect green velvet cheesecake cake requires a mix of essential ingredients that each play a significant role in flavor and texture. Here’s what you'll need:
Essential ingredients for the cheesecake layer
For the luscious cheesecake layer, gather:
- Two 8-ounce packages of cream cheese, softened to room temperature
- ⅔ cup of granulated white sugar
- A pinch of salt
- 2 large eggs
- ⅓ cup each of sour cream and heavy whipping cream
- 1 teaspoon of vanilla extract
These ingredients combine to create a rich, creamy layer that complements the cake beautifully.
Key components for the green velvet cake
For the stunning green velvet cake, you'll need:
- 2½ cups of all-purpose flour
- ½ teaspoon of salt
- 1½ cups of canola or vegetable oil and sugar each
- 2 large eggs
- 1 teaspoon each of vanilla extract and white vinegar
- 1 teaspoon of baking soda
- 1 cup of buttermilk
- 1 tablespoon of green food coloring
These ingredients create the cake’s vibrant color while ensuring it’s moist and delicious.
Frosting essentials for a perfect finish
For the dreamy frosting, gather:
- Two 8-ounce packages of cream cheese
- ½ cup (1 stick) of salted butter, softened
- One 7-ounce jar of marshmallow creme
- 1 cup of powdered sugar
This combination results in a fluffy and flavorful frosting that perfectly complements your green velvet cheesecake cake.
Ready to dive into the baking world? With these ingredients in hand, your journey to creating a delicious treat begins!
Preparing the Green Velvet Cheesecake Cake
Making a Green Velvet Cheesecake Cake might sound like a monumental task, but by breaking it down into straightforward steps, you'll find it's as delightful to prepare as it is to eat. Let’s dive into the delicious details!
Step 1: Prepare the cheesecake layer
Begin by preheating your oven to 325°F. This step is essential for getting that perfect texture. While that heats up, grab a large roasting pan for the water bath — this is crucial in preventing your cheesecake from cracking. Spray a 9-inch springform pan with nonstick spray, and use parchment paper at the bottom for easy release later. In a mixing bowl, blend two packages of cream cheese until it’s smooth. Add in ⅔ cup of granulated sugar and a pinch of salt, continuing to blend for two minutes. Mix in two eggs, then follow with ⅓ cup each of sour cream and heavy whipping cream, and finally, one teaspoon of vanilla extract. Pour the batter into your prepared pan, then place it inside the roasting pan. Pour in hot water until it reaches about an inch up the sides of the cheesecake pan for that water bath magic.
Step 2: Bake the cheesecake layer
Bake this cheesy goodness for about 45 minutes. You want it to be set and no longer jiggly when you gently tap the sides. After baking, let it cool on a wire rack for an hour, then pop it into the freezer — this freeze is essential for assembly later on!
Step 3: Prepare the green velvet cake layers
While your cheesecake is chilling, preheat your oven to 350°F. For the cake layers, line two 9-inch round pans with parchment paper and give them a spritz of nonstick spray. In one bowl, sift together 2½ cups of all-purpose flour and ½ teaspoon of salt. In another, beat together 1½ cups of canola oil and 1½ cups of sugar for about two minutes, add your eggs and a teaspoon of vanilla extract, and continue to mix.
Step 4: Bake the green velvet cake layers
Now add a teaspoon of white vinegar, 1 teaspoon of baking soda, 1 cup of buttermilk, and a tablespoon of green food coloring. Beat it all to combine, then fold in your dry ingredients. Divide the batter evenly between the pans and bake for 30 to 35 minutes. Check with a toothpick, and let them cool completely after baking.
Step 5: Prepare the frosting
It’s time to whip up some delicious frosting! In a mixing bowl, combine two packages of cream cheese with ½ cup of softened butter. Add in a jar of marshmallow crème and 1 cup of powdered sugar, beating until smooth and creamy.
Step 6: Assemble the cake
Once your cheesecake and cakes are cool, start by placing one cake layer on a serving plate. Gently remove the cheesecake from the springform pan — if it’s larger, trim it to fit perfectly atop the first cake layer. Place the remaining velvet cake on top.
Step 7: Frost the cake
To finish your masterpiece, apply a crumb coat — a thin layer of frosting to seal in all those wonderful crumbs. Chill the cake for at least 30 minutes before applying the final layer of frosting. Make it pretty by adding swirls or decorative touches. This Green Velvet Cheesecake Cake isn’t just a dessert; it’s a celebration on a plate, perfect for sharing or indulging in solo!
If you run into any questions during your baking journey, feel free to pause and reach out! Enjoy the process and savor every bite.
Variations on Green Velvet Cheesecake Cake
Gluten-Free Green Velvet Cheesecake Cake
For those navigating gluten sensitivities, you can create a delightful gluten-free green velvet cheesecake cake by swapping out regular flour for a high-quality gluten-free flour blend. Make sure to check that all other ingredients, including your baking soda and baking powder, are also gluten-free. If you need more guidance on gluten-free baking, resources like Gluten-Free Living can provide helpful tips and recipes.
Vegan Green Velvet Cheesecake Options
If you're looking to whip up a vegan green velvet cheesecake cake, you're in luck! Substitute the cream cheese with a vegan cream cheese alternative and replace the eggs with flaxseed meal (1 tablespoon flaxseed with 2.5 tablespoon water per egg). For the sour cream, opt for coconut yogurt for that creamy texture. Using vegan butter in place of regular butter will also keep it entirely plant-based. Explore more vegan baking techniques at Minimalist Baker, which is a fantastic resource for all things vegan and delicious!
These variations make it easier than ever to enjoy this festive dessert, no matter your dietary preferences!
Baking Notes for Green Velvet Cheesecake Cake
Tips for Avoiding Cheesecake Cracking
To ensure a smooth, crack-free green velvet cheesecake cake, consider using a water bath. This technique provides moisture and gentle heat, which helps achieve a creamy texture. Don’t rush the cooling process—let the cheesecake rest in the oven for a bit before transferring it to a cooling rack. Also, avoid overmixing after adding the eggs; this keeps air bubbles to a minimum, reducing the chances of cracks. For further guidance, check out this helpful post on water bath baking from Baker's Journal.
Tricks for Leveling Cake Layers Perfectly
Leveling your cake layers might sound daunting, but it’s easier than you think! Use a serrated knife to trim the tops of each layer, creating a flat surface. Alternatively, invest in a cake leveling tool for precision. Always chill your cakes for about 20 minutes before leveling; this helps firm them up and makes cutting smoother. If you're working with an uneven rise, remember: even the pros deal with this, and it’s all part of the fun!
Serving suggestions for Green Velvet Cheesecake Cake
Perfect Moments for This Delight
The green velvet cheesecake cake is a showstopper that’s perfect for celebrations, from birthdays and anniversaries to St. Patrick’s Day and holiday gatherings. Its stunning color and decadent layers make it a delightful centerpiece, sparking joy and conversation. Whether you’re hosting a cozy dinner party or a lively holiday bash, this cake is sure to impress your guests.
Enjoy with Ideal Beverages
Pair this luscious dessert with a variety of beverages for a delightful experience:
- Coffee or Tea: A hot cup of coffee or a soothing herbal tea enhances the cake's rich flavors beautifully.
- Milk or Non-Dairy Alternatives: The creaminess of milk, whether regular or oat-based, complements the cheesecake’s texture.
- Sparkling Water: A refreshing sparkling water with a twist of lime offers a cleanse between bites, enhancing the indulgence.
Explore more beverage pairing ideas here. This cake is not only delicious but also versatile, making it a perfect fit for countless occasions!
Tips for Making the Perfect Green Velvet Cheesecake Cake
Key Ingredients for Flavor Enhancement
To elevate your green velvet cheesecake cake, focus on using high-quality ingredients. Fresh eggs and good cream cheese make a noticeable difference in texture and taste. Opt for real vanilla extract instead of imitation to enrich your flavors. Don’t skip the buttermilk; its acidity provides moisture and tenderness to the cake while balancing the sweetness.
Techniques for Maintaining Moisture in the Cake
Keeping your cake moist is essential for a delightful bite. Ensure you:
- Do not overmix your batter; just mix until combined.
- Use oil rather than butter in the cake recipe to retain moisture.
- Avoid overbaking; check for doneness with a toothpick—aim for a few moist crumbs, not dry ones.
Following these tips will help you achieve that luxuriously rich and moist cheesecake cake everyone will love!
Time details for Green Velvet Cheesecake Cake
Preparation time
Get ready for a fun baking adventure! The preparation time for your green velvet cheesecake cake is about 30 minutes. This includes gathering all your ingredients, prepping the pans, and mixing the cheesecake batter for that creamy layer.
Baking time
Once you're all set, it’s time to bake. The cheesecake takes around 45 minutes at 325°F, while the cake layers need about 30 to 35 minutes. Keep an eye on them to ensure they come out perfectly moist.
Total time
In total, you’ll devote approximately 5 to 6 hours to this delightful dessert. Don’t forget: a portion of that time is cooling and freezing, so make sure to plan ahead! For an amazing presentation, let it chill overnight in the fridge before serving.
Nutritional Information for Green Velvet Cheesecake Cake
Understanding the nutritional content of your favorite treats is essential, especially when indulging in something as delicious as a green velvet cheesecake cake. Here's a quick overview of what each serving has to offer:
- Calories: 646 kcal
- Protein: 9 g
- Sodium: 418 mg
This scrumptious cake combines the rich flavors of velvet and cheesecake, making it a delightful dessert option while still keeping your dietary preferences in mind. If you want to learn more about how to make this cake a little lighter, consider experimenting with healthier ingredient alternatives!
FAQs about Green Velvet Cheesecake Cake
How to store leftover cheesecake cake?
To keep your green velvet cheesecake cake fresh, store any leftovers in the refrigerator. Cover it tightly with plastic wrap or place it in an airtight container. This will help maintain its creamy texture and delicious flavor. If you have leftovers beyond a few days, consider freezing individual slices. Just wrap each slice in plastic and then in aluminum foil before placing them in a freezer bag.
Can I make this cake ahead of time?
Absolutely! The green velvet cheesecake cake is perfect for making in advance. You can prepare both the cheesecake and cake layers a day or two ahead and assemble them when you're ready to serve. Just don’t forget to chill the assembled cake to ensure it stays firm and fresh!
What can I substitute for cream cheese?
If you're looking for alternatives to cream cheese, consider using Greek yogurt or vegan cream cheese as a replacement. Both options will give you a creamy texture with a slightly different flavor profile. For a lighter option, ricotta cheese can also work well—just blend it until smooth for the best results.
Conclusion on Green Velvet Cheesecake Cake
The green velvet cheesecake cake is a delightful fusion of textures and flavors, making it an impressive centerpiece for any occasion. With its vibrant color and rich taste, it’s sure to capture hearts and taste buds alike. Don’t hesitate to try this recipe and share the joy it brings!
Green Velvet Cheesecake Cake
Equipment
- 9-inch springform pan
- 9-inch round cake pans
- roasting pan
- electric mixer
- Kettle
- parchment paper
Ingredients
CHEESECAKE
- 16 oz cream cheese at room temperature
- ⅔ cup granulated white sugar
- 1 pinch salt
- 2 large eggs
- ⅓ cup sour cream
- ⅓ cup heavy whipping cream
- 1 teaspoon vanilla extract
GREEN VELVET CAKE
- 2½ cups all purpose flour
- ½ teaspoon salt
- 1½ cups canola or vegetable oil
- 1½ cups granulated white sugar
- 2 large eggs
- 1 teaspoon vanilla extract
- 1 teaspoon white vinegar
- 1 teaspoon baking soda
- 1 cup buttermilk
- 1 tablespoon green food coloring alternately, you can use gel paste
FROSTING
- 16 oz cream cheese at room temperature
- ½ cup salted butter at room temperature
- 7 oz marshmallow creme
- 1 cup powdered sugar
Instructions
PREPARE THE CHEESECAKE LAYER
- Preheat the oven to 325℉. Place a large roasting pan on the lower third rack of the oven. Place a kettle of water on the stove to boil.
- Spray a 9-inch springform pan with nonstick spray and line the bottom with a round of parchment paper. Wrap a double layer of heavy duty foil around the bottom and up the sides of the pan.
- In a large bowl, blend the cream cheese until smooth, then mix in the sugar and salt.
- Add the eggs one at a time, blending after each addition. Mix in the sour cream, whipping cream, and vanilla until smooth.
- Pour the batter into the prepared pan and place in the roasting pan. Pour hot water into the roasting pan.
- Bake for 45 minutes. Cool on a wire rack for at least an hour then freeze completely for 4 to 5 hours or overnight.
PREPARE THE CAKE LAYERS
- Preheat the oven to 350℉. Spray two 9-inch round pans with nonstick spray and line with parchment paper.
- In a medium bowl, sift together the flour and salt. In a large bowl, beat the oil and sugar together.
- Add the eggs one at a time and the vanilla, and beat for an additional 2 minutes.
- Combine vinegar and baking soda in a small bowl; add to the oil mixture with buttermilk and food coloring. Beat on medium-low speed.
- Add dry ingredients, beat on medium-high, scraping down the sides. Divide batter between prepared pans.
- Bake for 30 to 35 minutes or until a toothpick comes out with a few moist crumbs. Cool for 20 minutes.
PREPARE THE FROSTING
- Combine cream cheese and butter in a large bowl and beat until smooth. Add marshmallow creme and mix until smooth.
- Add powdered sugar and beat until smooth and spreadable.
ASSEMBLE THE CAKE
- Place one cake layer onto a cake plate. Remove the cheesecake from the freezer and trim to size.
- Place the cheesecake layer on top of the first cake layer, then top with the second cake layer.
FROST THE CAKE
- Apply a crumb coat layer and refrigerate for 30 minutes until set. Apply the second layer of frosting.
- Spread frosting evenly across the top and down the sides of the cake.
Leave a Reply