
Introduction to Classic Peanut Butter Blossoms
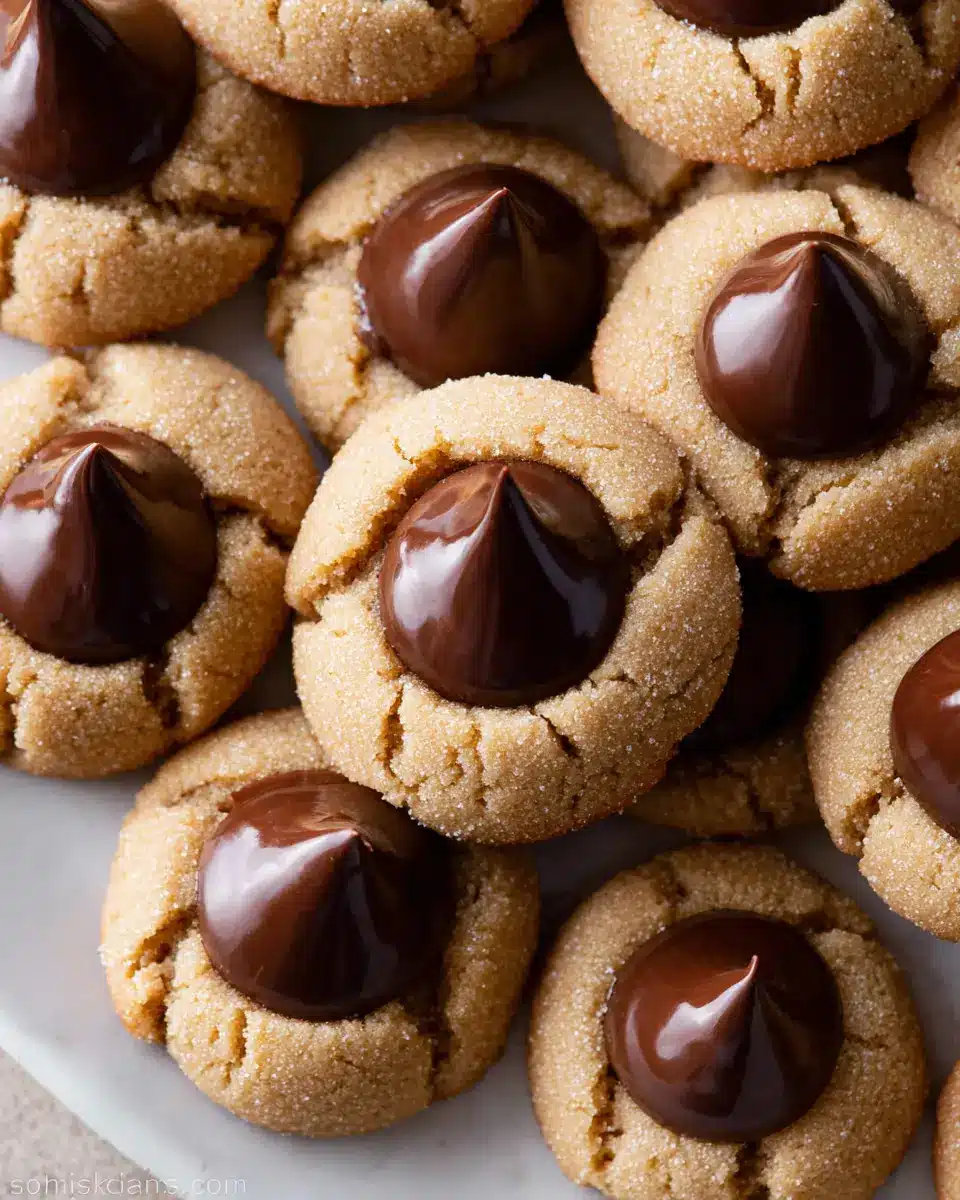
Peanut butter blossoms are a nostalgic cookie that brings warmth to any gathering. The delightful combination of soft, chewy peanut butter dough paired with a chocolate kiss creates a perfect harmony of flavors that keeps people reaching for just one more. But what makes these classic peanut butter blossoms a timeless treat?
What Makes Peanut Butter Blossoms a Timeless Treat?
At the heart of their charm lies the simple yet satisfying combination of peanut butter and chocolate. Famed for their inviting aroma and mouthwatering taste, these cookies are easy to whip up for any occasion—be it a casual dessert, a holiday gathering, or a cozy night in. The balance of sweet and salty appeals to all palates, making them a favorite among young professionals and families alike.
The recipe is straightforward, with ingredients that many already have in their pantries. You can explore more on how to master cookie-baking skills through detailed guides like this one from Sally's Baking Addiction. Additionally, decorating with colorful sanding sugar, especially during festive seasons, offers a great chance to get creative. So whether you're baking for yourself or sharing with friends, making classic peanut butter blossoms is a delightful way to celebrate any occasion!
Essential Ingredients for Classic Peanut Butter Blossoms
To create those mouthwatering classic peanut butter blossoms, you’ll need a few staple ingredients that work harmoniously together. Here’s what you should gather:
- All-Purpose Flour: 1 and ¼ cups will provide the perfect base for your cookies.
- Baking Soda: This helps achieve that lovely, chewy texture.
- Salt: Just a touch (¼ teaspoon) to enhance the flavors.
- Unsalted Butter: ½ cup, softened, for a rich buttery taste.
- Brown Sugar and Granulated Sugar: A mix of ½ cup brown sugar and ¼ cup granulated sugar keeps these cookies sweet yet balanced.
- Egg: One large egg, ideally at room temperature, binds everything.
- Creamy Peanut Butter: ¾ cup of this nutty goodness is what makes the flavor pop.
- Vanilla Extract: 1 teaspoon adds a warm, inviting aroma.
- Chocolate Kiss Candies: 24 unwrapped kisses for that signature ‘blossom’ finish.
Optional Ingredients for Personal Touches
While the essentials will get you there, why not add some personality to your classic peanut butter blossoms? Here are a few optional ingredients to consider:
- Sanding Sugar: For a festive look, mix ¼ cup of green sanding sugar and ¼ cup of red sanding sugar for coating.
- Peanut Butter Variants: Try crunchy peanut butter for added texture.
- Chocolate Variations: You can substitute the chocolate kisses with peanut butter cups or even drizzle melted chocolate on top for extra indulgence!
Feel free to experiment a bit! Each ingredient adds a unique twist that will surely impress friends and family. If you're looking for tips on how to select the best peanut butter, check out this excellent resource on choosing peanut butter. Enjoy the process, and happy baking!
Preparing Classic Peanut Butter Blossoms
Baking is a delightful experience, especially when it involves classic peanut butter blossoms. These delectable cookies combine a soft peanut butter base with a gooey chocolate kiss, making them irresistible. Let’s walk through each step together to ensure your baking endeavor is both enjoyable and successful!
Gather All Your Ingredients
Start by gathering your ingredients. You’ll need:
- 1 and ¼ cups all-purpose flour
- ½ teaspoon baking soda
- ¼ teaspoon salt
- ½ cup unsalted butter, softened to room temperature
- ½ cup packed light or dark brown sugar
- ¼ cup granulated sugar
- 1 large egg at room temperature
- ¾ cup creamy peanut butter
- 1 teaspoon pure vanilla extract
- 24 unwrapped chocolate kiss candies
For a fun touch, consider colorful sanding sugar for coating!
Mix Dry Ingredients
In a medium bowl, whisk together the flour, baking soda, and salt. This pairing ensures your cookies rise perfectly and have a great texture. Set this mixture aside; it’s the dry foundation for your classic peanut butter blossoms.
Cream Butter and Sugars
In a larger bowl, using either a hand mixer or a stand mixer, beat the softened butter on high speed for about a minute until it’s creamy. Then, lower the speed to medium-high and add the brown sugar and granulated sugar. Beat until the mixture is smooth—this should take around two minutes. If you're unsure about the creaming process, this guide offers excellent insights.
Incorporate Egg and Peanut Butter
Next, add the egg and mix it in until combined. Don’t forget to scrape down the sides of the bowl as needed. Now, it’s time to fold in the peanut butter and vanilla extract. Beat until thoroughly combined, creating a luscious batter that smells heavenly.
Combine Wet and Dry Ingredients
Now it’s time to bring it all together! Slowly add the dry mixture to your wet ingredients, mixing on low speed to avoid a cloud of flour. The dough will be soft and creamy—this is what makes the cookies so delicious!
Chill the Dough
For the best flavor and texture, cover the dough and chill it in the refrigerator for at least an hour. This step helps firm up the dough, making it easier to shape later.
Preheat the Oven and Prepare Baking Sheets
While the dough chills, preheat your oven to 350°F (177°C). Line two baking sheets with parchment paper or silicone mats for hassle-free baking.
Shape the Cookies and Bake
Once the dough is sufficiently chilled, scoop out about one heaping tablespoon of dough. Roll each ball in sugar (or your preferred sanding sugar). Place the dough balls three inches apart on the prepared baking sheets and bake for 11–13 minutes until the tops start to crack.
Press in Chocolate Kisses
Immediately after taking the cookies out, press a chocolate kiss into the center of each cookie. Be gentle when transferring cookies to a plate—since they are soft, a thin spatula works wonders here.
Cool and Enjoy!
Finally, allow the cookies to cool for about five minutes on the baking sheets before moving them to a cooling rack or serving plate. Enjoy your homemade classic peanut butter blossoms within the week; they’re sure to be devoured quickly!
There you have it—a step-by-step guide to preparing classic peanut butter blossoms. Happy baking!
Variations on Classic Peanut Butter Blossoms
Elevate your classic peanut butter blossoms with these delicious twists that cater to diverse tastes!
Almond Butter Blossoms
Try using almond butter instead of peanut butter for a delightful nutty flavor. The nutty richness enhances the cookies and pairs beautifully with a milk chocolate or dark chocolate kiss. Almond butter not only ensures a scrumptious taste but also adds a unique texture, making these blossoms an exciting alternative for those who prefer almond to peanut.
Dark Chocolate Kiss Twists
For a gourmet upgrade, swap the traditional milk chocolate kisses for dark chocolate. This variation lends a rich depth to the sweetness while balancing the indulgence. Consider adding a sprinkle of sea salt on top after pressing in the chocolate kisses. The salty-sweet contrast will leave your taste buds dancing!
These fun variations on classic peanut butter blossoms provide a delicious twist that everyone will adore. Which one will you try first?
Baking notes for Classic Peanut Butter Blossoms
Tips for achieving the perfect texture
For that ideal chewy yet slightly crispy texture in your classic peanut butter blossoms, follow a couple of crucial tips. Ensure your butter is softened to room temperature, allowing for better incorporation with sugars. Chilling your dough for at least an hour helps to prevent spreading during baking, which keeps the cookies thick. Finally, avoid overbaking; remove them when the tops begin to crack for soft centers!
Storage insights for freshness
Keeping your classic peanut butter blossoms fresh is easy! Store them in an airtight container at room temperature for up to one week. If you’d like, you can also freeze them—just place layers of cookies separated by parchment paper in a freezer-safe bag to enjoy later. For best results, consume within three months for optimal flavor!
Serving Suggestions for Classic Peanut Butter Blossoms
Pair with Milk or Homemade Hot Chocolate
Nothing quite complements classic peanut butter blossoms like a tall glass of cold milk or a warm cup of homemade hot chocolate. The richness of peanut butter combined with the sweetness of chocolate creates an irresistible flavor explosion. If you're feeling adventurous, consider experimenting with flavored milks, such as almond or oat, which add a unique twist to the pairing. Want an even cozy vibe? Serve these cookies alongside your favorite hot chocolate recipe.
Creative Packaging for Gifting
If you’re planning to share these delightful cookies, think outside the box with your packaging! Festive tins, clear cellophane bags tied with colorful ribbons, or even recycled jars adorned with twine can make your classic peanut butter blossoms both delicious and visually stunning gifts. Personalize each package with a handwritten note or a fun recipe card to make it extra special. After all, who wouldn’t love receiving a homemade treat packed with love?
These thoughtful serving and gifting suggestions are sure to enhance your cookie experience. Happy baking!
Tips for Making Perfect Classic Peanut Butter Blossoms
Avoiding Overbaking
To ensure your classic peanut butter blossoms come out perfectly chewy, watch your baking time closely. Remove the cookies from the oven when the tops are just beginning to crack, around 11–13 minutes. They'll continue to set as they cool on the baking sheet. Remember, a slightly underbaked cookie is a delicious cookie!
Managing Peanut Butter Consistency
Make sure to use a creamy peanut butter for the best texture. Natural peanut butter may yield drier cookies, so always go for a well-blended variety. This helps keep your dough soft, making those signature cookie balls a breeze to roll. If your peanut butter seems too thick, a quick stir can help reach the right consistency.
For more tips on baking cookies, check out Sally's Baking Addiction for a wealth of resources!
Time Details for Classic Peanut Butter Blossoms
Preparation Time
Getting the dough ready for your classic peanut butter blossoms takes about 20 minutes of hands-on time. This includes mixing all your ingredients until they’re perfectly blended and creamy.
Chilling Time
Once your dough is ready, let it chill in the refrigerator for at least 1 hour. This step is crucial for achieving that perfect texture and flavor! You can chill it for up to 3 days if you want to prepare ahead.
Baking Time
When you're ready to bake, preheat your oven to 350°F (177°C) and pop those cookies in for 11–13 minutes. Keep an eye on them; you're looking for a slight crackle on top.
Total Time
Overall, from preparation to cooling, expect a total time of about 1 hour and 35 minutes. Most of this time is hands-off while the dough chills, allowing you to take a breather or tackle other tasks!
Whether you're baking for a gathering or just treating yourself, these classic peanut butter blossoms will surely be a hit! If you need any tips on measuring ingredients, check out this guide. Happy baking!
Nutritional Information for Classic Peanut Butter Blossoms
When indulging in classic peanut butter blossoms, it’s great to know the nutritional breakdown of these delightful cookies. Here’s what you can expect per cookie:
Calories
Each cookie contains approximately 120 calories, making it a sweet treat that fits nicely into various diets when enjoyed in moderation.
Protein
You’ll find about 3 grams of protein in each cookie, thanks to the creamy peanut butter, which also adds a touch of nourishment to this sweet delight.
Sugars
These cookies have around 8 grams of sugar each, giving you that satisfying sweetness without overwhelming your taste buds.
For more insights on maintaining a balanced diet while enjoying your favorite treats, consider reading about sugar alternatives or healthy snacking options. Enjoy your baking adventure!
FAQs about Classic Peanut Butter Blossoms
Can I use natural peanut butter?
Absolutely! You can use natural peanut butter for your classic peanut butter blossoms. Just keep in mind that natural peanut butter tends to be runnier, which may alter the texture of your cookie dough. If you're up for a slight adjustment, you might want to reduce the quantity of added fat or flour to compensate for the creaminess.
How do I store leftover cookies?
Storing your classic peanut butter blossoms is a breeze! Simply place them in an airtight container at room temperature. They'll stay fresh for up to a week. If you need to keep them longer, consider freezing them; just make sure to layer them between parchment paper to prevent sticking.
What can I use instead of chocolate kisses?
If you’re looking for alternatives to chocolate kisses, there are plenty of options! Peanut butter cups, caramel candies, or even chocolate chips can work beautifully. For a fun twist, try Rolo candies or white chocolate for a unique take on the classic. Your imagination is the limit!
Conclusion on Classic Peanut Butter Blossoms
Classic peanut butter blossoms are more than just cookies; they're a delightful treat that brings joy to any gathering. With their soft texture and the satisfying burst of chocolate, these cookies are sure to become a staple in your baking rotation. Enjoy crafting and sharing these sweet morsels!
For more inspiration, check out Taste of Home for creative cookie variations and baking tips!
Classic Peanut Butter Blossoms
Equipment
- mixing bowls
- hand mixer
- measuring cups
- measuring spoons
- baking sheets
- parchment paper
- Silicone Spatula
Ingredients
Cookie Ingredients
- 1.25 cups all-purpose flour spooned & leveled
- 0.5 teaspoon baking soda
- 0.25 teaspoon salt
- 0.5 cups unsalted butter softened to room temperature
- 0.5 cups brown sugar packed light or dark
- 0.25 cups granulated sugar
- 1 large egg at room temperature
- 0.75 cups creamy peanut butter
- 1 teaspoon pure vanilla extract
- 24 pieces chocolate kiss candies unwrapped
Coating Ingredients
- 0.5 cups granulated sugar
- 0.25 cups green sanding sugar optional
- 0.25 cups red sanding sugar optional
Instructions
Cookie Preparation
- Whisk the flour, baking soda, and salt together in a medium bowl. Set aside.
- In a large bowl using a hand mixer or a stand mixer fitted with paddle attachment, beat the butter for 1 minute on high speed until creamy. Switch to medium-high speed and beat in the brown sugar and ¼ cup granulated sugar until completely creamed and smooth, about 2 minutes.
- Add the egg and beat until combined, about 1 minute. Scrape down the sides and bottom of the bowl with a silicone spatula as needed. Add the peanut butter and vanilla extract and beat until combined.
- Add the flour mixture to the wet ingredients and beat on low speed until combined. Cover and chill the cookie dough in the refrigerator for at least 1 hour, and up to 3 days.
- Preheat oven to 350°F (177°C). Line two large baking sheets with parchment paper or silicone baking mats. Set aside. Also, make sure there’s room in your freezer because the cookies will need to be placed inside to prevent the chocolates from melting.
- Scoop and roll cookie dough, about 1 heaping Tablespoon of dough each. Roll each ball in the ½ cup of sugar (or sanding sugar) and arrange on the baking sheet about 3 inches apart. Bake for 11–13 minutes or until the tops begin to slightly crack. Remove cookies from the oven and allow to cool on the baking sheets for 5 minutes.
- Press a chocolate kiss candy into the center of each, then, using a thin spatula, immediately transfer the cookies to a large plate or a few smaller plates. Place the plate(s) of cookies in the freezer for 10 minutes to quickly set the chocolate in the cookie.
- Remove from the freezer and serve.
- Cookies stay fresh covered at room temperature for up to 1 week.
Leave a Reply