
Introduction to Chicken Caesar Wraps
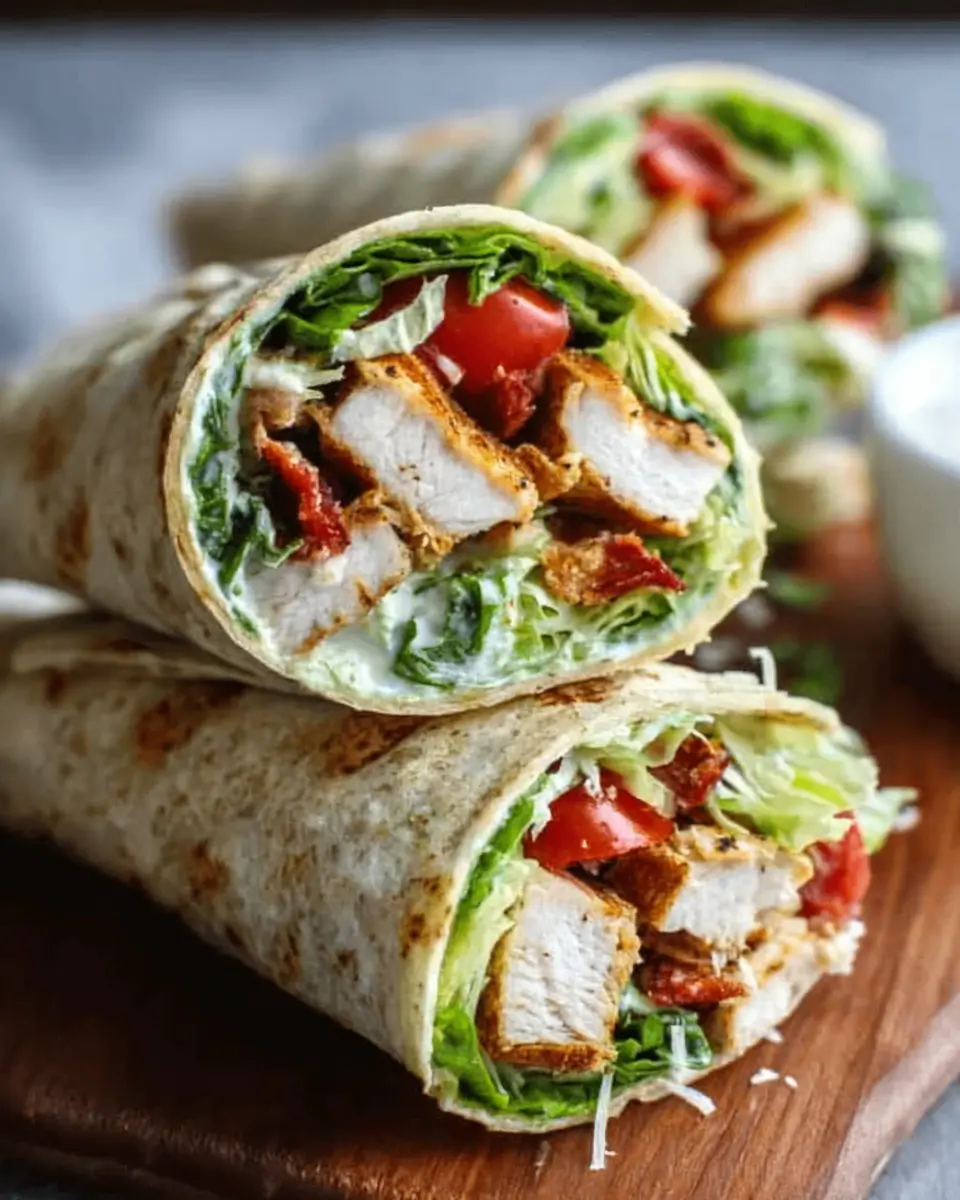
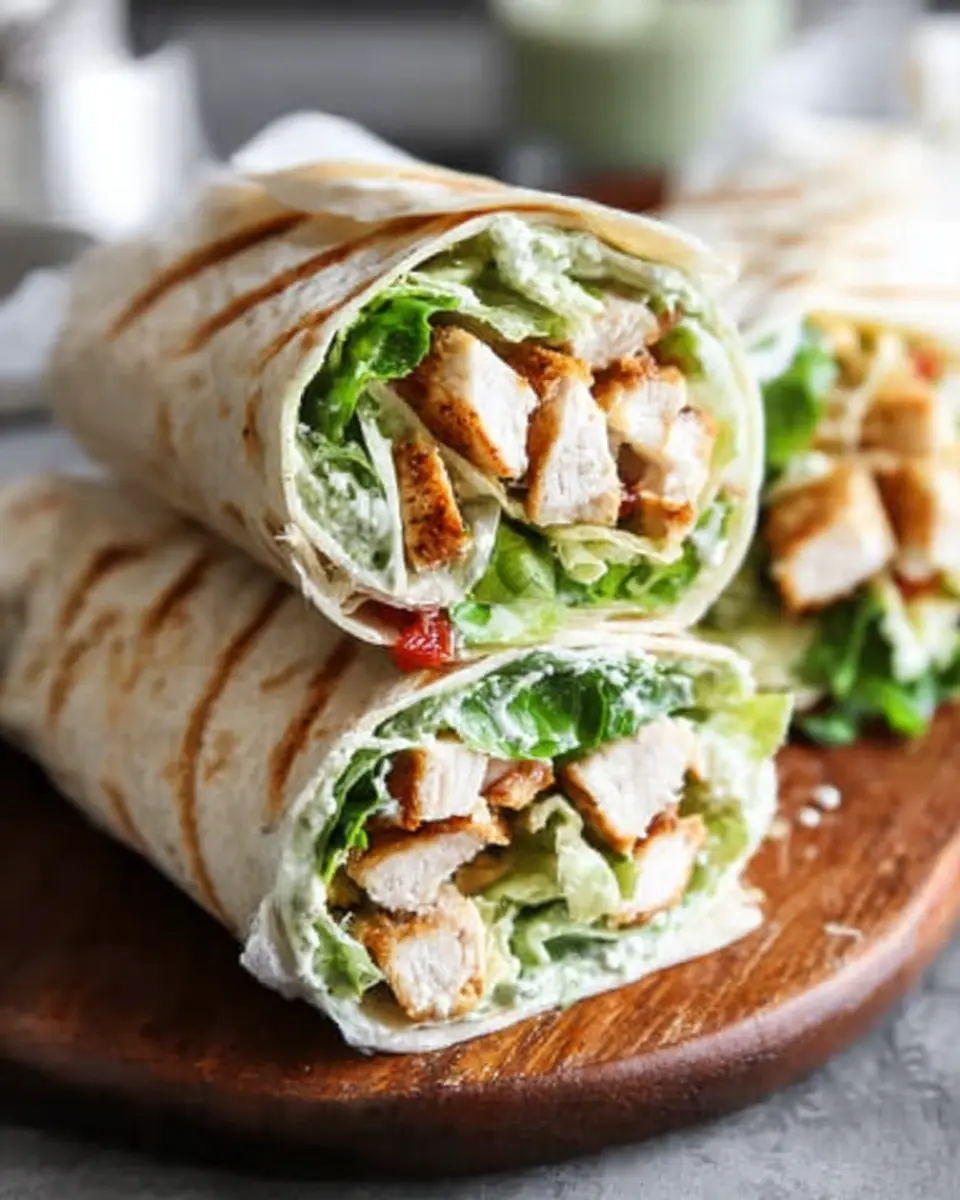
When it comes to a satisfying and nutritious meal, Chicken Caesar Wraps are incredibly versatile and delightful. Perfect for a quick lunch or a leisurely dinner, these wraps blend the classic flavors of Caesar salad into a handheld treat. Imagine crispy romaine lettuce, tender chicken, and a rich Caesar dressing all wrapped in a soft tortilla—delicious, right?
Why are Chicken Caesar Wraps the ideal choice for a homemade meal? For starters, they’re super easy to make, requiring just a handful of ingredients. You can customize each wrap according to your taste. Prefer a bit of crunch? Add croutons! Want more tang? Sprinkle in extra parmesan cheese. Plus, you can whip them up in next to no time, making them perfect for busy weeknights.
Not to mention, they’re a hit among both adults and kids, making family dinners enjoyable for everyone. With a balance of protein, greens, and carbs, these wraps can easily fit into a healthy eating plan. For a delicious twist, try using crispy fried chicken tenders for extra crunch. So, if you’re ready to impress your taste buds, let’s dive into this Chicken Caesar Wraps recipe and bring a taste of gourmet dining right to your kitchen!

Ingredients for Chicken Caesar Wraps
Essential components for delicious wraps
Creating scrumptious Chicken Caesar Wraps starts with quality ingredients. For the main filling, you'll need:
- 2 cups of cooked chicken (or crispy fried chicken tenders for a crunch).
- 3 cups of chopped romaine lettuce for that satisfying crunch.
- ⅔ cup of halved cherry tomatoes which add a touch of sweetness.
- A sprinkle of ¼ cup freshly grated parmesan cheese for that cheesy goodness.
- ½ cup of croutons to bring texture and flavor.
- ½ cup of Caesar salad dressing for that iconic creamy taste.
- Finally, don’t forget a touch of freshly ground black pepper for the perfect seasoning.
- You’ll wrap it all up in 5 large flour tortillas, making each bite easy to handle.
Optional add-ins to elevate your wraps
Want to take your Chicken Caesar Wraps to the next level? Consider adding:
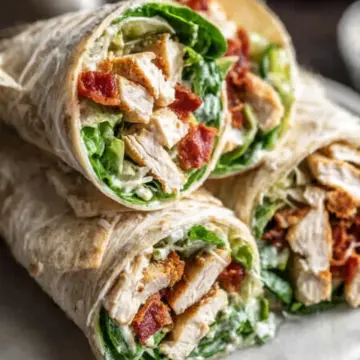
- Turkey bacon for some extra smokiness.
- Chicken ham for additional flavor.
- Avocado slices for creaminess and healthy fats.
- A handful of sliced olives for a briny twist.
- Sliced bell peppers for a bit of zing and crunch.
Mix and match these ingredients based on your taste preferences, and don't hesitate to experiment! It's all about finding what works for you in creating the ultimate wrap experience.
Step-by-step Preparation of Chicken Caesar Wraps
Step 1: Gather your ingredients
First things first! To whip up these delicious Chicken Caesar Wraps, you’ll need to collect all the ingredients. Here’s what you’ll need:
- 2 cups of chopped cooked chicken (280g) or crispy fried chicken tenders
- 3 cups of chopped romaine lettuce (135g)
- ⅔ cup of halved cherry tomatoes (100g)
- ¼ cup of freshly grated parmesan cheese (22g)
- ½ cup of croutons (30g)
- ½ cup of Caesar salad dressing (120mL)
- Freshly ground black pepper, to taste
- 5 large flour tortillas
Having these items on hand will set you up nicely for a successful wrap-making adventure!
Step 2: Prepare the chicken either cooked or fried
If you’re using cooked chicken, ensure that it's chopped into bite-sized pieces. When using crispy fried chicken tenders, slice them into thin strips. The mix of textures adds a delightful crunch that balances perfectly with the fresh ingredients. Don't forget to season your chicken with a touch of pepper to elevate the taste!
Step 3: Chop the veggies and cheese
Next up, it's time to chop! Take your romaine lettuce and cherry tomatoes, and give them a good chop. Aim for a uniform size so every bite is consistent. Add the freshly grated parmesan cheese to the pile—it not only enhances the flavor but also creates that signature Caesar touch. If you love a little crunch, crush your croutons slightly, ensuring they distribute evenly throughout the wraps.
Step 4: Mix it all together in a bowl
Toss all the prepared ingredients, excluding the tortillas, into a large mixing bowl. Add the Caesar salad dressing and sprinkle in your freshly ground black pepper to taste. Give everything a good mix using a spatula or your hands, ensuring each component is well-coated in that creamy dressing. This step is key; you want every bite to burst with flavor!
Step 5: Wrapping it up: How to roll your tortillas
Lay out a tortilla on a flat surface and scoop a generous spoonful of your chicken and veggie mixture along one edge of the tortilla. Now, the fun part—tightly roll the tortilla around the filling, tucking in the sides as you go. It should resemble a burrito in shape. If you find your wraps unrolling, secure them with a toothpick for serving!
Step 6: Serving up your wraps
Finally, it’s showtime! Slice your wraps diagonally for an appealing presentation. These Chicken Caesar Wraps are fantastic served as a quick lunch, a picnic snack, or at a gathering with friends. Pairing them with extra Caesar dressing or a light side salad can take your meal to the next level. Enjoy your creation, and don’t forget to share it with your friends—after all, good food is best enjoyed together!
Variations on Chicken Caesar Wraps
If you're looking to mix it up, there are plenty of fun and delicious variations on the classic Chicken Caesar Wraps that can cater to different tastes and dietary needs. Here are a few ideas:
Spicy Chicken Caesar Wraps
For those who like a little heat, adding some sliced jalapeños or a drizzle of your favorite hot sauce to the wrap can deliver a delightful kick. You could also swap the regular Caesar dressing for a spicy version to amplify the flavor.
Vegetarian Caesar Wraps
Even meat lovers can appreciate these! Replace the chicken with grilled or roasted veggies like zucchini, bell peppers, and mushrooms. Toss in chickpeas for protein and keep your favorite Caesar dressing for that signature flavor, transforming your wrap into a hearty, veggie-packed delight.
Gluten-Free Caesar Wraps
No gluten? No problem! Opt for gluten-free tortillas made from rice or corn. You can find these at your local grocery store. This way, everyone can enjoy the deliciousness of Chicken Caesar Wraps, regardless of dietary restrictions.
Experiment and enjoy your wraps in any of these variations!
Cooking Tips and Notes for Chicken Caesar Wraps
Storing leftovers
If you've got extra Chicken Caesar Wraps, store them in an airtight container in the fridge for up to three days. For the best experience, keep the dressing on the side until you're ready to chow down—it helps prevent sogginess.
Perfecting the wrap technique
To master the wrap, lay the tortilla flat, scoop in a generous portion of the filling near the edge, and roll tightly. Tuck in the sides as you go for that burrito-style seal. If all else fails, toothpicks are your best friend!
Customization ideas
Feel free to get creative! Swap in grilled shrimp or turkey bacon for added flavor, or use different greens like spinach or kale. You can even add avocado or swap out the dressing for a tangy balsamic vinaigrette for a delightful twist. The possibilities are as endless as your taste buds!
Serving Suggestions for Chicken Caesar Wraps
Pairing with sides for a filling meal
To elevate your Chicken Caesar Wraps into a wholesome meal, consider serving them with a side of crispy sweet potato fries or a refreshing cucumber salad. These complements not only add a delightful crunch but also introduce a range of flavors that pair beautifully with the rich Caesar dressing. For those looking to kick it up a notch, a side of garlic breadsticks can be the perfect indulgence—who doesn’t love a warm bread to dip?
Making it a meal prep staple
Creating a meal prep version of your Chicken Caesar Wraps is a game-changer! Prepare your chicken and veggies in advance, and store them separately in your fridge. When you're ready to eat, simply assemble your wrap with all the fresh ingredients. This approach not only saves time during busy weeknights but also promotes healthier eating habits. You can even switch up the ingredients, adding avocado or switching up the dressing for variety! For detailed storage tips, check out this meal prep article.
Time Breakdown for Chicken Caesar Wraps
Preparation time: 15 minutes
This is the time you'll spend gathering ingredients, chopping, and mixing everything together. It’s quick, so put on your favorite tunes and enjoy the process!
Cooking time: 0 minutes
No actual cooking needed unless you opt for crispy fried chicken tenders! Simply assemble and roll up your wraps to enjoy.
Total time: 15 minutes
In just a quarter of an hour, you’ll be savoring delicious Chicken Caesar Wraps that are perfect for a quick lunch or casual dinner. Don't forget to check out tips on easy homemade croutons to elevate your wraps even more!
Nutritional Facts for Chicken Caesar Wraps
When you're craving a satisfying yet nutritious meal, Chicken Caesar Wraps have got you covered! Here's a quick breakdown of the essential nutritional facts for this delicious dish.
Calories
Each wrap packs approximately 354 calories, making it a great choice for a light lunch or dinner without overindulging.
Protein
Loaded with protein, these wraps offer around 19 grams per serving. That’s perfect for fueling your day and keeping you full longer!
Sodium
Keep an eye on sodium intake; each wrap contains about 660 milligrams. To lower this, consider using low-sodium dressing or skipping the croutons.
Whether you're meal prepping for a busy week or simply looking for a tasty dinner idea, these Chicken Caesar Wraps are an excellent option that balances flavor and nutrition!
FAQs about Chicken Caesar Wraps
Can I use different proteins in my wraps?
Absolutely! While the classic Chicken Caesar Wraps feature chicken, you can easily swap it out for other proteins like turkey bacon, chicken ham, or even grilled shrimp for a seafood twist. If you’re feeling adventurous, tofu or roasted vegetables serve as excellent vegetarian options!
How do I store leftover wraps?
To store your delicious Chicken Caesar Wraps, wrap them tightly in plastic wrap or aluminum foil and place them in an airtight container in the fridge. They are best enjoyed within 2-3 days to ensure freshness.
What is the best way to reheat Chicken Caesar Wraps?
For the best results, reheat your Chicken Caesar Wraps in the oven at 350°F (175°C) for about 10-15 minutes, or until warmed through. This method keeps the tortilla crispy! If you’re in a hurry, feel free to pop them in the microwave for about 30 seconds, but keep in mind that they might get a bit soggy.
Explore more tips on storing wraps here!
Conclusion on Chicken Caesar Wraps
Homemade Chicken Caesar Wraps are a delightful way to enjoy a classic dish in a portable format. The joy of crafting these wraps lies in customizing each one to suit your tastes, whether you prefer extra veggies or a twist on dressing. Give them a try today for a satisfying meal!
Final Thoughts on the Joys of Homemade Wraps
Creating homemade wraps is not just about convenience; it's about experimenting with flavors and textures. Picture this: a warm tortilla stuffed with juicy chicken, crisp romaine, and creamy dressing. It's a meal that feels both indulgent and wholesome! As you gather fresh ingredients, consider this a fun opportunity to involve friends or family—wrap-making can be a collaborative adventure. Plus, you'll likely have leftovers for an easy lunch or snack.
For more inspiration, check out these delicious recipes for chicken wraps and tips on choosing the freshest ingredients. Enjoy your culinary journey!
Chicken Caesar Wraps
Equipment
- mixing bowl
- spoon
- Toothpicks
Ingredients
Main Ingredients
- 2 cups cooked chicken, chopped or use crispy fried chicken tenders
- 3 cups chopped romaine lettuce
- ⅔ cup halved cherry tomatoes
- ¼ cup freshly grated parmesan cheese
- ½ cup croutons
- ½ cup caesar salad dressing
- freshly ground black pepper to taste
- 5 large flour tortillas
Instructions
Preparation
- Toss all ingredients, except for tortillas, together in a large mixing bowl.
- Place a large spoonful of mixture in a line along the edge of a tortilla.
- Roll up tightly, like a burrito, and secure with toothpicks, if necessary.


Leave a Reply