
Introduction to Grandma's Old Fashioned Custard Pie
When it comes to comfort food, there’s something truly magical about Grandma's Old Fashioned Custard Pie. These recipes have stood the test of time, often filled with loving memories and hearty ingredients that bring warmth to any gathering. But why are Grandma’s recipes such timeless treasures? Perhaps it’s because they come with a history, stories of family gatherings, and the joy of sharing a slice with loved ones.
Many of us will recall the enchanting aroma of freshly baked custard pie wafting through the house, reminding us of simpler times. This classic dessert is the ultimate treat that blends simplicity and elegance, making it perfect for both everyday indulgence and special occasions. The combination of creamy custard with a tender, flaky crust is truly irresistible!
Not only does this pie offer a delightful taste experience, but it also allows us to connect with our heritage through cooking. So grab your apron, roll up your sleeves, and let's delve into the step-by-step process of creating Grandma's Old Fashioned Custard Pie. For more pie crust tips, check out Foolproof Flaky Pie Dough. Your kitchen is about to become a haven of sweet nostalgia.
Ingredients for Grandma's Old Fashioned Custard Pie
Bringing Grandma's Old Fashioned Custard Pie to life in your kitchen starts with gathering the right ingredients. Here’s what you’ll need:
Essential Ingredients You'll Need
- 1 disc of Foolproof Flaky Pie Dough or a good-quality store-bought pie dough for that perfect flaky crust
- 4 large eggs to form the foundation of the custard
- ½ cup sugar (feel free to increase to ⅔ cup for a sweeter treat)
- ½ teaspoon salt for balancing flavors
- 1 tablespoon vanilla extract which adds a warm, comforting note
- 1 cup heavy cream for richness and creaminess
- 1½ cups milk to soften the custard texture
- ¼ teaspoon freshly grated nutmeg for a hint of spice
- Fresh whipped cream for serving is always a delightful topping!
Optional Ingredients for Extra Flavor
If you’d like to personalize your pie a bit more, consider adding a splash of almond extract or a sprinkle of cinnamon for added warmth. Some even enjoy drizzling a bit of caramel sauce on top! The optional ingredients can elevate your custard pie into a unique family heirloom recipe. What's your family twist?
Step-by-step Preparation of Grandma's Old Fashioned Custard Pie
Preparing Grandma's Old Fashioned Custard Pie is a heartwarming experience that takes you back to simpler times. With a few careful steps, you can create a delightful dessert that’s just as beloved today. Let’s dive into this delicious journey!
Preheat the oven and prepare the crust
Start by preheating your oven to 425°F. While that’s heating up, dust your countertop with flour and roll out your pie dough to about three inches larger than your pie plate. Don’t worry if your dough isn’t perfectly round. You can easily trim it with a knife or pizza cutter.
Once rolled out, gently transfer the dough onto the rolling pin, then carefully place it into your pie plate. Press it in, tuck any loose edges under, and crimp them with a fork or your fingers for a rustic touch. For the best results, pop your pie crust in the freezer for at least 15 minutes. This ensures that it holds its shape beautifully while baking.
Assemble the custard filling
It’s time to make that heavenly custard filling! Crack the four large eggs into a medium bowl. Once your crust is chilled, brush the inside of the crust with beaten egg whites. This will create a protective barrier that prevents sogginess.
In the same bowl, combine the sugar, salt, vanilla extract, heavy cream, milk, and freshly grated nutmeg. Whisk it all together gently until there are no visible bits of egg. Remember, you want a smooth custard without incorporating too much air, which could lead to bubbles forming during baking.
Bake the crust and pour in the custard
Place your crust in the oven and bake for 10 minutes. Keep an eye on it to ensure the edges remain intact—if they start to fall, gently press them back up while it's still hot. Once baked, let the crust cool down.
Now, lower the oven temperature to 325°F. Pour your creamy custard filling into the cooled crust. To avoid spills, place the pie plate on a foil-lined sheet pan. This step saves you from a messy oven disaster!
Perfecting the baking process
Slide your pie into the oven and let it bake for about an hour. The edges should be set while the center remains a little wobbly—this jiggle means perfect custard. If it doesn’t jiggle, you’ve likely overcooked it.
For a flawlessly baked pie, keep an eye on the crust edges. If they're browning too quickly, shield them with a bit of foil.
Cooling and chilling the pie
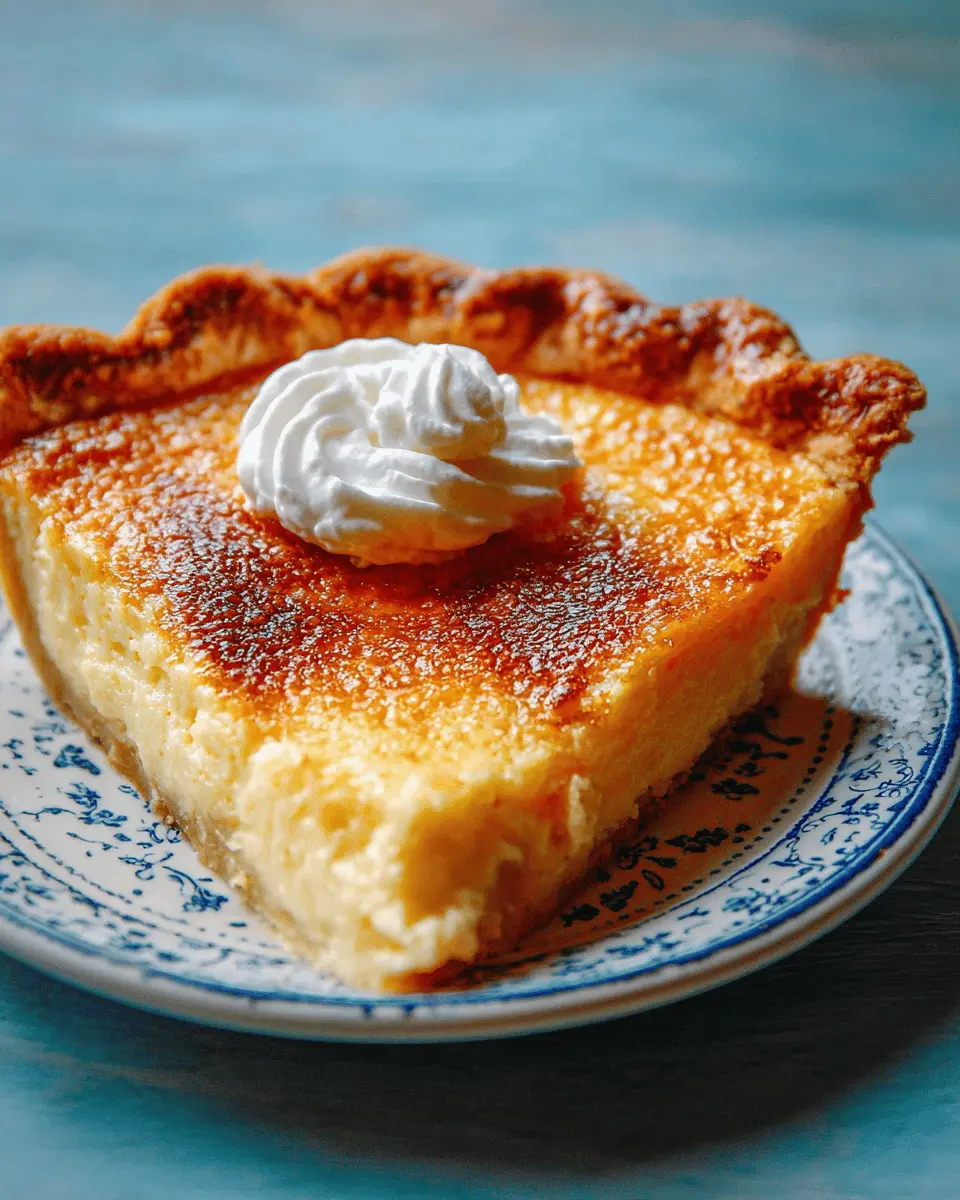
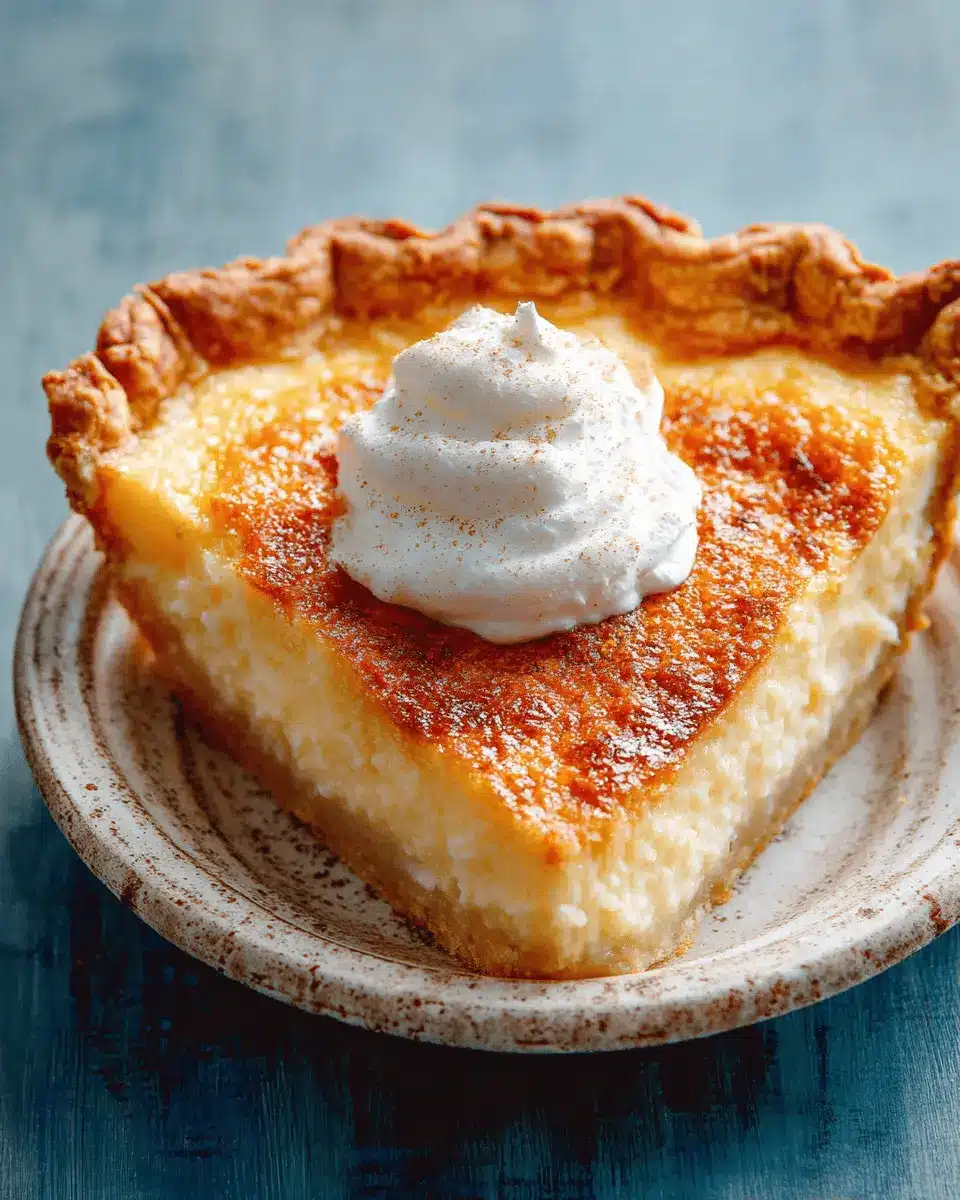
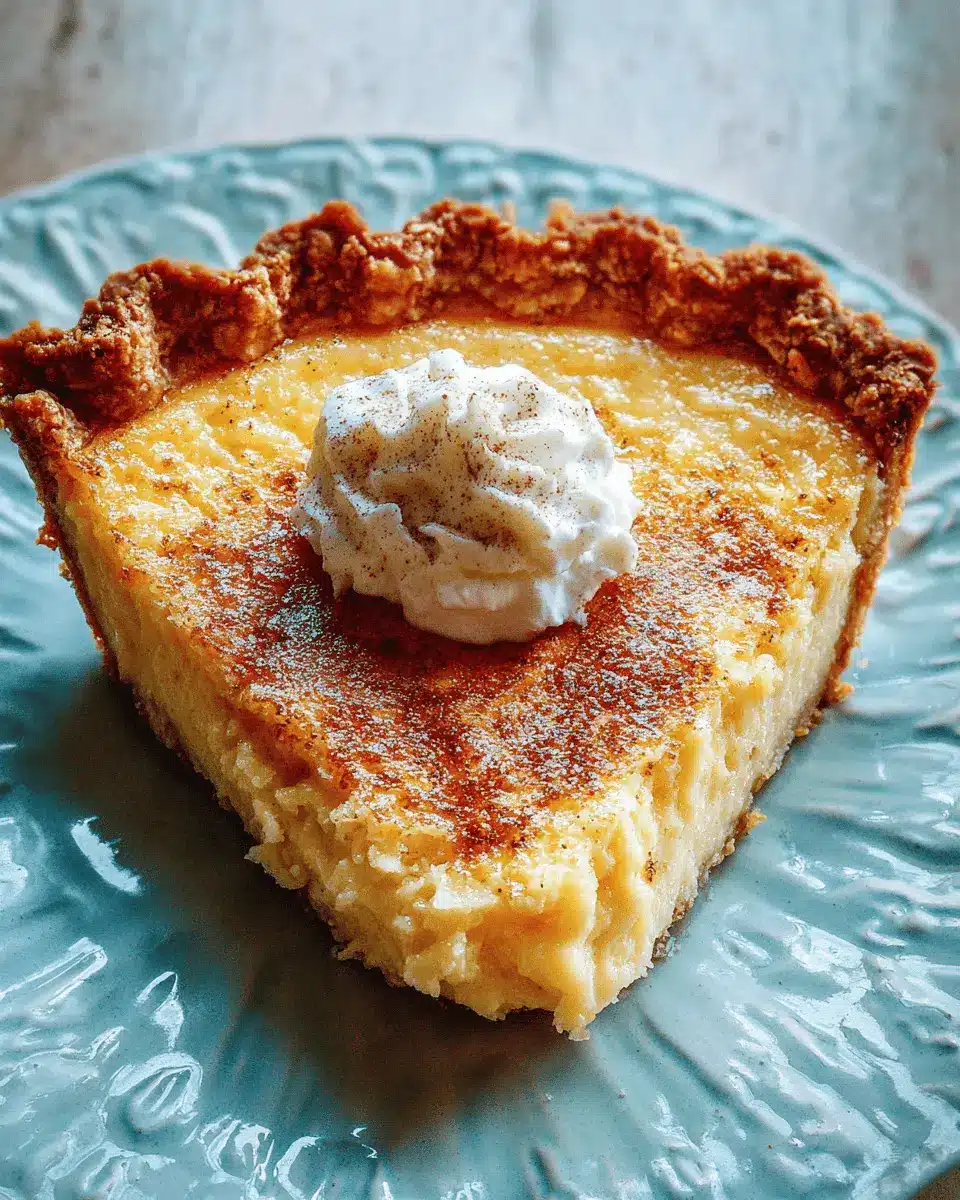
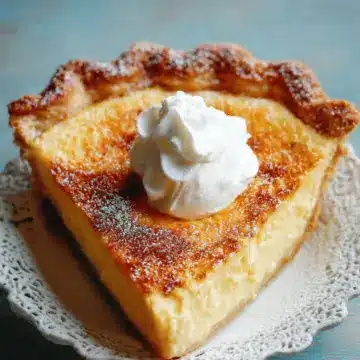
Once the pie is out of the oven, allow it to cool to room temperature. After cooling, pop it in the fridge until it’s well chilled—ideally for at least 6-8 hours. This time allows the custard to firm up. When you're ready to serve, top it with fresh whipped cream and a sprinkle of nutmeg for an extra special touch.
Now, sit back, savor a slice, and enjoy the nostalgic flavors of Grandma’s Old Fashioned Custard Pie! It’s a delightful treat that’s bound to impress family and friends alike.
Variations of Grandma's Old Fashioned Custard Pie
Adding spices for a twist
While Grandma's Old Fashioned Custard Pie is delicious as is, you can easily spice things up with an array of flavorful add-ins. Consider incorporating a dash of cinnamon, or even a hint of ginger, to give your custard a warm, cozy vibe. You could also explore flavors like cardamom or allspice for a unique twist that might just surprise your taste buds.
Alternative sweeteners for a healthier option
If you’re looking for a healthier option, try substituting traditional sugar with alternatives like honey or maple syrup. These choices can add just the right amount of sweetness while infusing the custard with a distinct flavor. Just remember to adjust the quantities accordingly; you might use less than the standard sugar amount. For a lower-calorie option, consider stevia or monk fruit sweetener—both work well without sacrificing taste.
By experimenting with these variations, you'll not only keep the spirit of Grandma's recipe alive but also make it your own!
Cooking Tips and Notes for Grandma's Old Fashioned Custard Pie
Tips for a flaky crust
To ensure your crust turns out perfectly flaky for Grandma's Old Fashioned Custard Pie, chill your pie dough before rolling it out. This helps the butter stay solid, preventing the dough from getting too soft. Remember to roll gently, aiming for an even thickness. If your edges sag during baking, gently push them back up with a spoon. A neat trick is to brush the crust with egg whites before pre-baking, which forms a barrier against the custard filling.
Notes on custard consistency
Achieving the right consistency for the custard is crucial. When mixing the ingredients, whisk just until combined—overwhisking can introduce air that leads to bubbles in your final pie. Aim for a smooth texture without visible egg bits. It's also essential to pour the custard mixture into a fully cooled crust to prevent scrambling. If you want a silkier finish, consider straining the custard before pouring it in. Remember, the center should still be slightly wobbly when it comes out of the oven; it’ll firm up as it cools!
Serving Suggestions for Grandma's Old Fashioned Custard Pie
Creative toppings to enhance the flavor
Elevate your Grandma's Old Fashioned Custard Pie with delightful toppings. Try adding a dollop of fresh whipped cream and a sprinkle of cinnamon or freshly grated nutmeg for that extra cozy touch. For fruit lovers, consider sliced strawberries or blueberries, which add a burst of color and a tangy contrast to the sweet filling. Crushed cookies or even a drizzle of chocolate sauce can add texture and richness, making each bite even more indulgent.
Best pairings for an impressive dessert experience
To impress your guests further, pair your custard pie with a side of chilled vanilla ice cream or a creamy vanilla bean custard. For drinks, serve with a refreshing herbal tea or a classic homemade lemonade. These complementary flavors will highlight the creamy, sweet notes of the pie and create a memorable dessert experience. Why not consider preparing a cheese platter as a prelude for more variety? The combinations are limitless, so feel free to get creative!
Time Breakdown for Grandma's Old Fashioned Custard Pie
Preparation time
Preparing Grandma's Old Fashioned Custard Pie takes about 25 minutes. This includes rolling out the pie crust and mixing up the velvety custard filling. Don’t rush! Take your time to enjoy this baking experience, as it's all about creating those cherished memories.
Baking time
Once your pie is ready for the oven, it needs about 70 minutes to bake. The time is crucial for achieving that perfectly set filling combined with a flaky, golden crust. Keep an eye on it in the last few minutes to prevent overbaking.
Total time
In total, you’re looking at around 1 hour and 35 minutes, not accounting for cooling and chilling time. For stellar results, refrigerate the pie for at least 6-8 hours, or better yet, overnight. This allows the custard to set properly, making each slice delightfully creamy.
Embrace the delicious nostalgia and give yourself plenty of time to create this unforgettable dessert! Enjoy your baking journey, and don't forget to add a dollop of whipped cream before serving. For more tips on pie baking, check out this helpful guide.
Nutritional Facts for Grandma's Old Fashioned Custard Pie
When indulging in Grandma's Old Fashioned Custard Pie, it's nice to know what you're savoring. Here's a quick breakdown of its nutritional values:
Calories
A slice contains around 248 calories, making it a delightful yet decently portioned treat.
Protein
You'll get about 5g of protein per slice, thanks to the eggs and milk, contributing to a satisfying dessert that keeps you feeling fuller for longer.
Sodium
With approximately 231mg of sodium, this custard pie is a great option for those mindful of their salt intake, especially when balanced with fresh fruit or a light meal.
Feel free to explore more about the benefits of eggs in your diet here. Enjoy responsibly!
FAQs about Grandma's Old Fashioned Custard Pie
How do I know when custard pie is done?
The perfect doneness of Grandma's Old Fashioned Custard Pie is all about that gentle jiggle! When the edges are set and the center still has a slight wobble, it's time to take it out. If it no longer jiggles at all, unfortunately, it could be overcooked. A little practice will help you master this delicate balance.
Can I make this pie in advance?
Absolutely! In fact, making it a day ahead is ideal. It needs time to chill in the refrigerator, allowing the custard to set beautifully. Just cover it well once it cools to room temperature to keep it fresh.
What can I use as a pie crust alternative?
If you’re looking for alternatives to a traditional pie crust, consider a graham cracker crust or even a cookie crust for added flavor. You could also use a gluten-free store-bought crust if needed. These options can lend a unique twist while still pairing wonderfully with the creamy custard filling.
For more custard pie tips, check out Epicurious for great pie crust ideas!
Wrapping Up Grandma's Old Fashioned Custard Pie
In conclusion, Grandma's Old Fashioned Custard Pie brings comfort and nostalgia to any gathering. Its creamy texture and delightful flavors make it a timeless dessert that's genuinely satisfying. Whether served at a family dinner or enjoyed solo, this pie is sure to create sweet memories. Don’t forget to top it with fresh whipped cream!
To discover more delightful recipes and tips on creating the perfect custard pie, check out Coley Cooks!
Grandma's Old Fashioned Custard Pie
Equipment
- Oven
- Pie Plate
- mixing bowl
- Rolling Pin
- pastry brush
- foil
Ingredients
Pie Dough
- 1 disc Foolproof Flaky Pie Dough or store bought pie dough
Custard Filling
- 4 large eggs
- 0.5 cup sugar increase to ⅔ for a sweeter pie
- 0.5 teaspoon salt
- 1 tablespoon vanilla extract
- 1 cup heavy cream
- 1.5 cups milk
- 0.25 teaspoon freshly grated nutmeg
- fresh whipped cream for serving
Instructions
Preparation
- Preheat the oven to 425℉.
- Dust a rolling pin with flour and roll out the pie dough so that it's about 3 inches larger than your pie plate. If the dough does not roll out perfectly round, use a knife or a pizza cutter to trim the edges and even it out.
- Gently roll the dough onto the rolling pin and carefully transfer it to the pie plate. Press it in to fit, then tuck the loose pieces under and use your fingers or a fork to crimp the edges. Place in the freezer for at least 15 minutes, or longer if you have time.
- Crack the eggs into a medium bowl. Remove the pie crust from the freezer, then dip a pastry brush into the egg whites and brush the pie crust all over. This will create a barrier so the custard doesn't make the crust soggy.
- Bake the crust for 10 minutes. Keep an eye on it to make sure the edges don't fall down. If they do, push them back up with the back of a spoon while still hot. Let cool.
- Lower the oven temperature to 325℉.
- Add the sugar, salt, vanilla extract, heavy cream, milk and nutmeg to the eggs. Whisk together until very well combined. There should be no visible bits of egg white or yolk remaining, but be careful not to whip too much air into the mixture.
- Place the pie plate on to a foil lined sheet pan to prevent any spills, then pour the mixture into the cooled crust.
- Carefully place the pie into the oven and bake for about 1 hour or until the edges are just set but the filling is still a bit wobbly in the center - if it doesn't jiggle, it's overcooked.
- Allow the pie to cool to room temperature, then place in the refrigerator until ready to serve.
- Top with whipped cream and more grated nutmeg for garnish if desired. Serve chilled.
Leave a Reply