
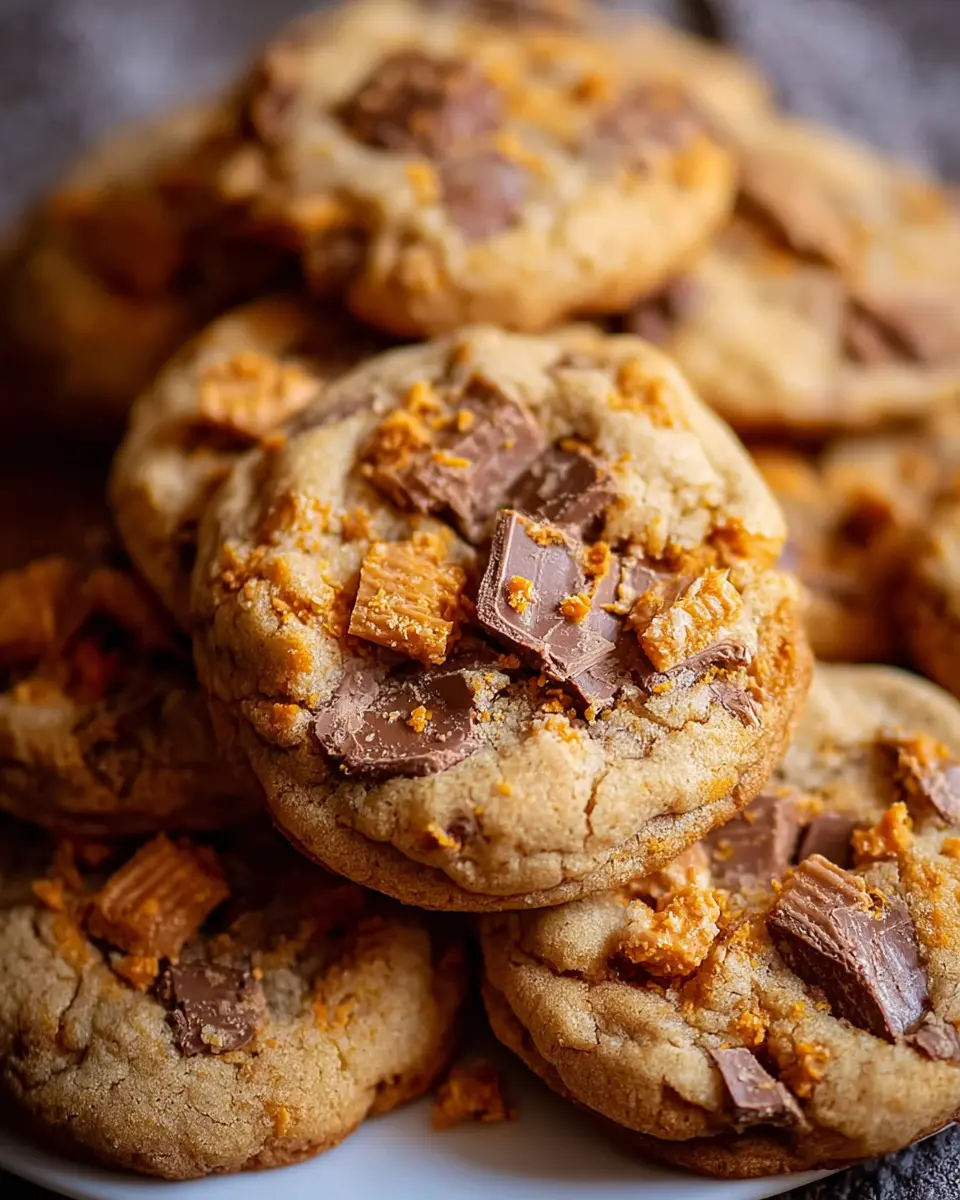
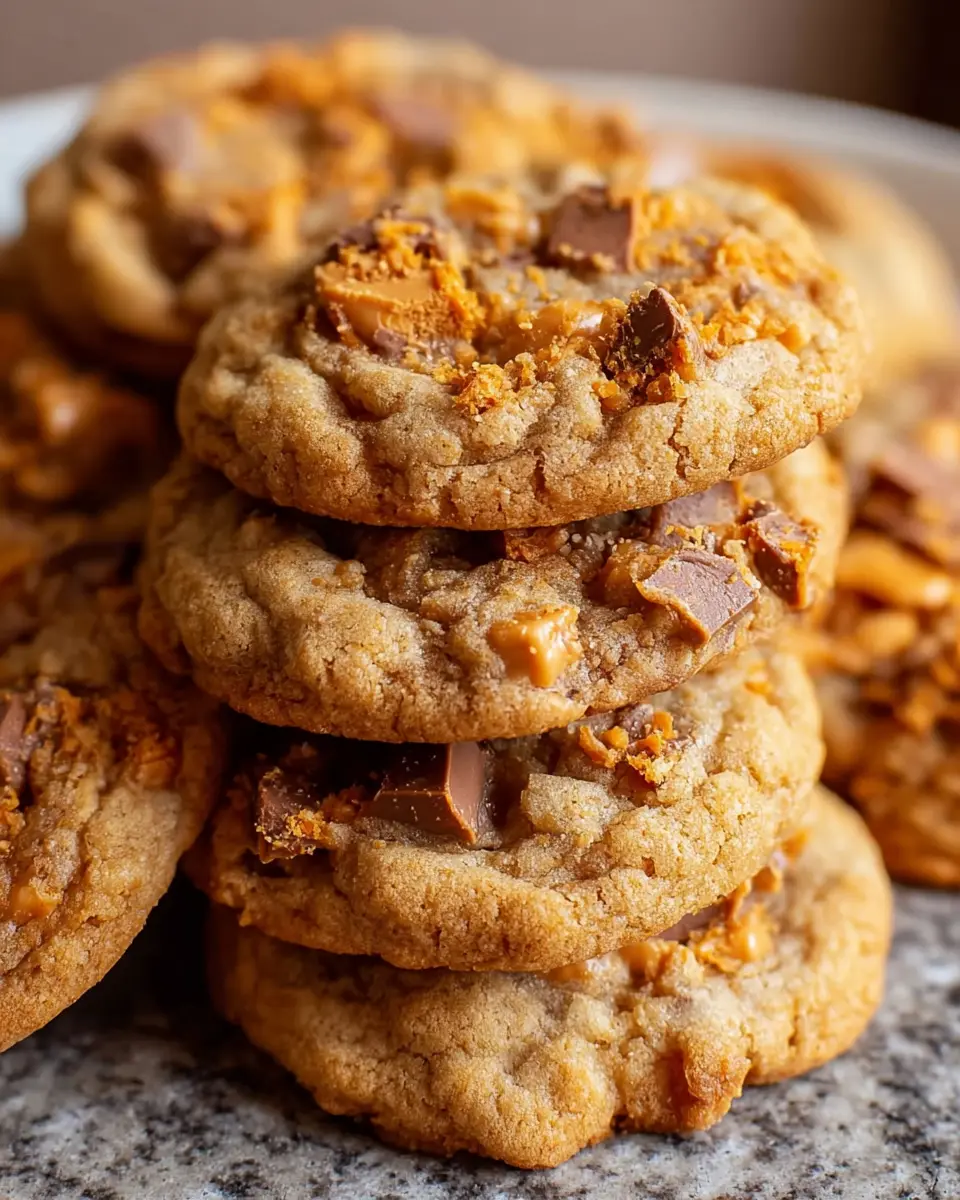
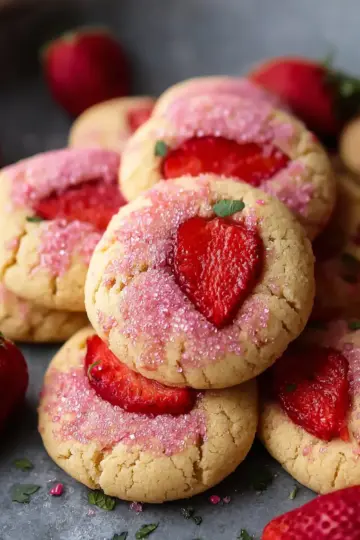
Introduction to Peanut Butter Butterfinger Cookies
If you're on the hunt for a cookie that will make your taste buds dance, look no further than Peanut Butter Butterfinger Cookies. These chewy treats beautifully combine the rich, creamy flavor of peanut butter with the delightful crunch of Butterfinger, creating an irresistible snack that's perfect for any occasion. Whether you're enjoying a cozy night in or impressing friends at a gathering, these cookies will surely become a favorite.
The ultimate treat for peanut butter lovers
Imagine biting into a freshly baked cookie that delivers a harmonious blend of textures and flavors—a soft and chewy center with just the right amount of peanut butter and a satisfying crunch from the chopped Butterfinger bars. It’s a match made in dessert heaven!
Beyond their deliciousness, cookies have a special way of bringing people together. They evoke feelings of nostalgia and warmth, often reminding us of baking sessions with loved ones. Many great recipes can be found here if you're looking to expand your baking repertoire! So, gather your ingredients and get ready to whip up a batch of these unforgettable Peanut Butter Butterfinger Cookies. Trust me; you'll want to share them (or maybe not!).
Ingredients for Peanut Butter Butterfinger Cookies
Making Peanut Butter Butterfinger Cookies is both fun and rewarding, and it starts with gathering the right ingredients. Here are the essentials you’ll need to whip up these decadent treats.
Essential Ingredients You'll Need
- Butter: ¾ cup (1 and ½ sticks), softened. This gives your cookies that rich, creamy texture.
- Sugars: ½ cup granulated sugar and ½ cup packed brown sugar. The mixture provides the perfect balance of sweetness and moisture.
- Peanut Butter: 1 cup (avoid using natural peanut butter for this recipe). This is the star ingredient!
- Egg: 1 large egg to bind everything together.
- Vanilla Extract: 1 and ½ teaspoons add warmth and flavor.
- Flour: 1 and ½ cups of all-purpose flour, spooned and leveled for an ideal dough consistency.
- Leavening Agents: ½ teaspoon baking soda and ½ teaspoon baking powder to ensure your cookies rise delightfully.
- Kosher Salt: ¼ teaspoon enhances the flavors.
- Butterfinger Bars: 16 ounces, chopped for irresistible candy pieces throughout the cookies.
For more tips on cookie-making essentials, you might find this guide from the American Baking Guild insightful! Enjoy the process and get ready to savor the deliciousness of these Peanut Butter Butterfinger Cookies. Happy baking!
Step-by-step Preparation of Peanut Butter Butterfinger Cookies
Baking delicious Peanut Butter Butterfinger Cookies is a fun and rewarding experience. With simple steps and a few key ingredients, you’ll be diving into a batch of gooey, sweet treats in no time. Let’s take a closer look at the process!
Cream the butter and sugars
Start by bringing your butter to room temperature to ensure it blends smoothly. In a large mixing bowl or a stand mixer, beat the softened butter until it's creamy. This should take about 1-2 minutes. The next step is to add in your granulated sugar and packed brown sugar, mixing until everything is light and fluffy. This is crucial because the air you incorporate here will help your cookies maintain a nice texture.
Blend in the peanut butter
Now it’s time to add 1 cup of peanut butter. Make sure you're using a traditional peanut butter and not a natural one; we want that creamy, delicious texture that holds up well in baking. Blend the peanut butter with the butter and sugars until it’s fully combined.
Incorporate the egg and vanilla
Next, crack in one large egg and add 1 and ½ teaspoons of vanilla extract. These ingredients contribute to the cookies' richness and flavor. Mix until everything is fully combined. You should have a silky dough at this point, fruity and inviting!
Mix together the dry ingredients
In a separate bowl, combine 1 and ½ cups of all-purpose flour, ½ teaspoon of baking soda, ½ teaspoon of baking powder, and ¼ teaspoon of kosher salt. It’s a good idea to stir these dry ingredients together slightly before gradually adding them to your wet mixture. Be careful to mix just until combined; overmixing can lead to tough cookies.
Fold in the Butterfinger pieces
This is where things get fun! Take 16 ounces of chopped Butterfinger bars and gently fold them into the dough. This step is all about ensuring those crunchy, peanut buttery bits are evenly distributed throughout the dough without breaking them up too much.
Chill the dough for perfect texture
Cover the bowl with plastic wrap or a clean kitchen towel and let it chill in the refrigerator for at least 15 minutes. Chilling the dough not only helps with flavor but also assists in achieving that perfect texture you crave—don’t skip this step!
Shape the dough and prep for baking
Preheat your oven to 350°F while your dough chills. Once chilled, use a cookie scoop or your hands to shape the dough into 2-inch balls and place them on a lined baking sheet. Leave some space between each cookie to allow for spreading.
Bake to delicious perfection
Finally, it’s time to bake your cookies! Pop them in the oven for about 10 minutes. You’ll know they’re done when the edges are firm, but the centers still look slightly underbaked—this ensures a chewy cookie. Let them cool on the pan for at least five minutes before transferring to a wire rack to cool completely.
Enjoy your Peanut Butter Butterfinger Cookies with a glass of milk or your favorite coffee. These are best shared, but if you keep them to yourself, we won’t tell a soul!

Variations on Peanut Butter Butterfinger Cookies
When you’re craving those Peanut Butter Butterfinger Cookies, it’s fun to explore variations to keep things exciting. Here are a couple of delicious twists you can try!
Peanut Butter Cookies with Chocolate Chips
Swap out some of the Butterfinger for chocolate chips for a classic combination. The melty chocolate combined with the peanut butter creates a rich, gooey texture that balances perfectly with the crunch of Butterfinger. Consider dark chocolate chips for a more intense flavor—your taste buds won’t mind in the least!
Nut-Free Butterfinger Cookies
For a nut-free twist, use sunbutter or another nut-free spread instead of peanut butter. You’ll still enjoy that delightful Butterfinger crunch without any nuts. If you're baking for someone with allergies, always double-check labels to ensure all ingredients are safe.
Experimenting with these variations keeps your baking game fresh while still highlighting that beloved Peanut Butter Butterfinger Cookies essence. Happy baking! For more tips and recipes, you might want to check out Baking A Moment or Sally's Baking Addiction for inspiration!
Cooking Tips and Notes for Peanut Butter Butterfinger Cookies
When making Peanut Butter Butterfinger Cookies, there are a few handy tips to elevate your baking game.
-
Chilling the Dough: Allowing the dough to chill for at least 15 minutes helps the flavors meld and prevents the cookies from spreading too much in the oven.
-
Mixing Technique: Be cautious when mixing. Overmixing can lead to tough cookies. Combine until just incorporated for a tender texture.
-
Butterfinger Substitutes: If you’re out of Butterfinger, try using crushed Reese's or toffee bars for a delicious twist.
For more insights on baking tips, you might want to check out Baking Basics or Cookie Science articles!
Serving Suggestions for Peanut Butter Butterfinger Cookies
Pairing Ideas for a Sweet Treat Experience
When enjoying your Peanut Butter Butterfinger Cookies, consider complementary flavors and textures that elevate the experience. Here are a few pairing suggestions:
- Milk Alternatives: A tall glass of almond or oat milk presents a creamy contrast to the sweet, nutty cookies.
- Coffee or Espresso: The rich bitterness of coffee balances the sweetness wonderfully; try it with a splash of cream.
- Chopped Nuts: Adding crushed peanuts or walnuts on top enhances crunch and depth.
- Fruit: Fresh banana slices or a handful of berries lend a refreshing pop against the cookies’ richness.
Experiment with these ideas and discover your favorite combination! For more inspiration, check out this article on flavor pairings that dives into the science of flavor compatibility.
Time Breakdown for Peanut Butter Butterfinger Cookies
Preparation Time:
Spend about 20 minutes whipping up the dough, which includes mixing everything to creamy perfection. Trust me, that aroma from the peanut butter is worth every second.
Chilling Time:
Chill your dough for at least 15 minutes up to 24 hours. This is essential for achieving those delightful chewy centers in your Peanut Butter Butterfinger Cookies.
Baking Time:
Bake the cookies for around 10 minutes. You want the edges to be set, leaving the centers just slightly undercooked for that perfect, gooey bite.
Total Time:
All in all, you’re looking at approximately 50 minutes to an hour, depending on your chilling duration. Perfect for a speedy treat after a long day!
Have you ever found yourself craving a late-night snack? These cookies are a dream. Plus, they're great for making ahead and having ready for unexpected guests! Enjoy!
Nutritional Facts for Peanut Butter Butterfinger Cookies
When indulging in Peanut Butter Butterfinger Cookies, it's good to know what you're enjoying! Here’s a quick breakdown of their nutritional profile to keep things balanced:
Calories
Each cookie contains approximately 150 calories, making them a delightful treat without overindulging.
Carbohydrates
Expect about 22 grams of carbohydrates per cookie. These provide quick energy, perfect for a mid-afternoon pick-me-up!
Sugars
With around 10 grams of sugar in each cookie, they satisfy your sweet tooth while combining the irresistibly crunchy pieces of Butterfinger.
For a deeper understanding of dietary needs and other snack options, check out this comprehensive guide on nutrition. Enjoy your baking adventure with these Peanut Butter Butterfinger Cookies!
FAQ about Peanut Butter Butterfinger Cookies
Can I substitute ingredients in the recipe?
Absolutely! If you’re in a pinch, you can swap out the granulated sugar for coconut sugar or even maple sugar for a different flavor profile. For those avoiding gluten, try using gluten-free all-purpose flour. Keep in mind that these substitutions may slightly alter the texture or taste, but it’s a fun way to experiment!
How do I store leftover cookies?
To keep your Peanut Butter Butterfinger Cookies fresh, store them in an airtight container at room temperature for up to a week. You can also freeze any extras! Just separate the cookies with parchment paper, place them in a freezer-safe bag, and they’ll last for up to three months.
What's the best way to make these cookies chewy?
For ultimate chewiness in your Peanut Butter Butterfinger Cookies, make sure not to overbake them. Pull them out when the edges are just set, and let them cool on the baking sheet for a few minutes. Chilling the dough for at least 15 minutes before baking can also help achieve that delightful chewy texture!
Feel free to check out other baking tips and tricks to enhance your cookie-making skills!
Conclusion on Peanut Butter Butterfinger Cookies
In summary, Peanut Butter Butterfinger Cookies are a delightful treat that marries the rich, nutty flavor of peanut butter with the satisfying crunch of Butterfinger candy. Whether you're baking for a gathering or indulging yourself, these cookies are sure to impress and satisfy sweet cravings. Enjoy every bite!

Peanut Butter Butterfinger Cookies
Equipment
- Stand Mixer
- baking sheets
- parchment paper
Ingredients
Cookies
- ¾ cup butter, softened (1 and ½ sticks)
- ½ cup granulated sugar
- ½ cup brown sugar (packed)
- 1 cup peanut butter (don't use natural pb)
- 1 large egg
- 1 and ½ teaspoons vanilla
- 1 and ½ cups all-purpose flour (spooned and leveled)
- ½ teaspoon baking soda
- ½ teaspoon baking powder
- ¼ teaspoon kosher salt
- 16 ounces Butterfinger (chopped)
Instructions
Cookie Preparation
- In a large bowl or stand mixer, beat the softened butter until smooth and creamy.
- Add granulated sugar and packed brown sugar; beat for about 2 minutes until fluffy.
- Add peanut butter, mixing until combined.
- Add egg and vanilla, beating until combined.
- Add flour, baking soda, baking powder, and kosher salt; stir the dry ingredients slightly before mixing into the dough.
- Turn the mixer on to combine the dry ingredients into the dough, being careful not to overmix.
- Fold in the chopped Butterfinger until just incorporated.
- Cover the bowl and chill the dough for 15 minutes to an hour (up to 24 hours).
- Preheat oven to 350°F. Line baking sheets with parchment paper.
- Shape the dough into 2-inch balls and place them on the baking sheet.
- Bake for about 10 minutes until the edges are set but the center is not shiny.
- Let cookies set on the pan for at least 5 minutes before transferring to a cooling rack.

Leave a Reply