
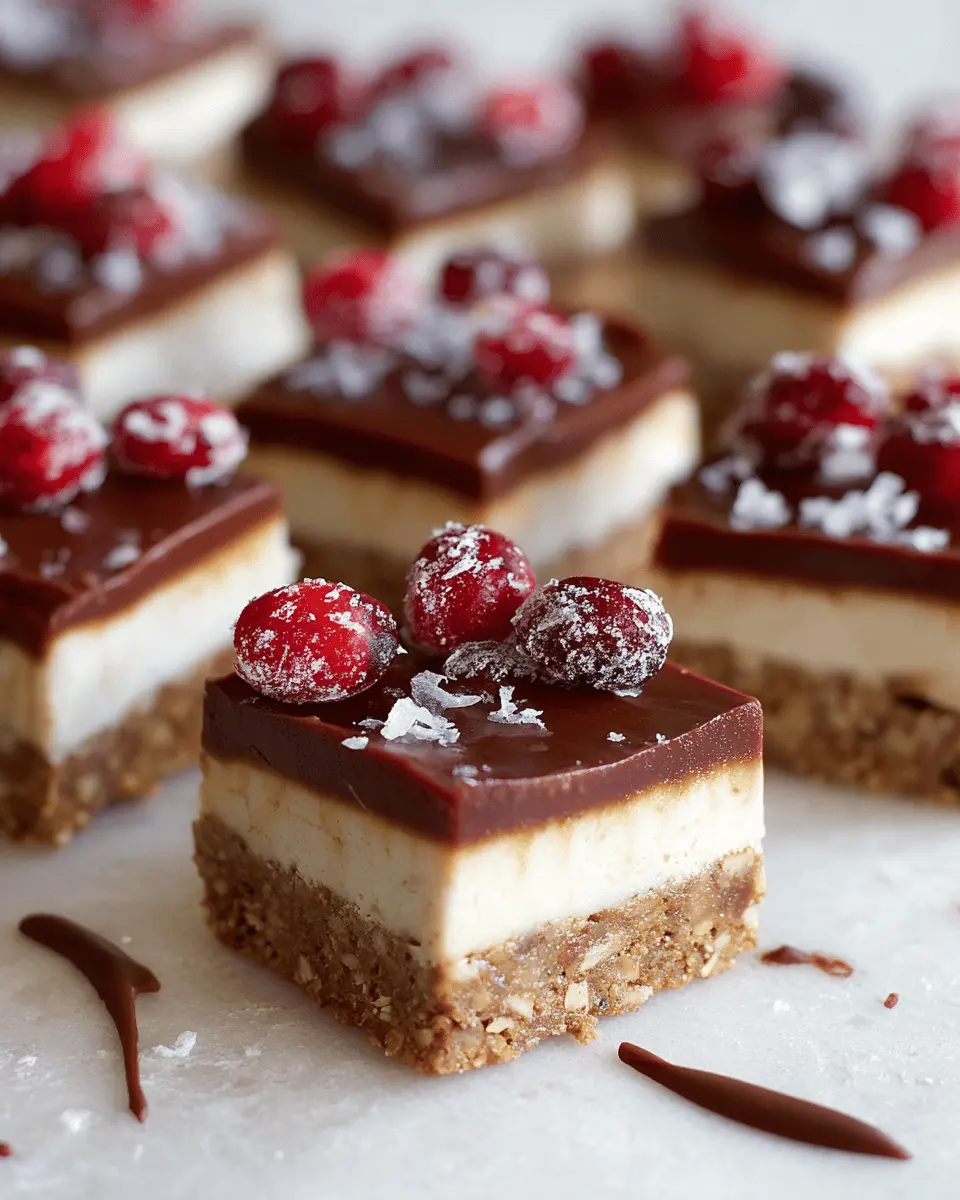
Introduction to No-Bake Christmas Bar Recipes
When it comes to holiday treats, no-bake Christmas bar recipes are an absolute game-changer. Imagine serving festive goodies without the need to preheat your oven or keep an eye on the timer! These easy-to-make bars allow you to enjoy all the holiday flavors while saving you precious time for decorating, gatherings, and savoring those magical moments with loved ones.
Why are no-bake recipes perfect for the holidays? For one, they’re a breeze to whip up, making them ideal for busy schedules filled with holiday parties and family traditions. Plus, they often require minimal ingredients, allowing you to get creative with whatever you have in your pantry. Whether you’re craving chocolatey delights, fruity sensations, or something a bit more festive, there’s a no-bake recipe out there to satisfy your sweet tooth.
Additionally, these bars can easily cater to various dietary preferences, from vegan to gluten-free, making them suitable for all your guests! You can find inspiration from countless food blogs that specialize in holiday recipes, and you’ll be amazed at how quickly you can create something that looks impressive and tastes delightful. So, let’s dive into some fantastic no-bake Christmas bar recipes that will spread joy this holiday season!
Ingredients for No-Bake Christmas Bars
Overview of Essential Ingredients
When it comes to making no-bake Christmas bar recipes, having the right ingredients is key to creating a delicious treat that everyone will love. For these festive bars, you'll need a variety of wholesome ingredients:
- Cranberries for that tangy burst of flavor.
- Medjool dates and walnuts to form a naturally sweet and crunchy crust.
- Coconut oil and full-fat coconut milk for a rich, creamy filling.
- Cashew butter adds creaminess and healthy fats.
- Maple syrup, lemon juice, and vanilla extract to enhance flavors and sweetness.
With these ingredients, you're well on your way to crafting a delightful dessert that’s perfect for the holiday season.
Substitute Options for Dietary Preferences
Everyone has different dietary needs, and the beauty of this recipe is its flexibility. Here are some substitute options that cater to various preferences:
- Swap full-fat coconut milk for cashew or almond milk for a lighter filling.
- Replace raw cashew butter with sunflower seed butter for a nut-free version.
- Use agave syrup instead of maple syrup if you prefer a different sweetener.
- For those avoiding refined sugars, try stevia to keep it low-cal and sugar-free.
These alternatives ensure that your no-bake Christmas bars can be enjoyed by everyone, regardless of dietary restrictions!
Step-by-Step Preparation of No-Bake Christmas Bars
Making no-bake Christmas bars is a delightful way to celebrate the holiday season without turning on your oven. Follow these steps for a scrumptious treat everyone will love!
Prepare the Cranberry Garnish
Start your festive journey by soaking fresh cranberries in maple syrup overnight. This not only sweetens them but also brings out their vibrant color. If you're feeling adventurous and want a sweet twist, you can roll them in sugar or a sugar substitute like granulated monk fruit sweetener after soaking. Just let them dry on a sheet pan for about an hour. Trust me, these shimmering cranberries add a beautiful touch to your bars!
Make the Cranberry Sauce
Next up is the cranberry sauce, which will bring a zesty punch to your bars. In a shallow saucepan, combine four ounces of fresh cranberries with eight teaspoons of water and six teaspoons of maple syrup. Bring it to a boil, then lower the heat and let it simmer for about ten minutes until the cranberries break apart. For a smooth consistency, feel free to use an immersion blender. Once blended, refrigerate the sauce in a sealed container until you’re ready to garnish your bars.
Create the Crust
You’ll want to prep your crust by lining an 8×8 inch brownie pan with parchment paper, leaving some overhang for easy removal later. Combine one and a half cups of pitted Medjool dates, walnut halves, coconut oil, and a pinch of sea salt in a food processor. Pulse the mixture until it’s well combined but still has some texture. If it feels too dry, a few additional dates can help; if it’s too sticky, just add more walnuts. Once your mixture is ready, press it firmly into your lined pan to form a solid base.
Mix the Filling
Now for the luscious filling: blend together one cup of full-fat coconut milk, three-quarters of a cup of raw cashew butter, fresh lemon juice, melted coconut oil, maple syrup, vanilla extract, and a pinch of sea salt until smooth. Pour this creamy goodness over your prepared crust, then pop it in the freezer for about two hours, or until set.
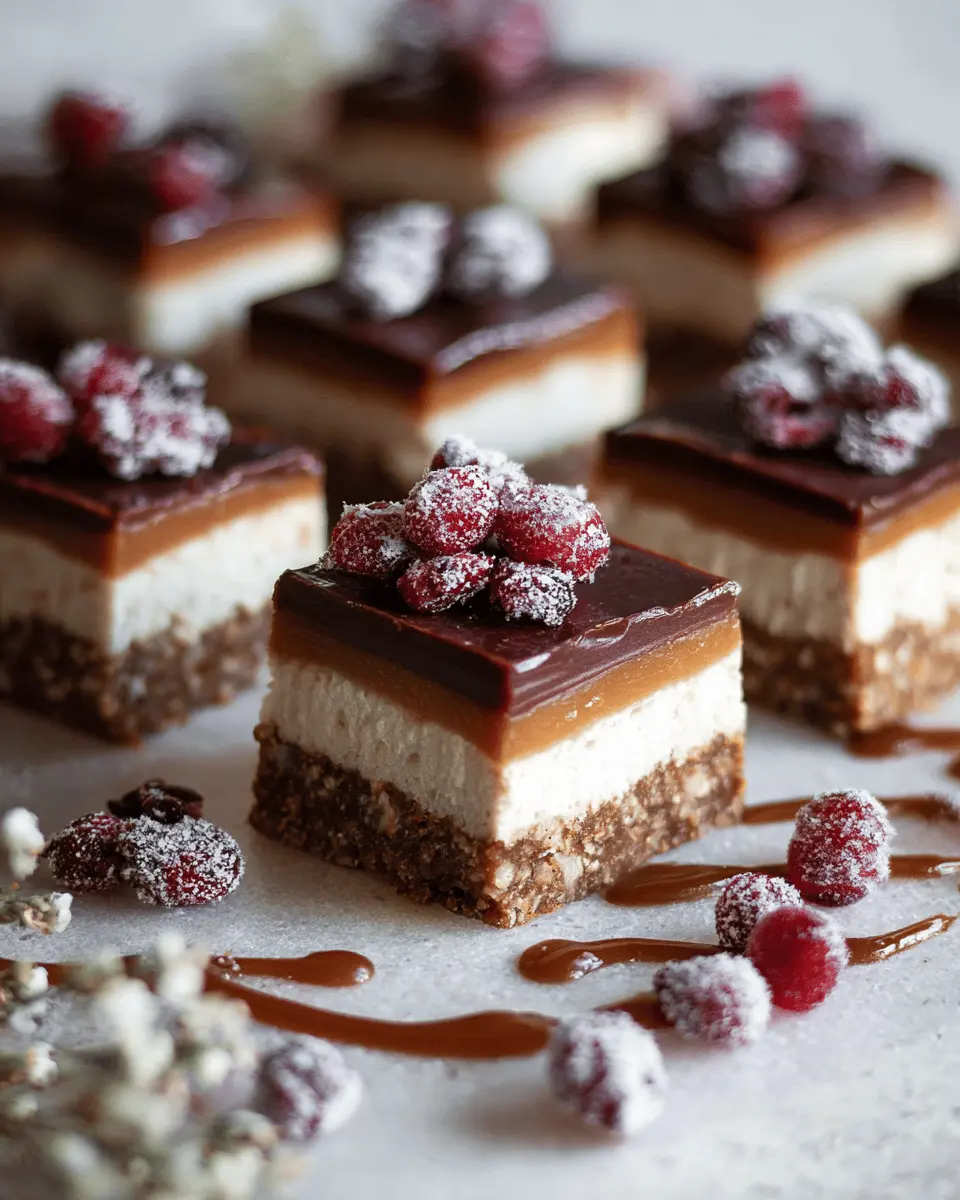
Assemble and Freeze the Bars
After the filling has hardened, carefully pull the bars out of the pan using the parchment overhang. Allow them to sit at room temperature for about five minutes before slicing them into 16 bars. For professional-looking edges, wipe your knife between cuts. Before you serve, let them sit for another 20 minutes to soften slightly and then garnish with your homemade cranberry sauce and those delightful candied cranberries. Store them in the fridge for up to five days or freeze for a longer shelf life.
These no-bake Christmas bars are sure to impress, and they’re a perfect treat for holiday gatherings or cozy nights in! Don’t forget to check out other holiday recipes on sites like Food Network or Epicurious for more festive inspiration!
Variations on No-Bake Christmas Bars
Nutty Variations: Adding Different Nut Butters
Elevate your no-bake Christmas bar recipes by experimenting with various nut butters. While raw cashew butter is a delightful base, why not switch it up? Try almond butter for a rich, nutty flavor or hazelnut butter for a unique twist that reminds you of holiday desserts. Each nut butter brings its own unique taste and creaminess, providing a delightful variation that can keep your holiday treats fresh and exciting.
Seasonal Swaps: Other Fruits and Toppings
Don't hesitate to swap in seasonal fruits! Beyond cranberries, consider using dried cherries, figs, or apricots. These fruits not only add vibrant colors but also contribute distinct flavors to your bars. As for toppings, try drizzling with dark chocolate or sprinkling shredded coconut on top for that festive touch. It’s all about embracing what’s in season and letting your creativity shine!
Cooking Tips and Notes for No-Bake Christmas Bars
Ensuring the Right Texture
For those perfect no-bake Christmas bars, achieving the right texture is crucial. When making the crust, ensure you don’t over-process the walnuts and dates; a bit of texture adds to the overall bite. If the mixture feels dry, just a few more dates can do wonders. Alternatively, for a bit more crunch or if it’s too sticky, add extra walnuts.
How to Properly Store and Preserve Bars
To keep your bars fresh and delicious, store them in a sealed container in the refrigerator for up to five days. If you want to keep them longer, they freeze beautifully! Just wrap them well and use them up to a month later. Before serving, let them sit at room temperature for about 20 minutes to regain their ideal creaminess. Trust me, your taste buds will thank you!
Serving Suggestions for No-Bake Christmas Bars
Perfect pairings with coffee or tea
These no-bake Christmas bars are a delightful treat, perfect alongside your morning cup or an afternoon pick-me-up. Pair them with a rich, creamy latte or a spiced chai to underscore their sweet, festive flavors. If you're feeling adventurous, consider adding a sprinkle of nutmeg or cinnamon to your beverage to really elevate the experience. The balance of textures and flavors between the bars and your drink creates a cozy vibe that's perfect for the holiday season.
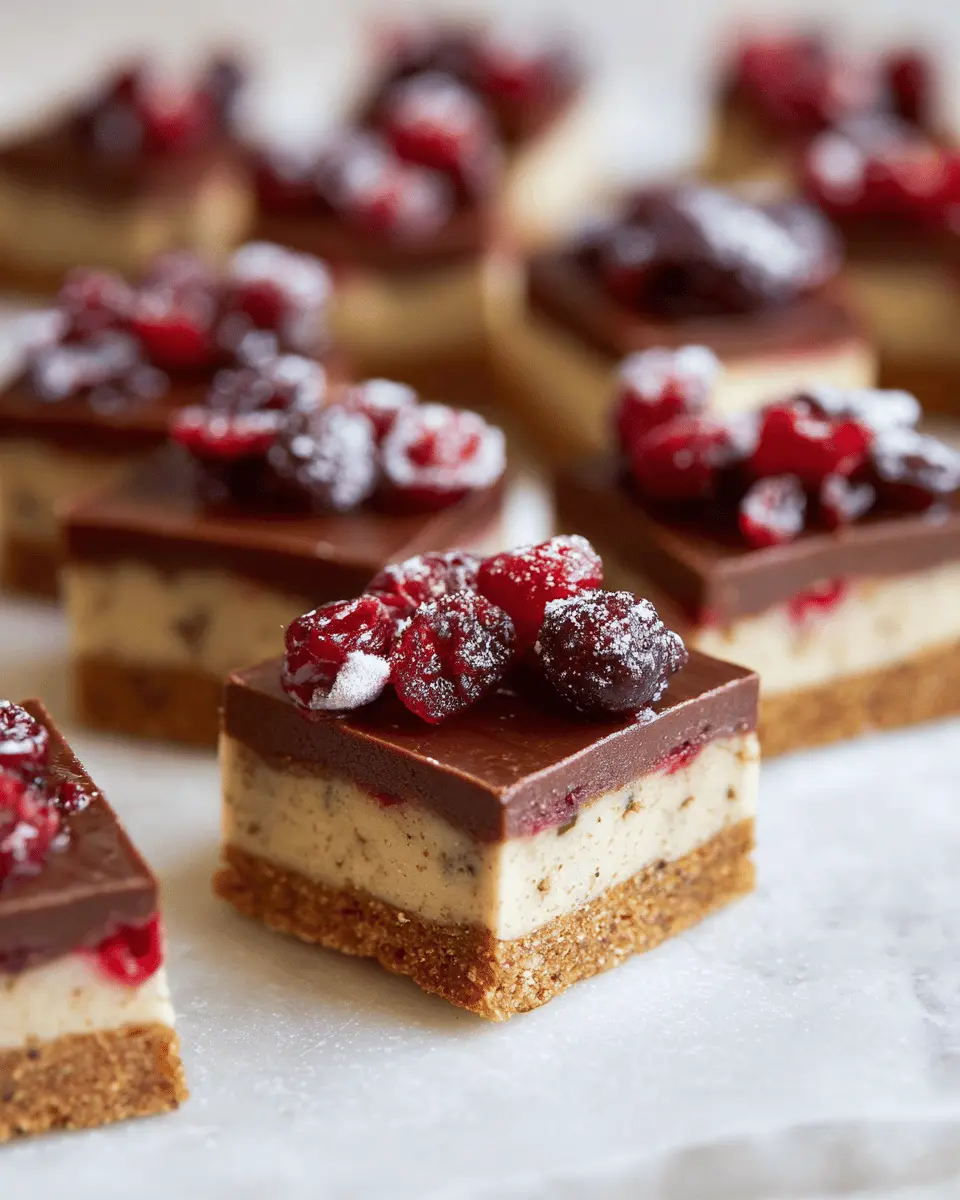
Creative presentation ideas for holiday gatherings
While these bars are delicious, how you serve them can make all the difference! Arrange the bars on a holiday-themed platter, adding some fresh greenery or a sprinkle of powdered sugar for that winter wonderland look. Create individual servings by cutting them into bite-sized pieces, perfect for mingling guests. You might also consider using festive cupcake liners to transform these treats into charming little gifts for friends and family. Personal touches like these make your gatherings memorable and give your no-bake Christmas bar recipes an extra touch of magic.
For more inspiration on festive treats, check out this guide on holiday desserts.
Time Breakdown for No-Bake Christmas Bars
Preparation Time
Getting started on your no-bake Christmas bar recipes is a breeze! You'll need about 20 minutes to gather your ingredients and whip everything together. It’s perfect for those busy holiday schedules when you're looking to squeeze in a bit of festive fun.
Freezing Time
Once you've made your delicious filling and layered it over the crust, place your creation in the freezer for 2 hours. This waiting period is crucial for achieving that perfect set texture that makes every bite delightful.
Total Time
If you add up the preparation and freezing, you're looking at a total of about 2 hours and 20 minutes. The best part? Nearly all of that time is just waiting while your bars chill! Get the kids involved or cozy up with a good book while you wait—trust us, it's worth it!
You can find more tips on preparing festive treats here.
Nutritional Facts for No-Bake Christmas Bars
When indulging in these delightful No-Bake Christmas Bar Recipes, it’s essential to know what you're treating yourself to!
Calories per bar
Each bar contains approximately 180 calories, making it a guilt-free festive treat.
Key nutrients
These bars are rich in:
- Healthy fats from coconut oil and cashew butter
- Fiber from Medjool dates
- Antioxidants from fresh cranberries
Health benefits of main ingredients
The use of walnuts provides omega-3 fatty acids, supporting heart health, while coconut milk contributes to hydration and skin health. Incorporating raw cashew butter offers protein and vitamin K, making these bars a tasty way to nourish your body this holiday season.
For more information on nutritional benefits, check out resources from the Harvard T.H. Chan School of Public Health or NutritionData.
FAQs about No-Bake Christmas Bars
How long do these bars last?
These delightful no-bake Christmas bars can last up to five days in the refrigerator when stored in a sealed container. It's best enjoyed fresh, so try to eat them within this timeframe for the best texture and flavor. If you find yourself with leftovers (which is rare!), make sure they’re stored properly to keep them delicious!
Can I freeze the bars?
Absolutely! These bars are a great option for freezing. Just ensure they are well-wrapped in a freezer-safe container. They can last for up to three months in the freezer. When you're ready to indulge, simply transfer them to the fridge to thaw overnight.
Are there vegan options available?
Yes, indeed! This no-bake Christmas bar recipe can easily be modified for a vegan diet. Simply opt for plant-based coconut milk, and check that your maple syrup and nut butters are free from any animal-derived ingredients. With these small tweaks, everyone can enjoy this festive treat!
For more festive inspiration, check out Minimalist Baker for additional vegan dessert recipes!
Conclusion on No-Bake Christmas Bars
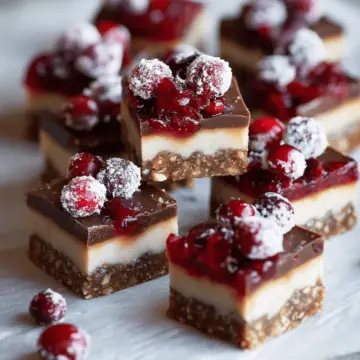
The joy of creating homemade treats, especially during the holidays, can't be overstated. No-bake Christmas bar recipes offer a delightful way to express your love through food, combining festive flavors with simple techniques. Share these tasty bars with friends and family for a truly special touch this season!
No-Bake Christmas Bar Recipes for a Joyful Holiday Treats
Equipment
- food processor
- 8x8 inch brownie pan
- shallow saucepan
Ingredients
Cranberry Garnish
- 4 oz fresh cranberries
- ½ cup maple syrup
- Sugar for rolling optional, not paleo
Cranberry Sauce
- 4 oz fresh cranberries
- 8 teaspoon water
- 6 teaspoon maple syrup
Crust
- 1 ½ cups pitted Medjool dates 225g
- 1 ½ cups walnut halves/pieces 150g
- 1 tablespoon coconut oil 14g
- ⅛ teaspoon sea salt
Filling
- 1 cup full fat coconut milk 236mL
- ¾ cup raw cashew butter 195g
- ⅓ cup freshly squeezed lemon juice juice of about 1.5 lemons
- ¼ cup coconut oil melted; 56g
- ¼ cup pure grade A maple syrup 59mL or 80g
- 1 teaspoon vanilla extract
- 1 pinch sea salt
Instructions
Cranberry Garnish
- Soak cranberries in maple syrup overnight.
- Drain and set aside for garnish. Alternatively, if you want to make sparkling cranberries (not paleo), roll in granulated sugar or monk fruit sweetener, then allow to dry on a sheet pan for about an hour.
Cranberry Sauce
- Combine all ingredients in a shallow saucepan. Bring to a boil, then reduce to simmer and allow to cook for about 10 minutes or until the cranberries have broken down.
- Use an immersion blender to make a smooth sauce. Refrigerate in a sealed container until ready to use.
Crust
- Before making the crust, line an 8x8" brownie pan with parchment paper.
- Place all crust ingredients in a food processor and pulse for about a minute until well combined.
- Pour the crust mixture into the brownie pan and gently distribute into an even layer. Press down firmly.
Filling
- Blend all filling ingredients together in a food processor until smooth.
- Pour the filling over the crust and place in the freezer for about 2 hours or until set.
Cut and Garnish
- While still frozen, remove from the pan by pulling on the parchment and place on a cutting board.
- After 5 minutes, slice into 16 bars using a sharp knife.
- Allow to sit at room temperature for about 20 minutes before serving. Garnish with cranberry sauce and candied cranberries.
Leave a Reply